Quantitative and qualitative analysis are usually taught in separate courses, with separate software. AnalyVa combines both in one app — switch workspaces once, and you have a full NVivo-style qualitative coding environment with your familiar variables still available in the other panel.
This post is the beginner’s tour of that workspace: from opening it for the first time to a fully coded corpus you can query.
Opening the Textual Analysis workspace
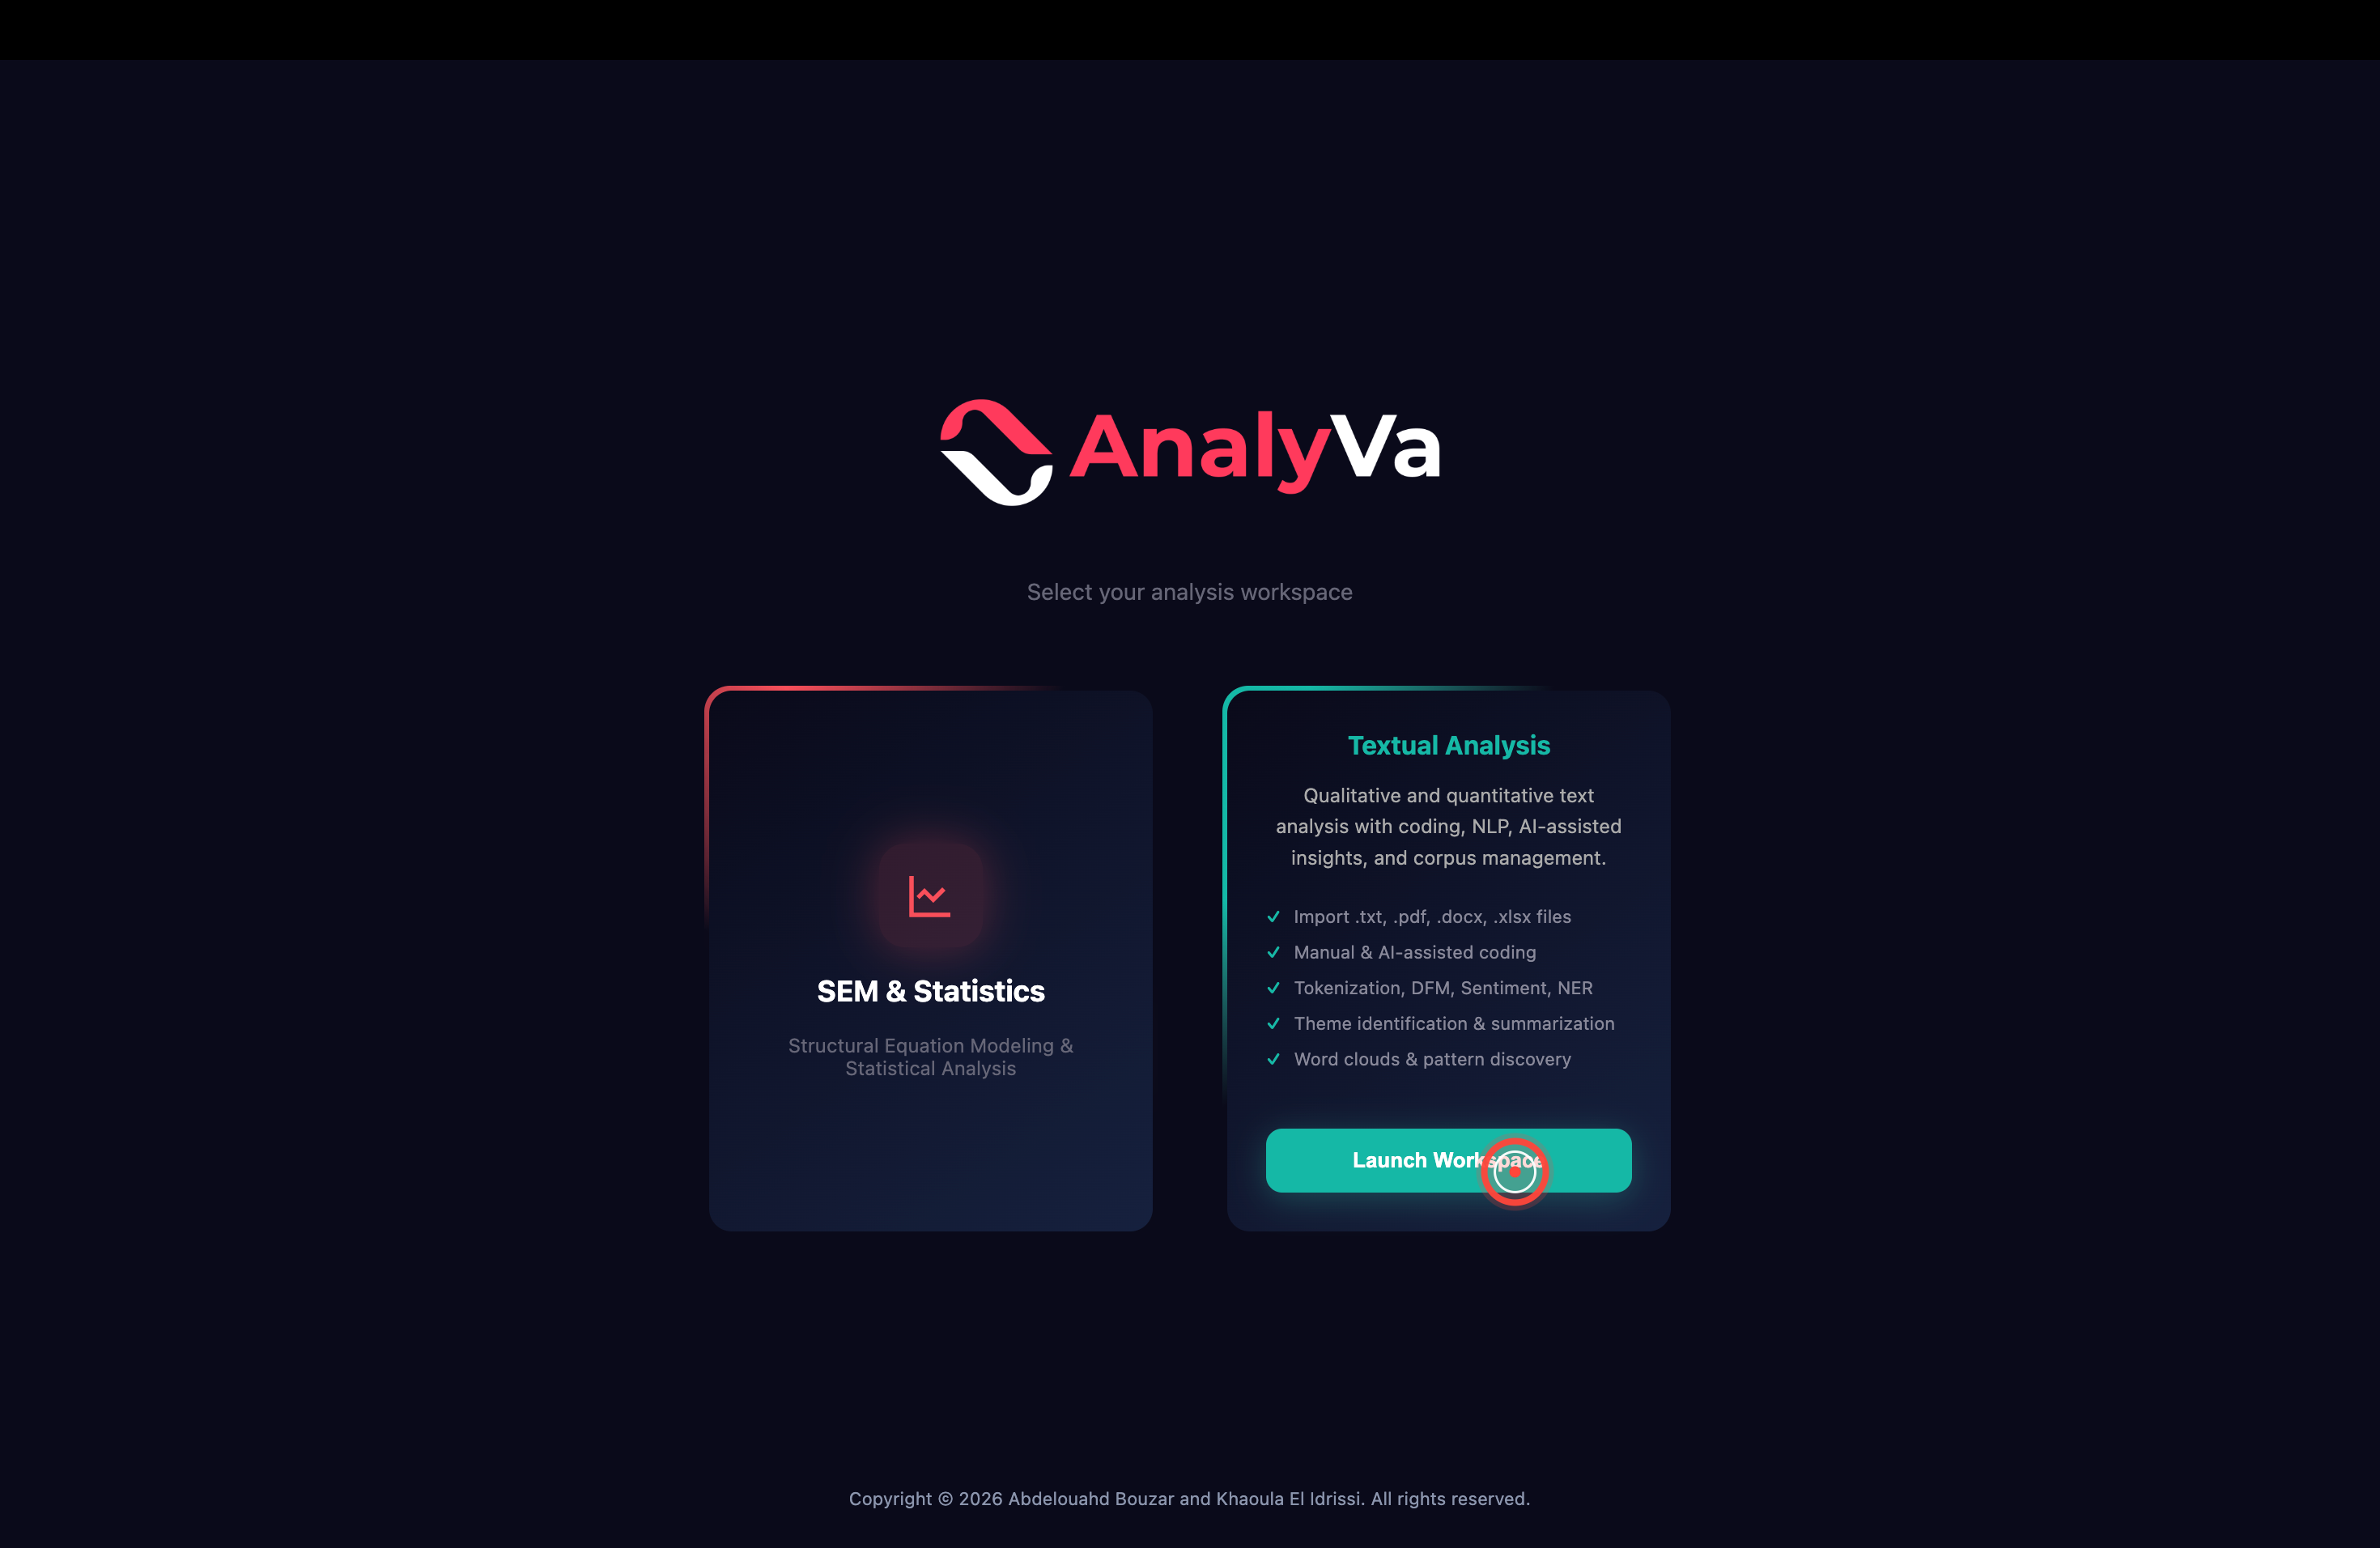
Step 1 — Pick Textual Analysis from the home screen. When AnalyVa opens, you get two workspace cards: SEM & Statistics (the familiar quantitative side) and Textual Analysis (the qualitative side). Click Launch Workspace on the second card.
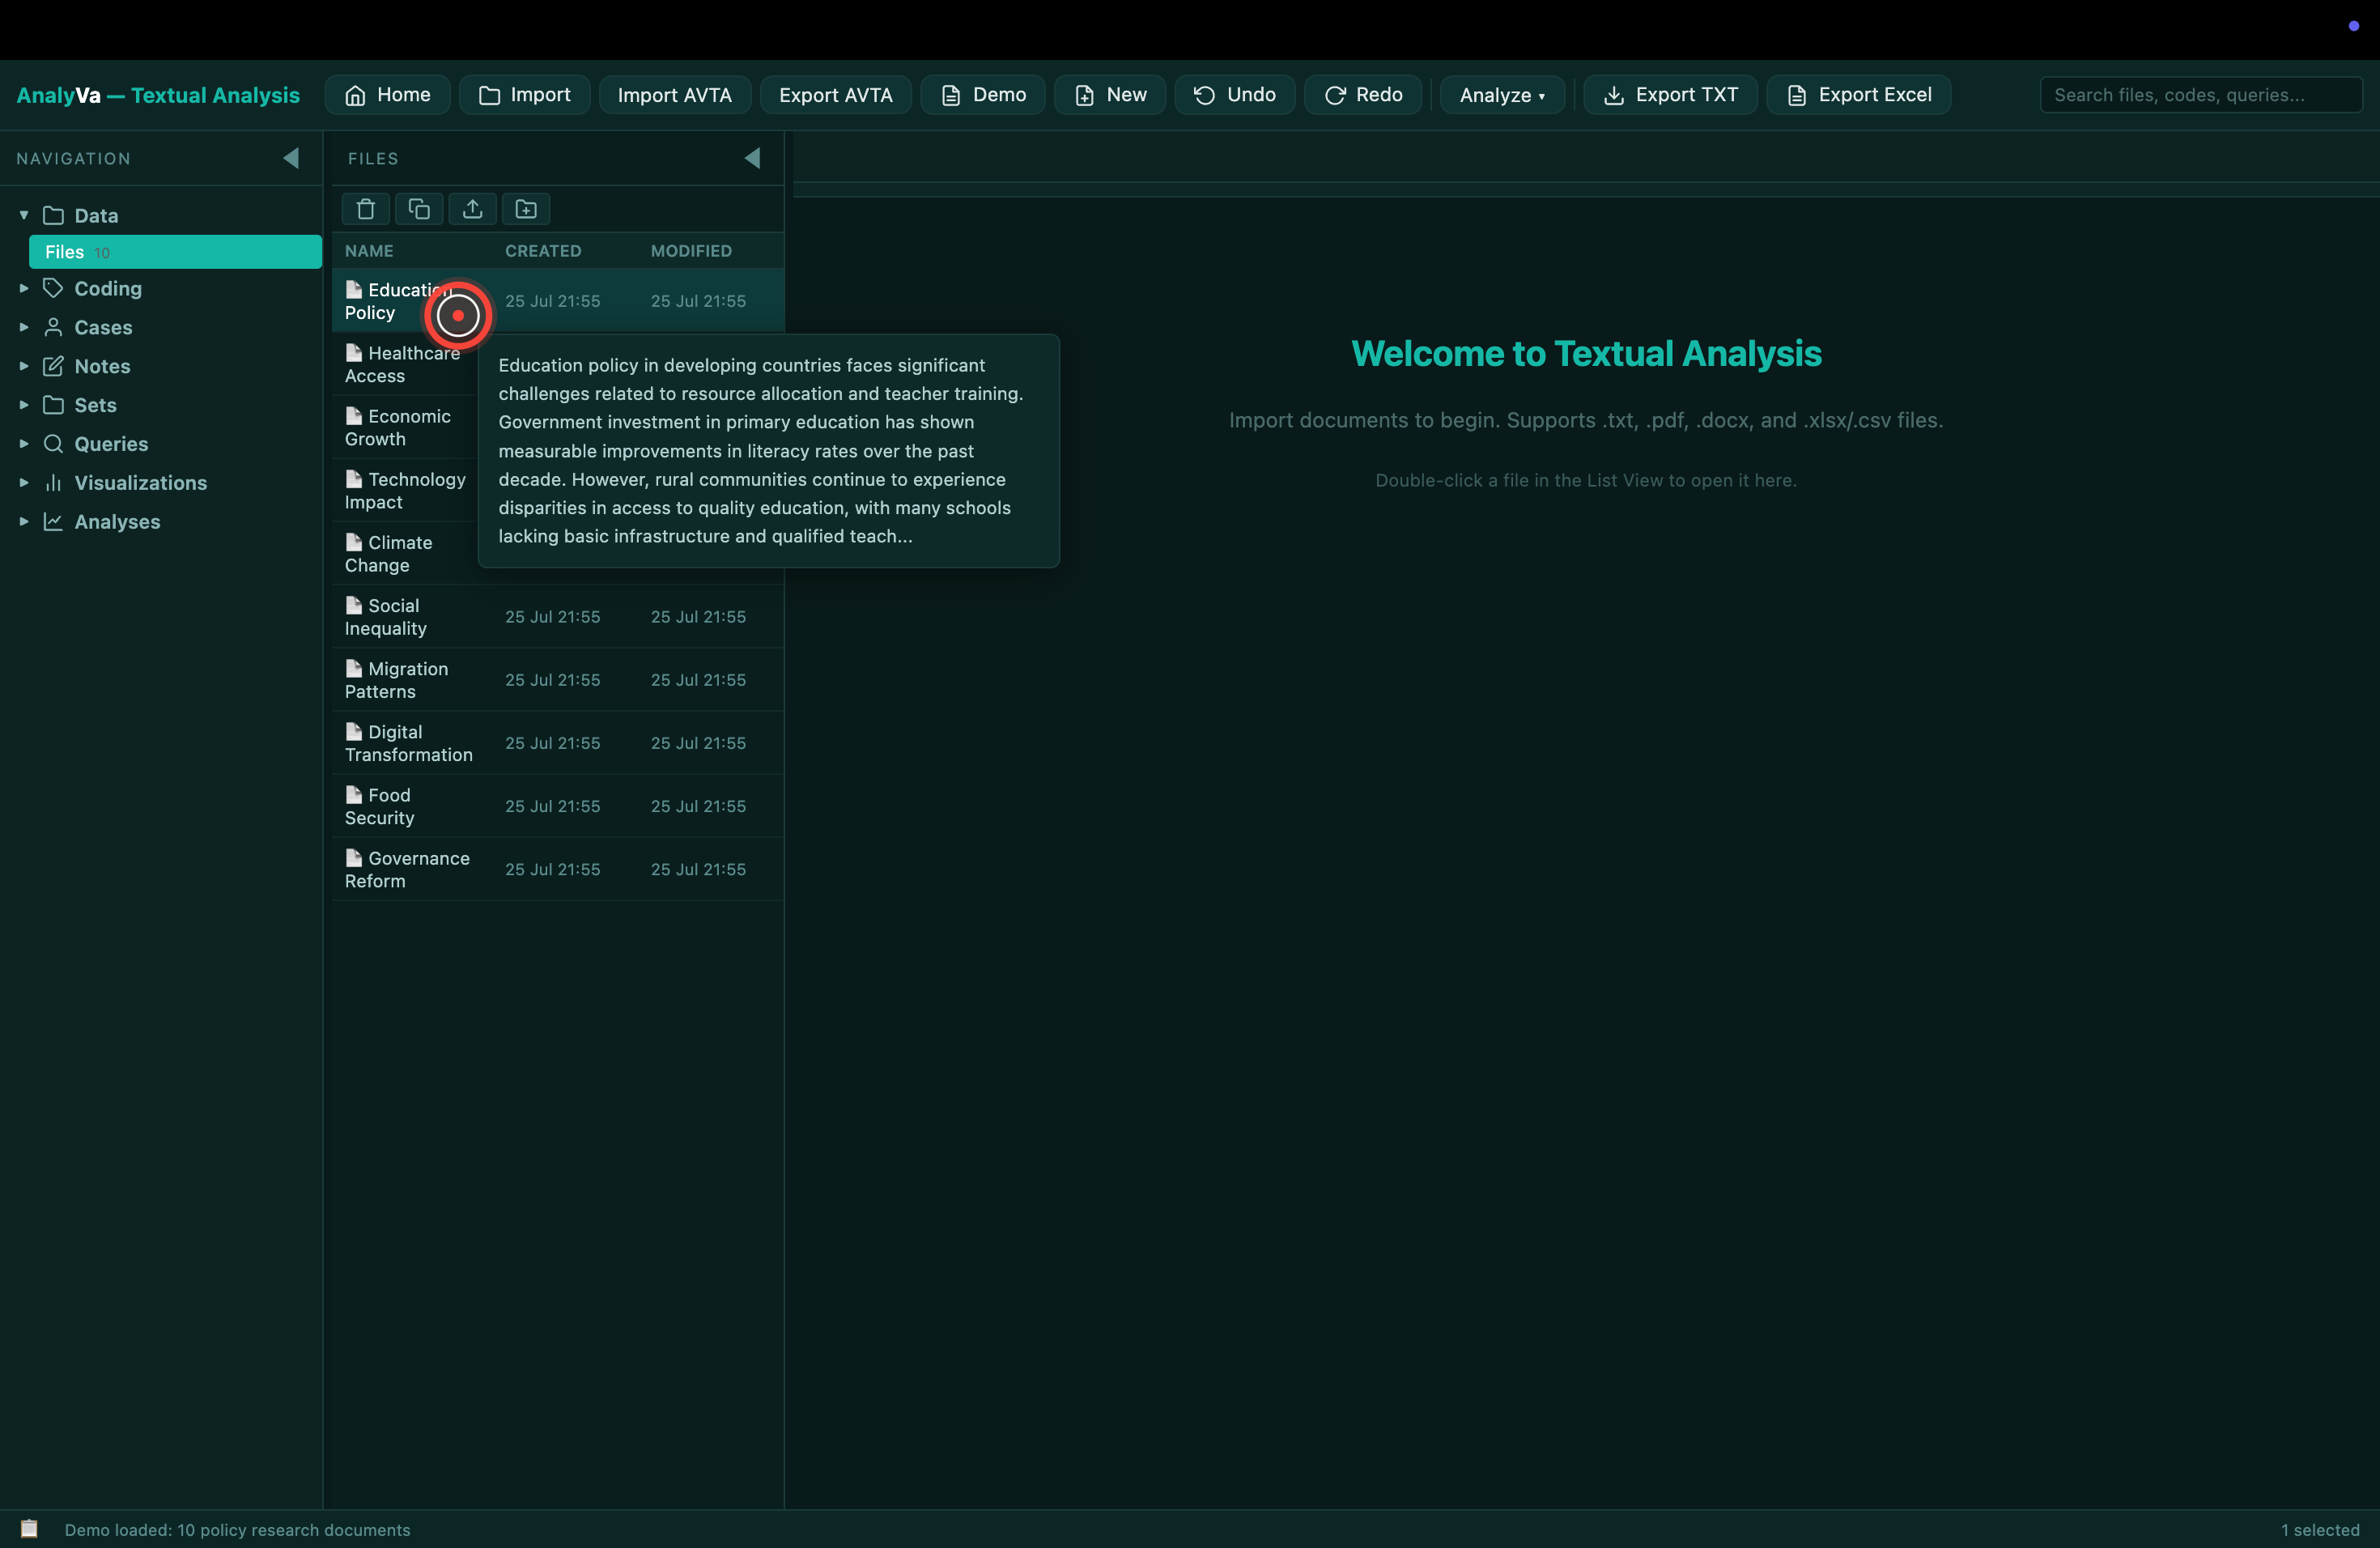
Step 2 — The Textual Analysis workspace loads. The layout is three columns: a Navigation sidebar (Data, Coding, Cases, Notes, Sets, Queries, Visualizations, Analyses), a Files list in the middle, and a large document viewer on the right.
Loading a corpus
Step 3 — Import your documents.
Click Import in the top toolbar and select .txt, .pdf,
.docx, or .xlsx files. Or, for a first walkthrough, click Demo
— AnalyVa ships with a set of 10 policy research documents you can
practice on without needing your own corpus first.
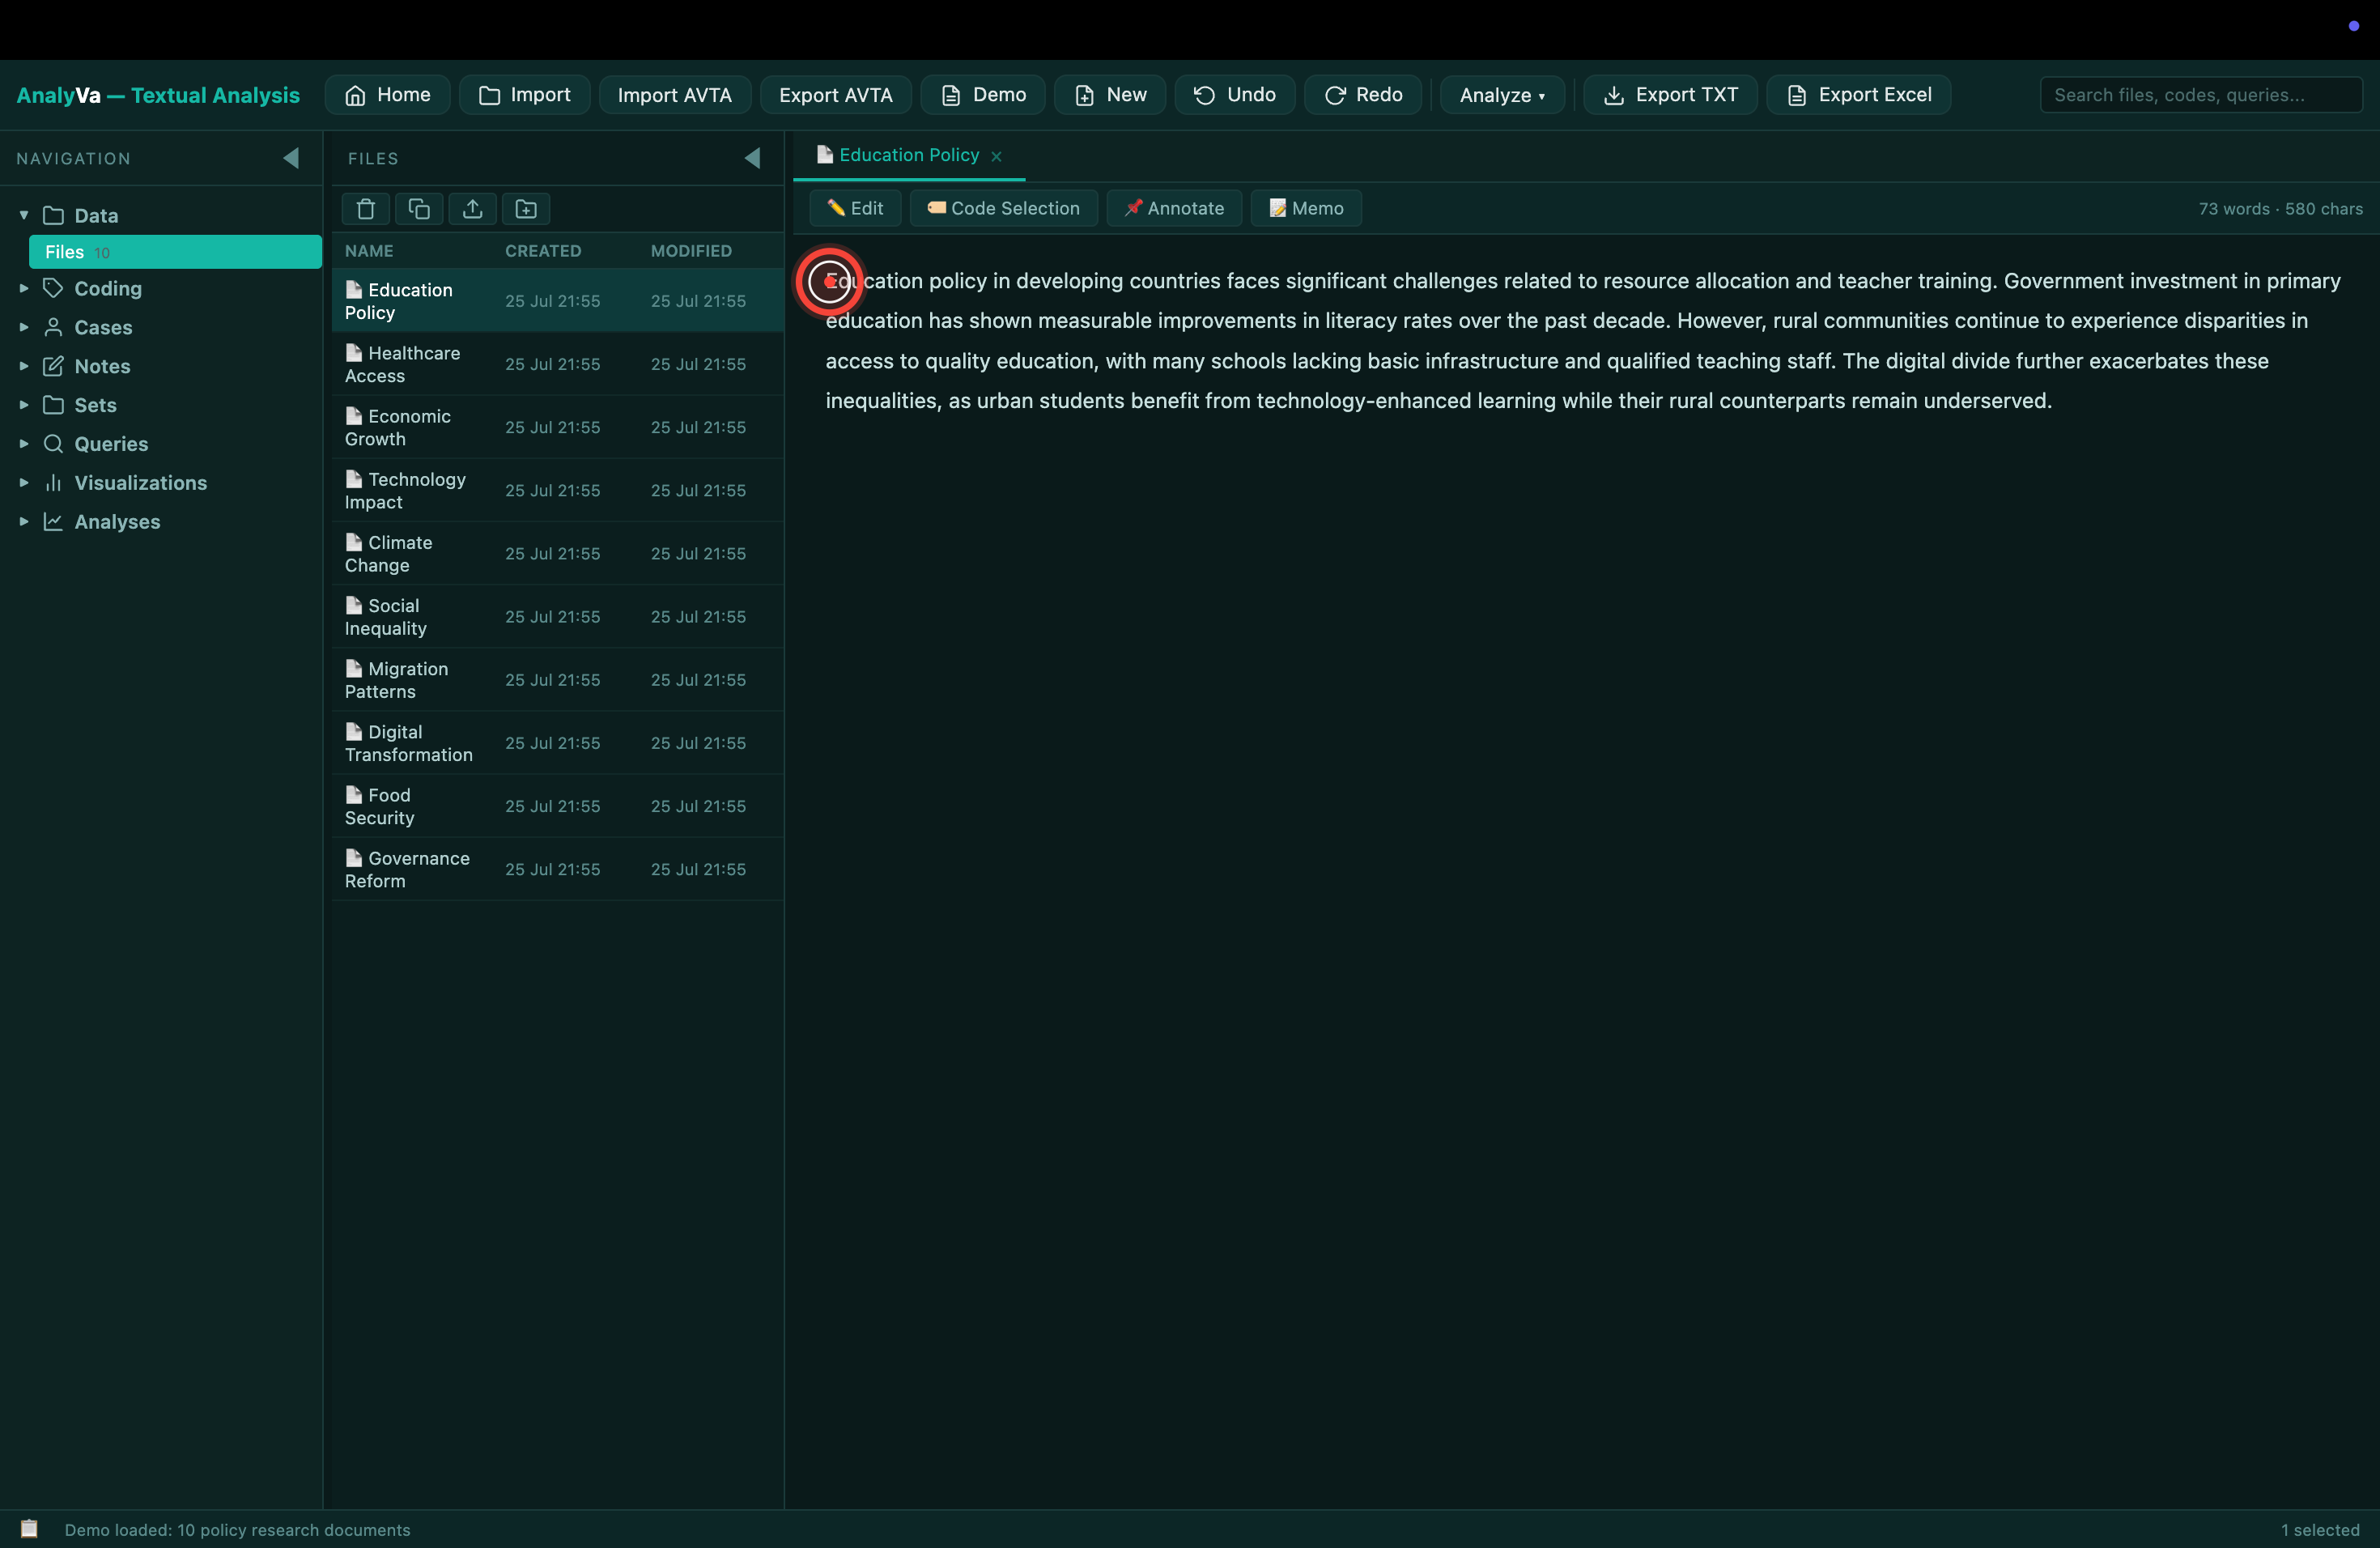
Step 4 — Files appear in the Files list. Each imported document becomes a row in the Files list with a created and modified timestamp. In the demo corpus you get ten documents on policy themes: Education Policy, Healthcare Access, Economic Growth, Climate Change, and so on.
Step 5 — Click a document to open it. The right pane opens the document with word and character counts in the top-right, plus four action buttons: Edit, Code Selection, Annotate, Memo.
Step 6 — Skim the text before you start coding. Read the document once end-to-end before annotating anything. Codes built from a first pass through unfamiliar material tend to fragment the theme; codes built from a second pass tend to organise it.
Coding text
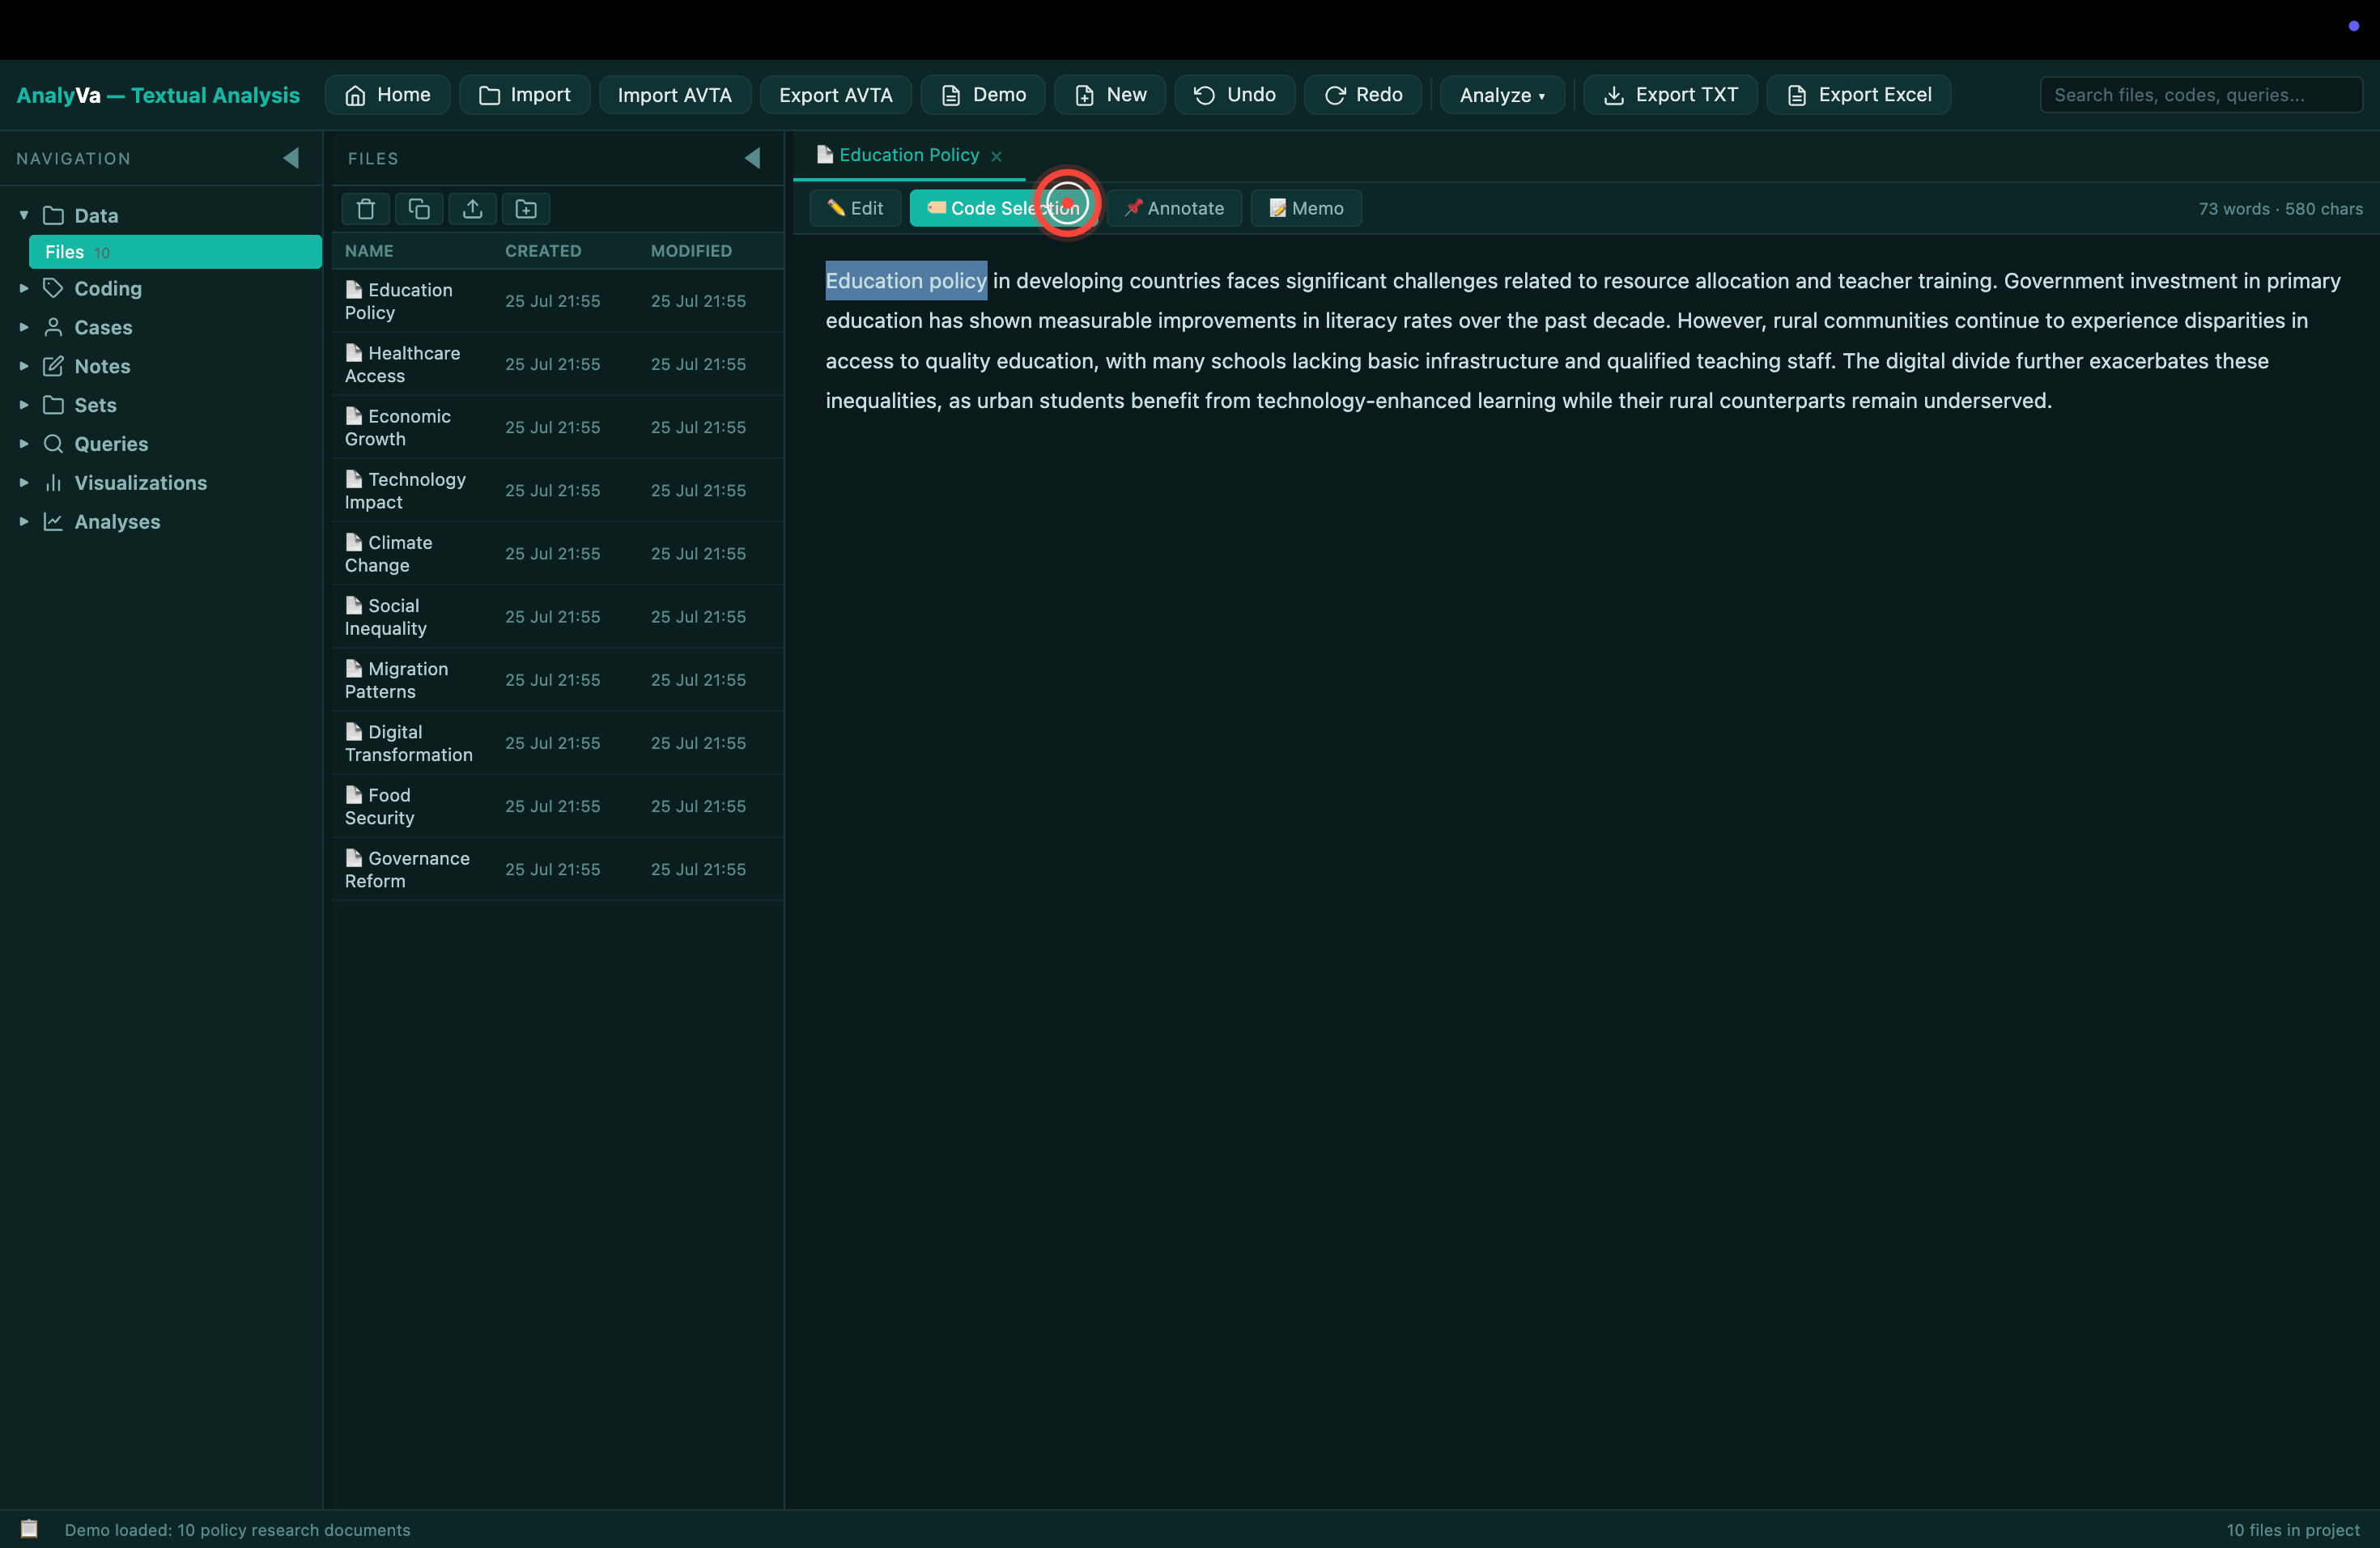
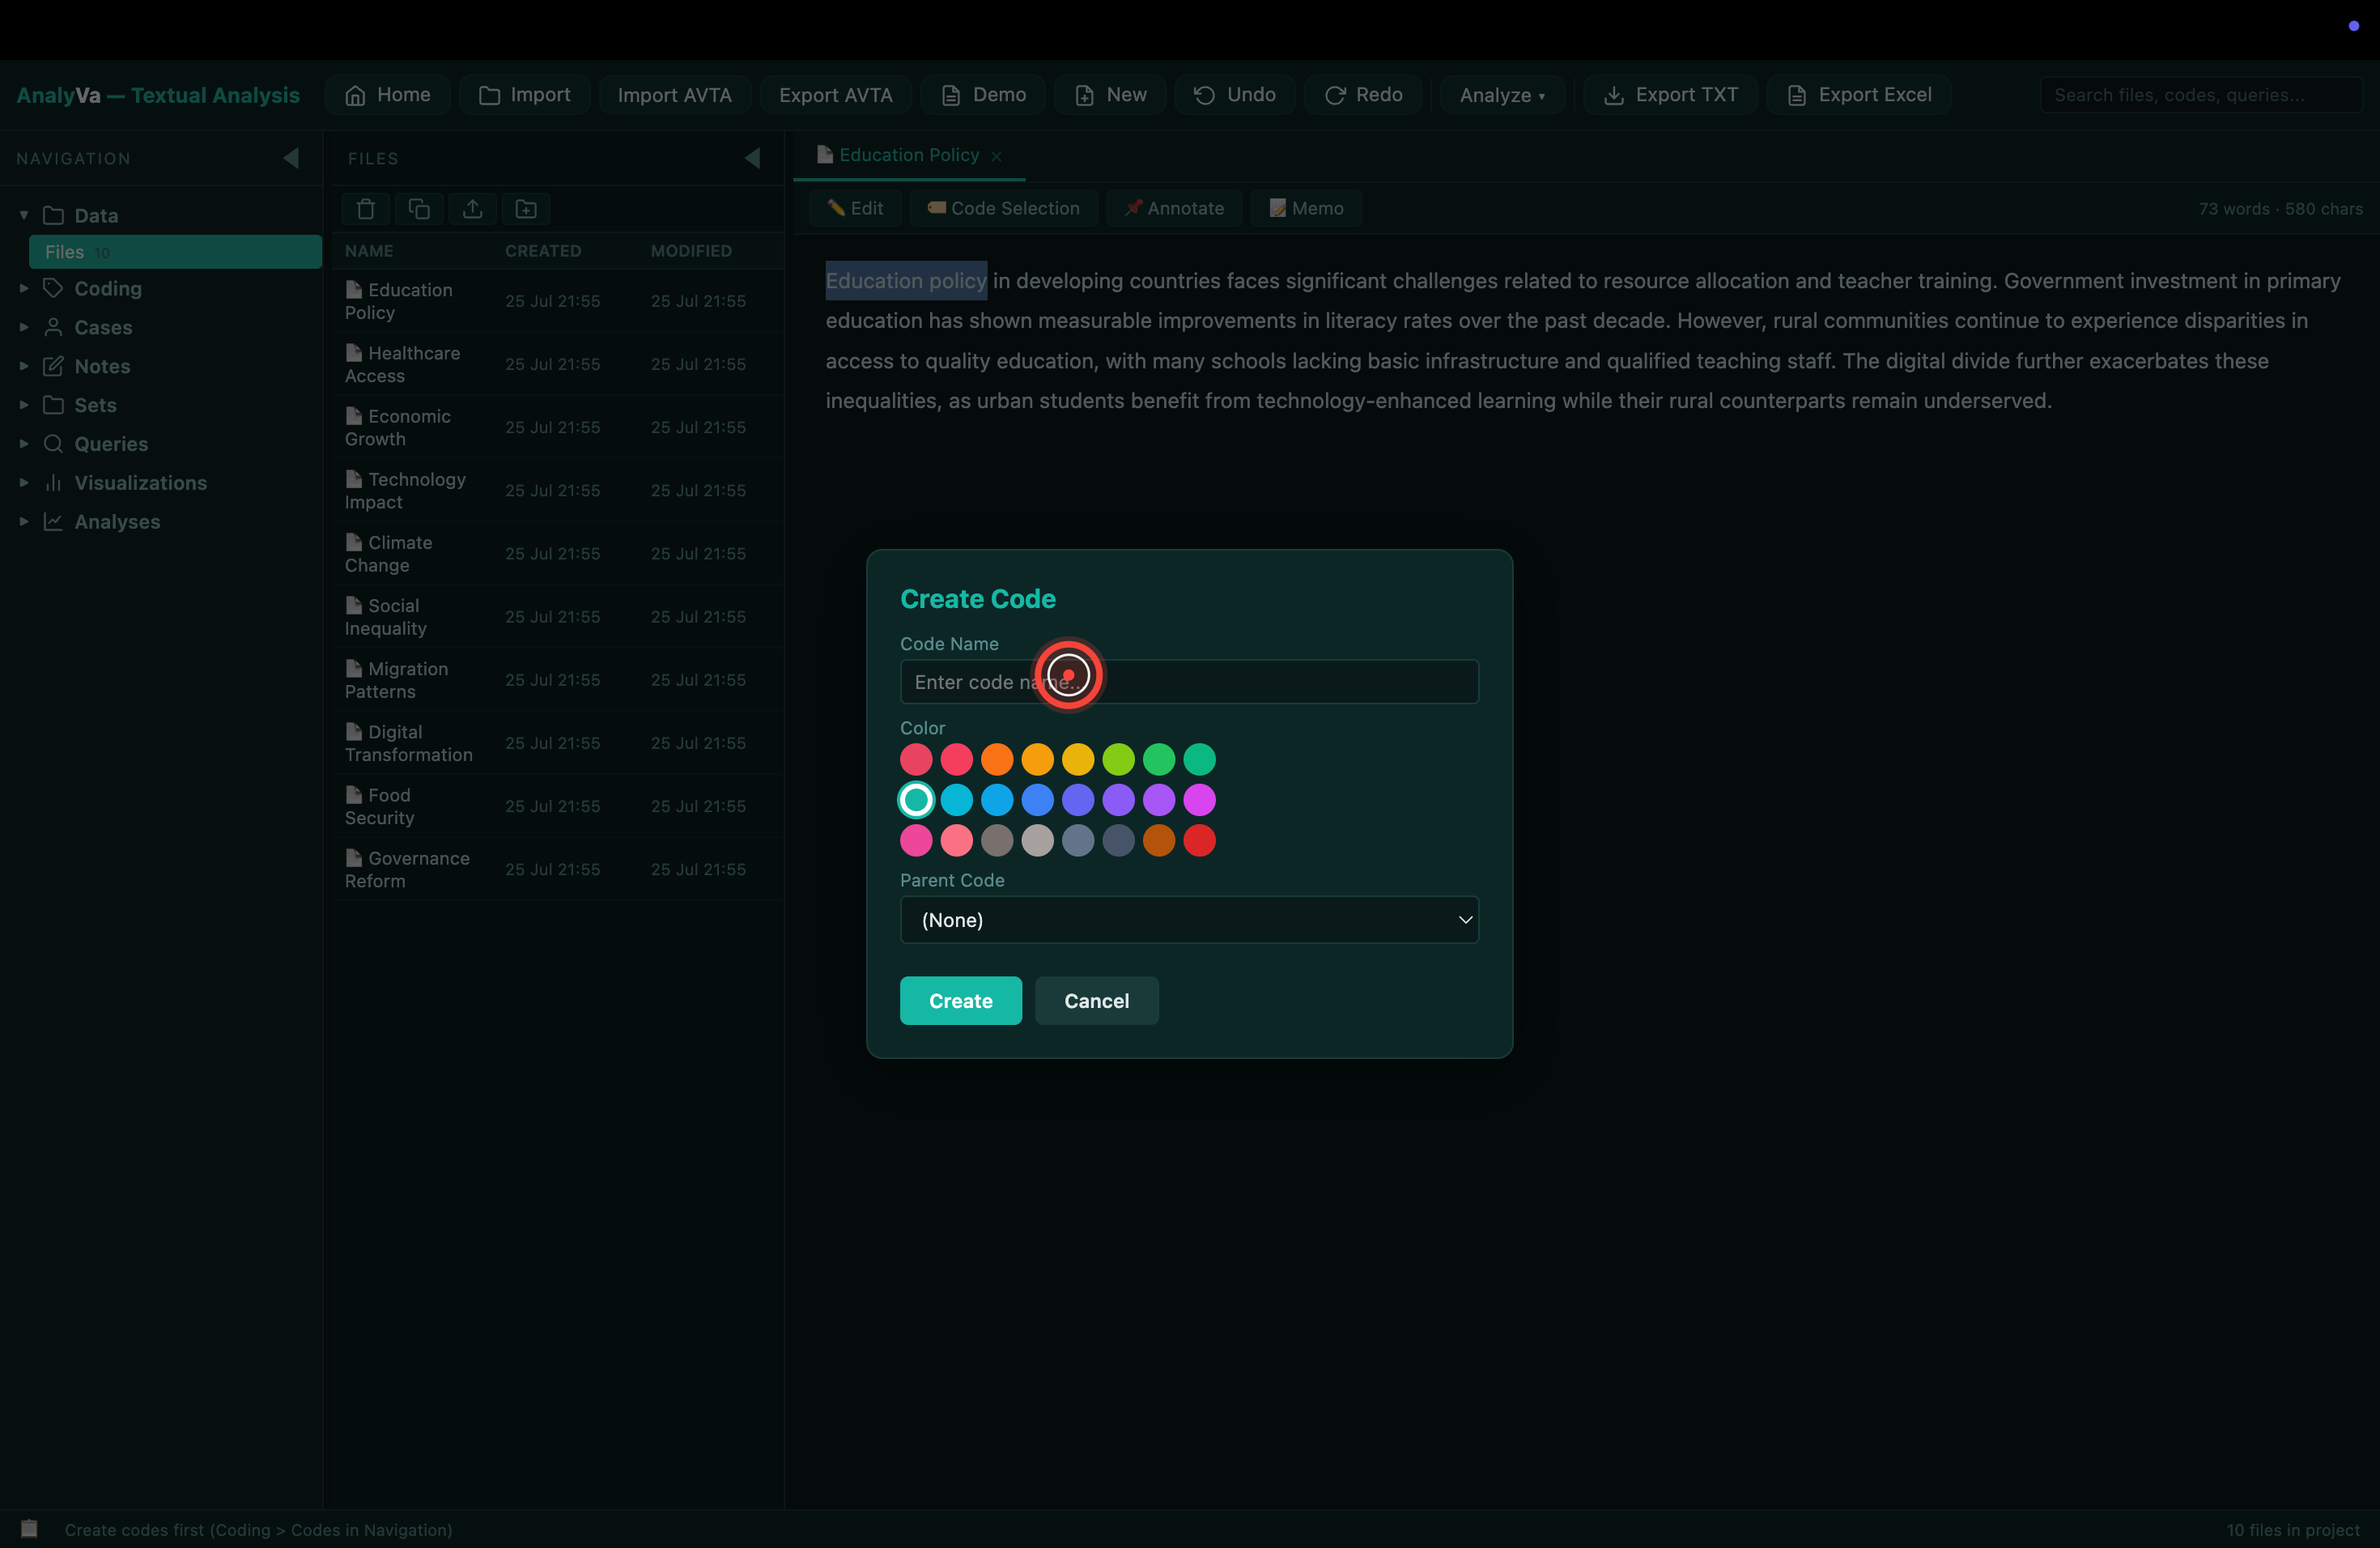
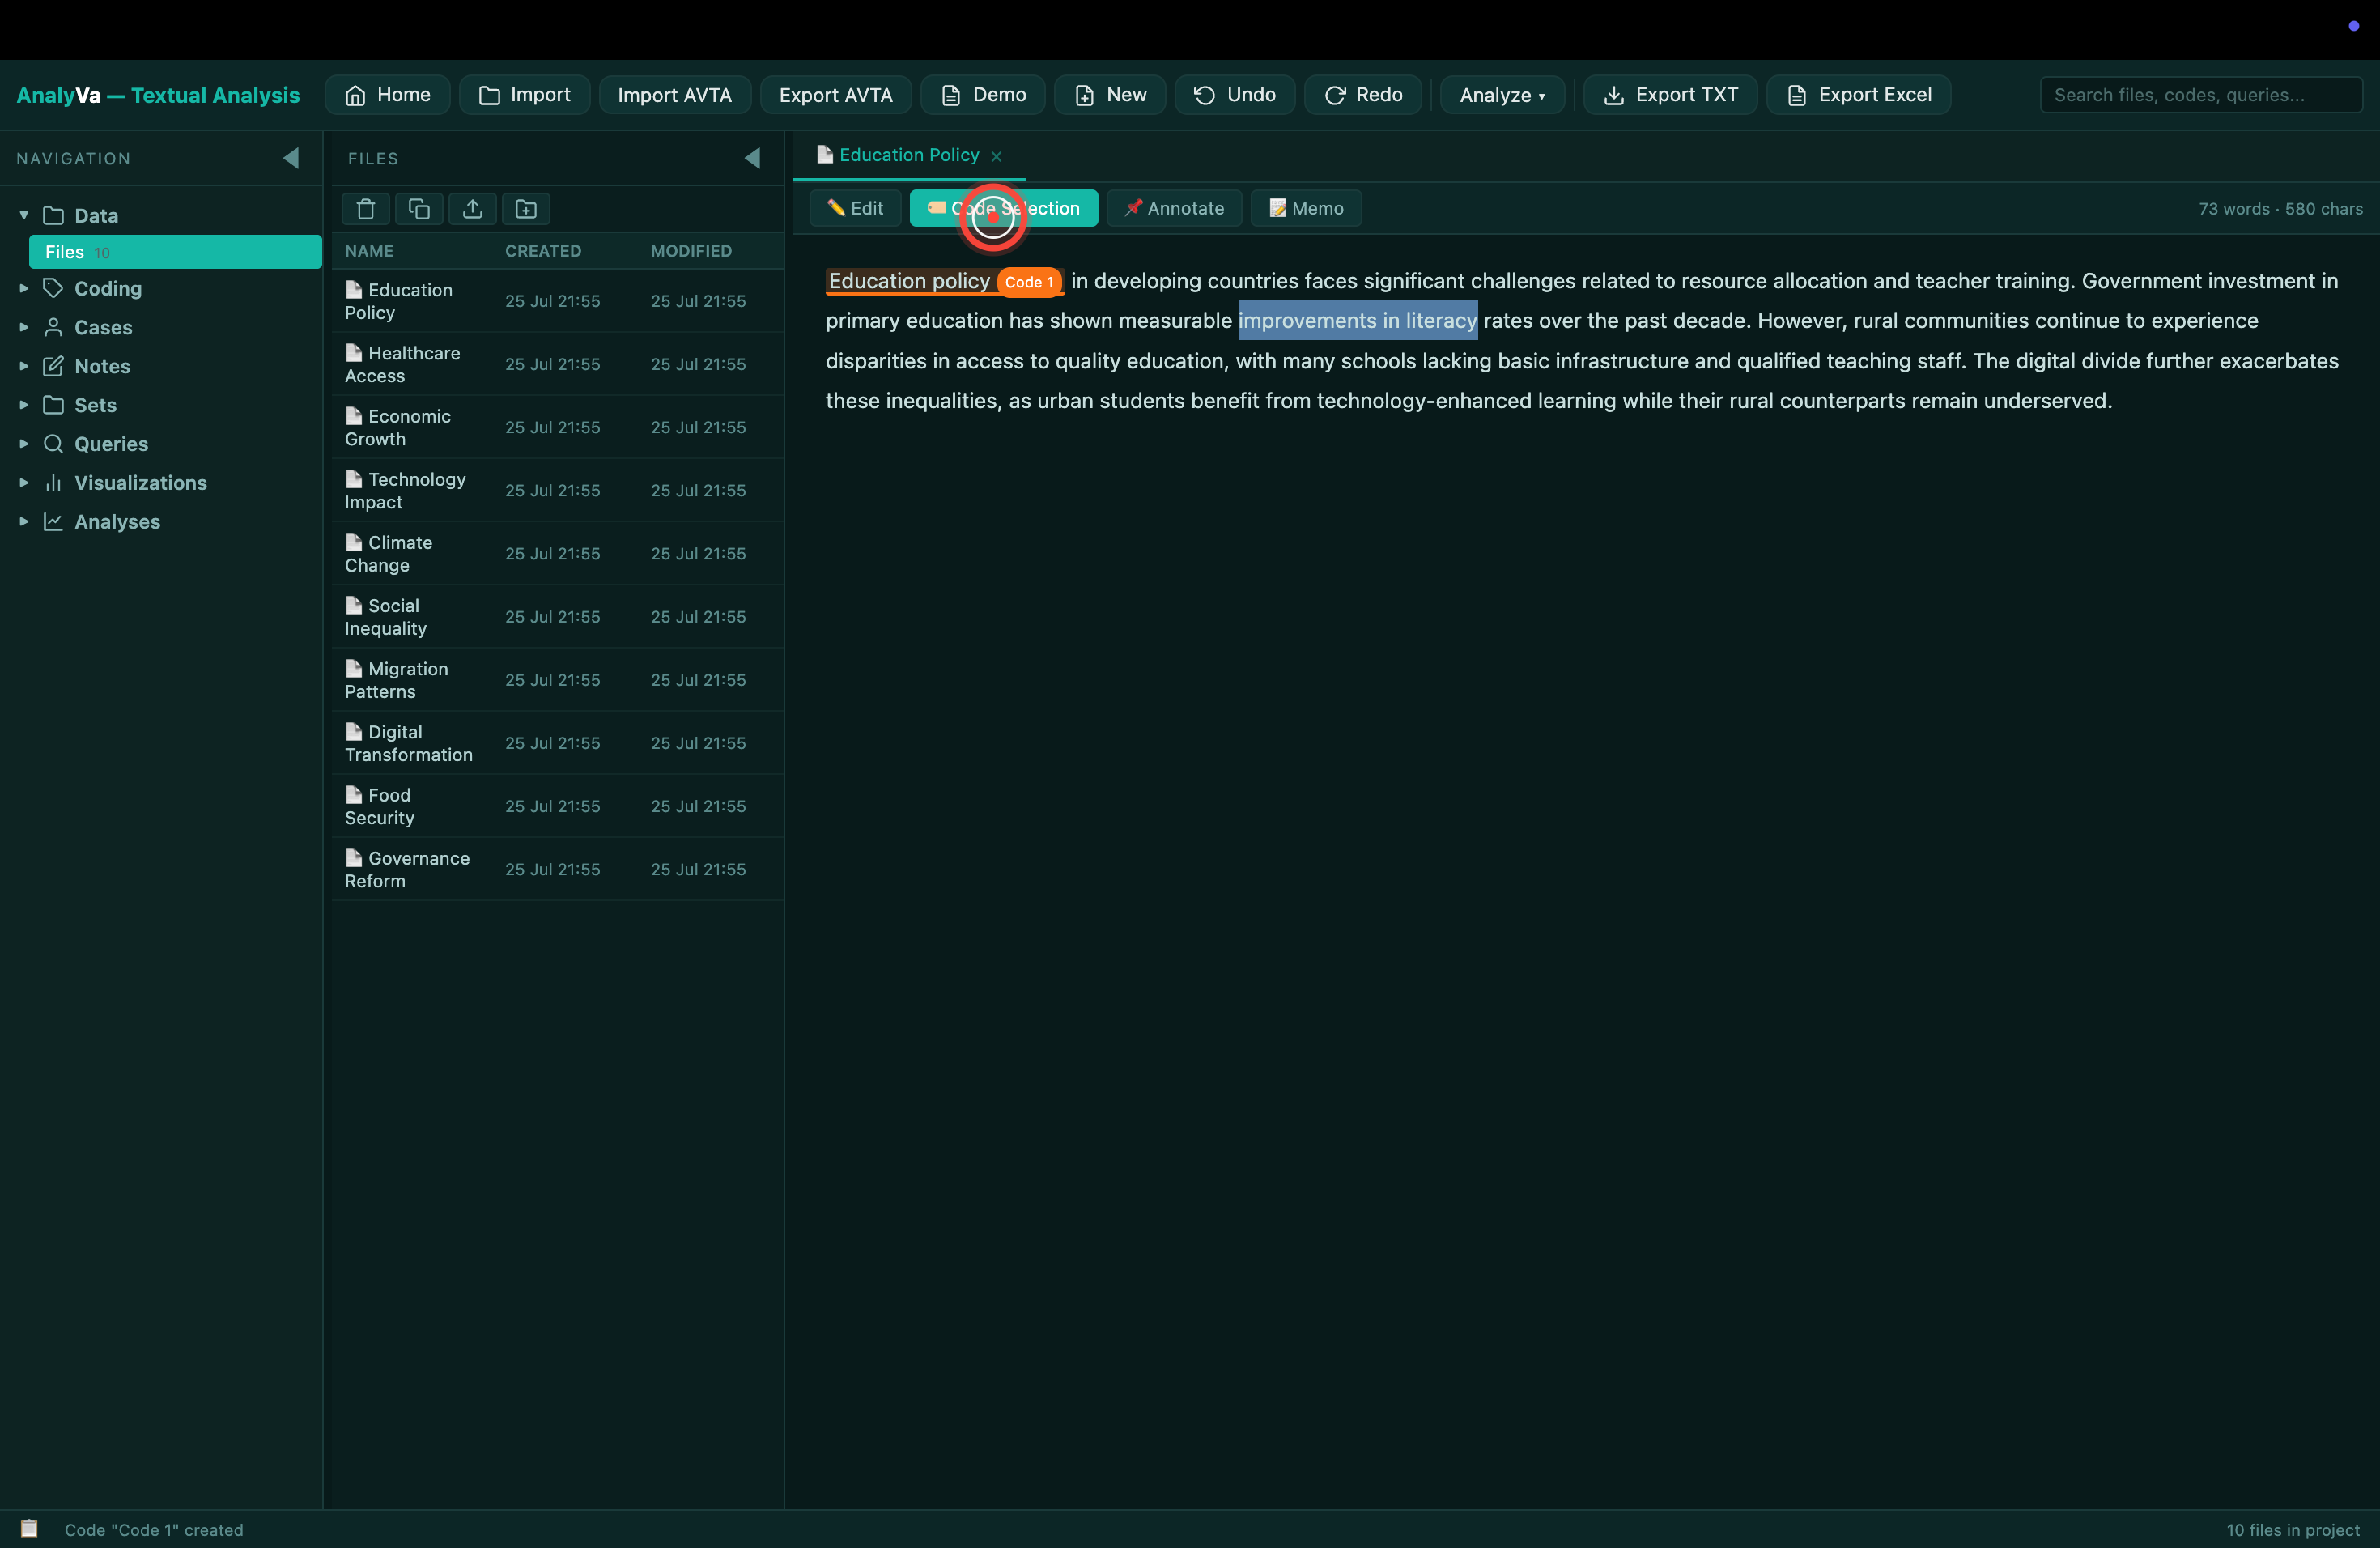
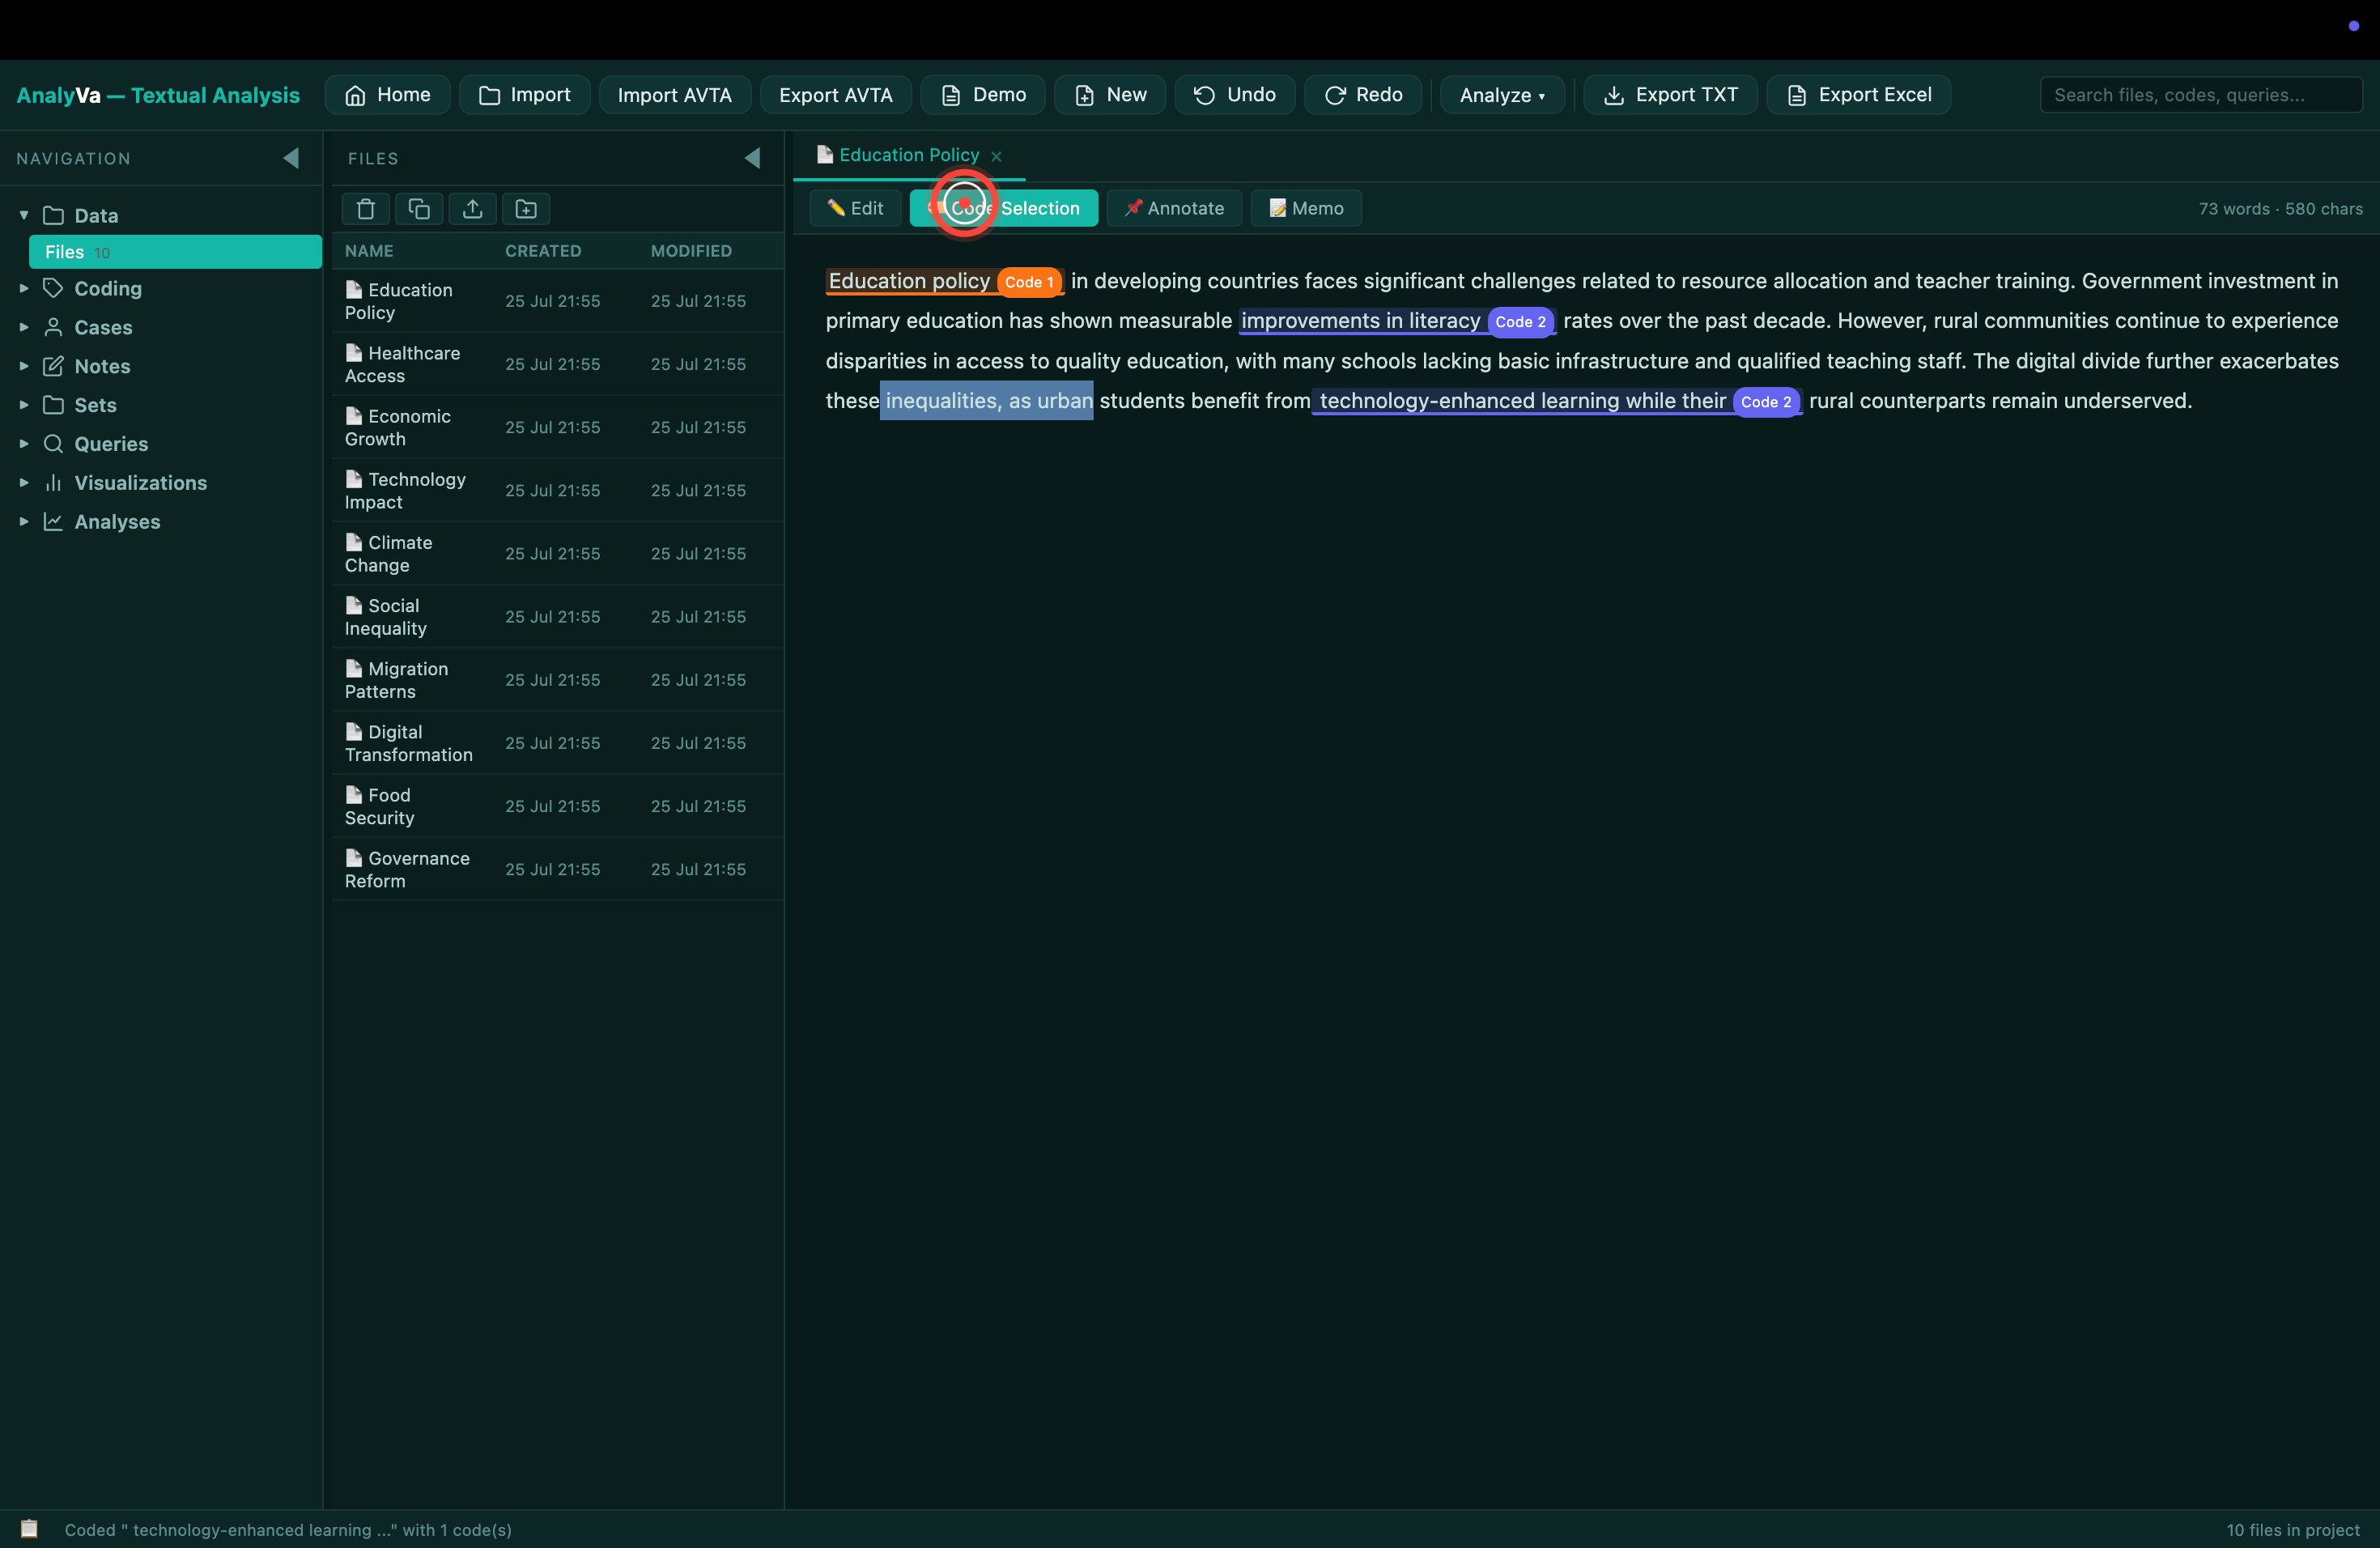
Step 7 — Highlight a passage you want to code. Click and drag to select the text — a word, a phrase, a full paragraph.
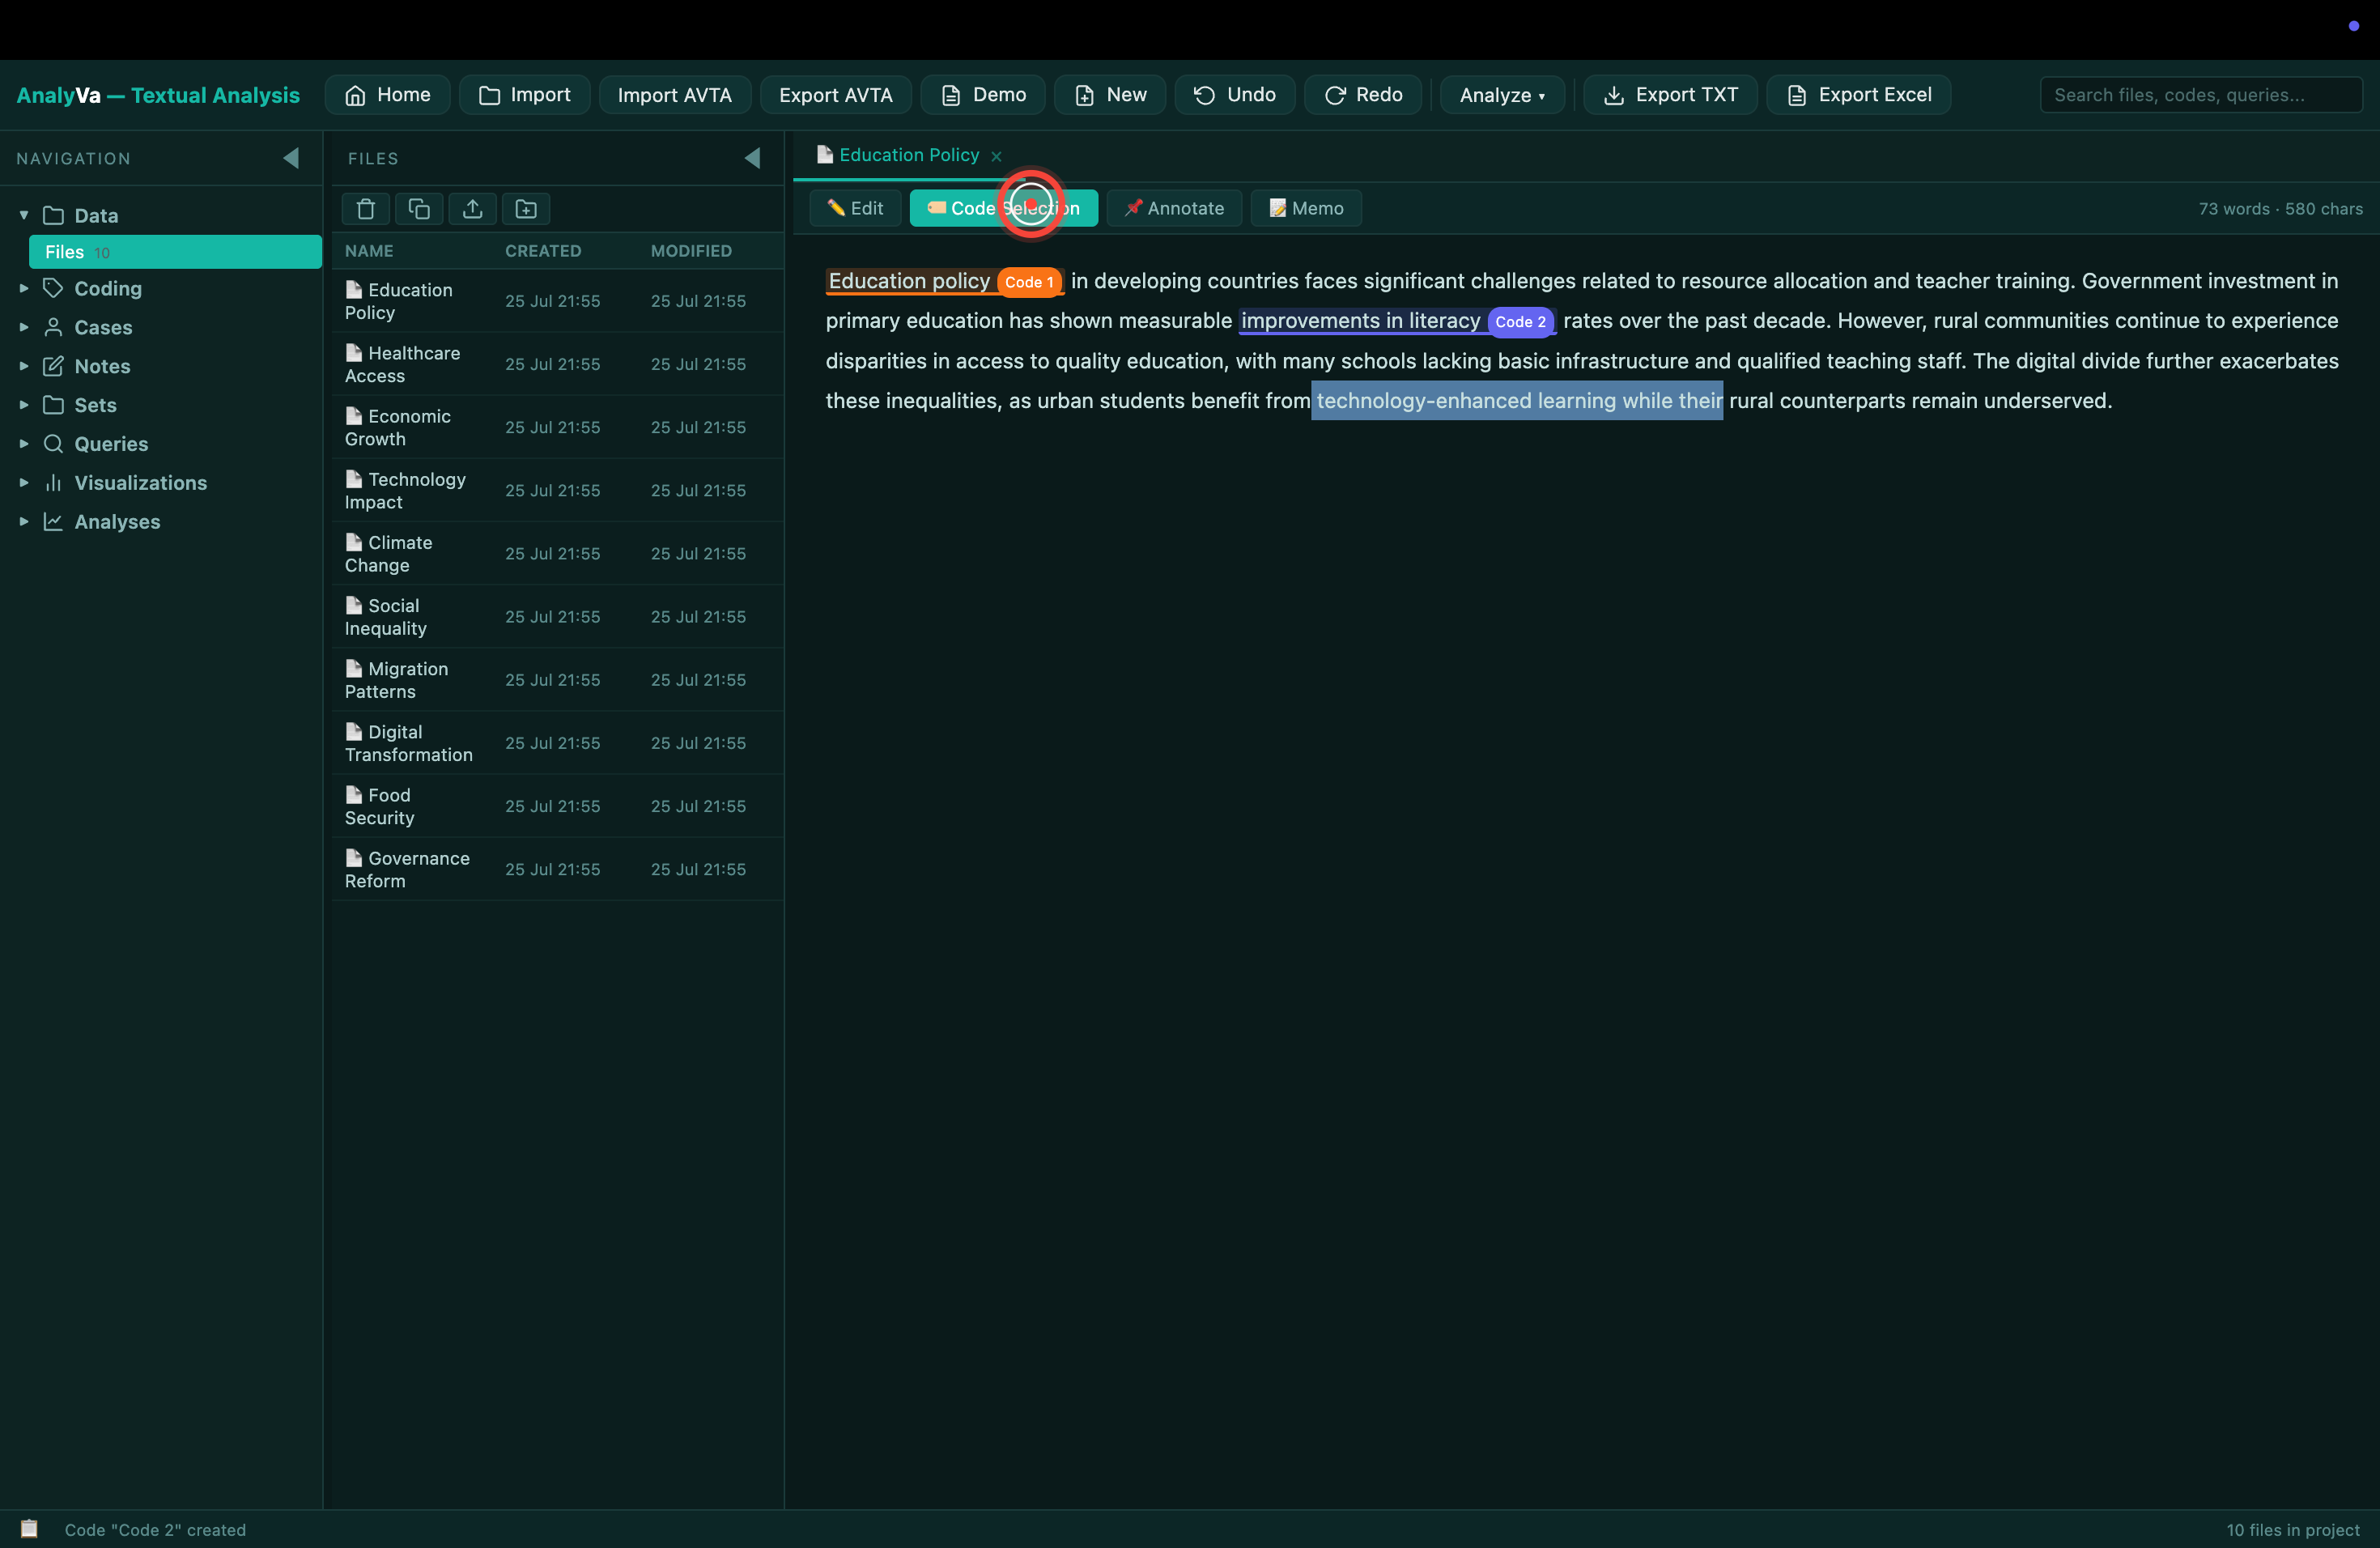
Step 8 — Click Code Selection in the toolbar above the document. Or right-click the highlighted text and pick Code Selection from the context menu.
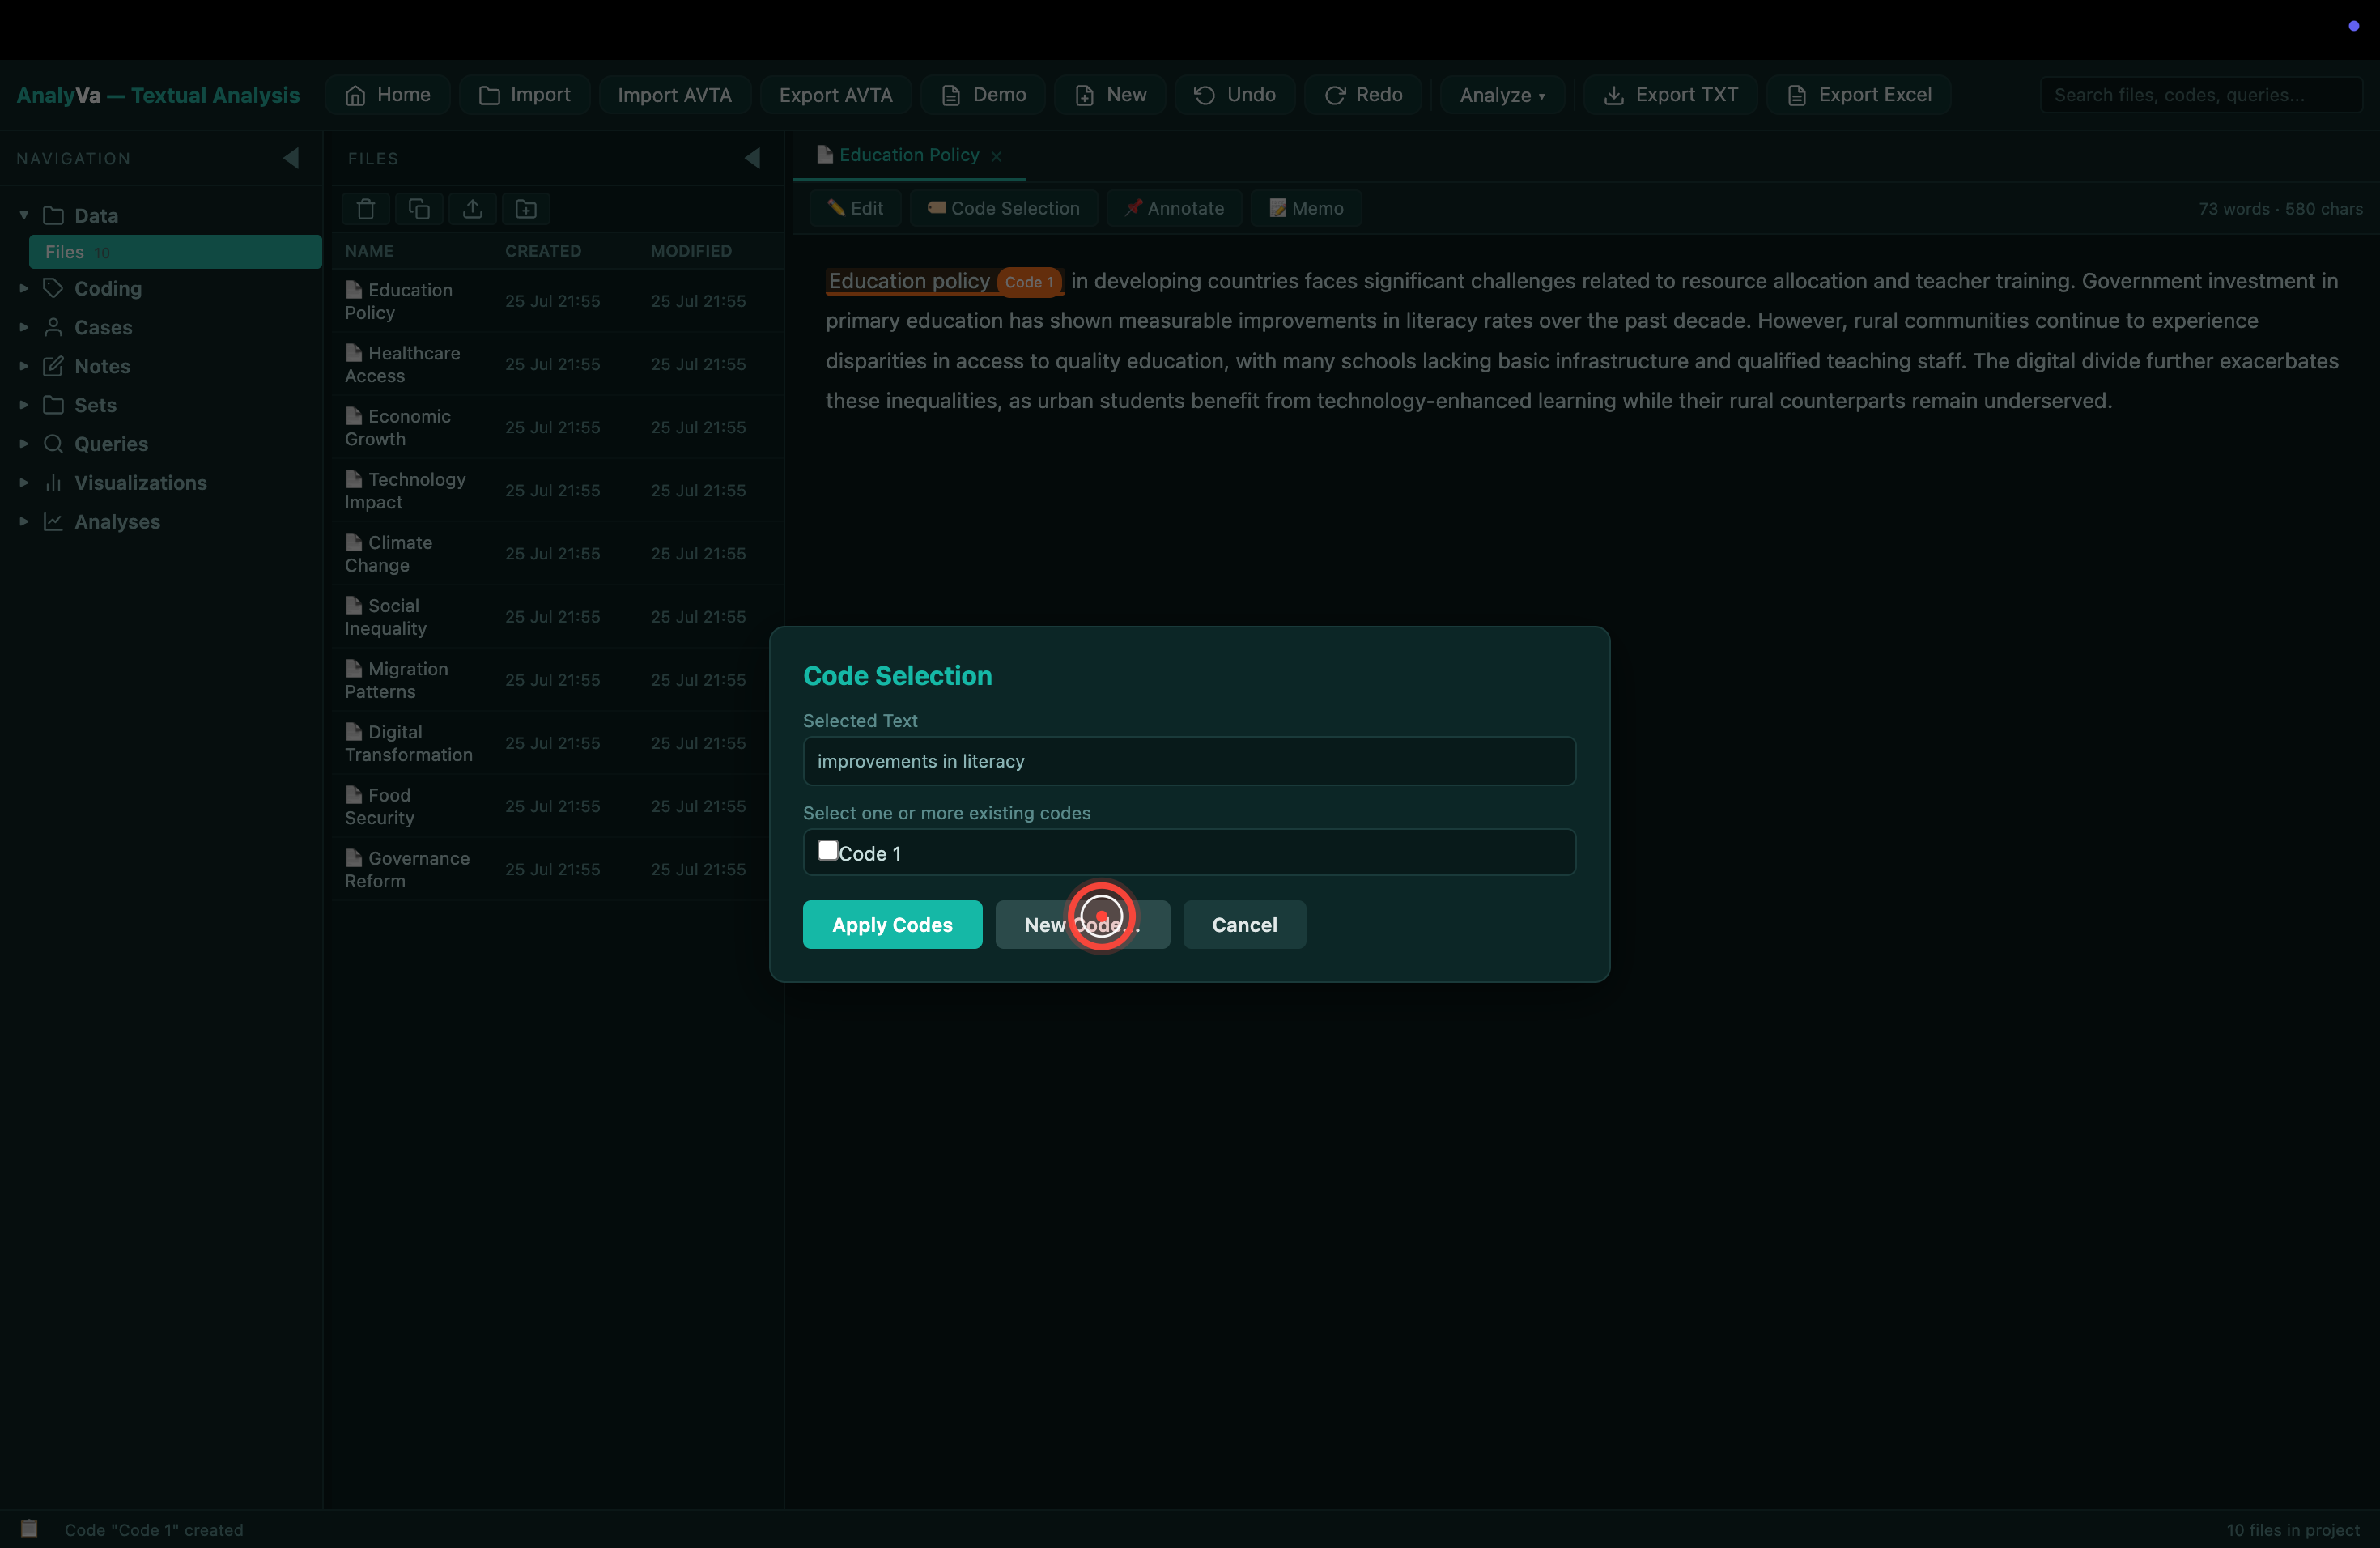
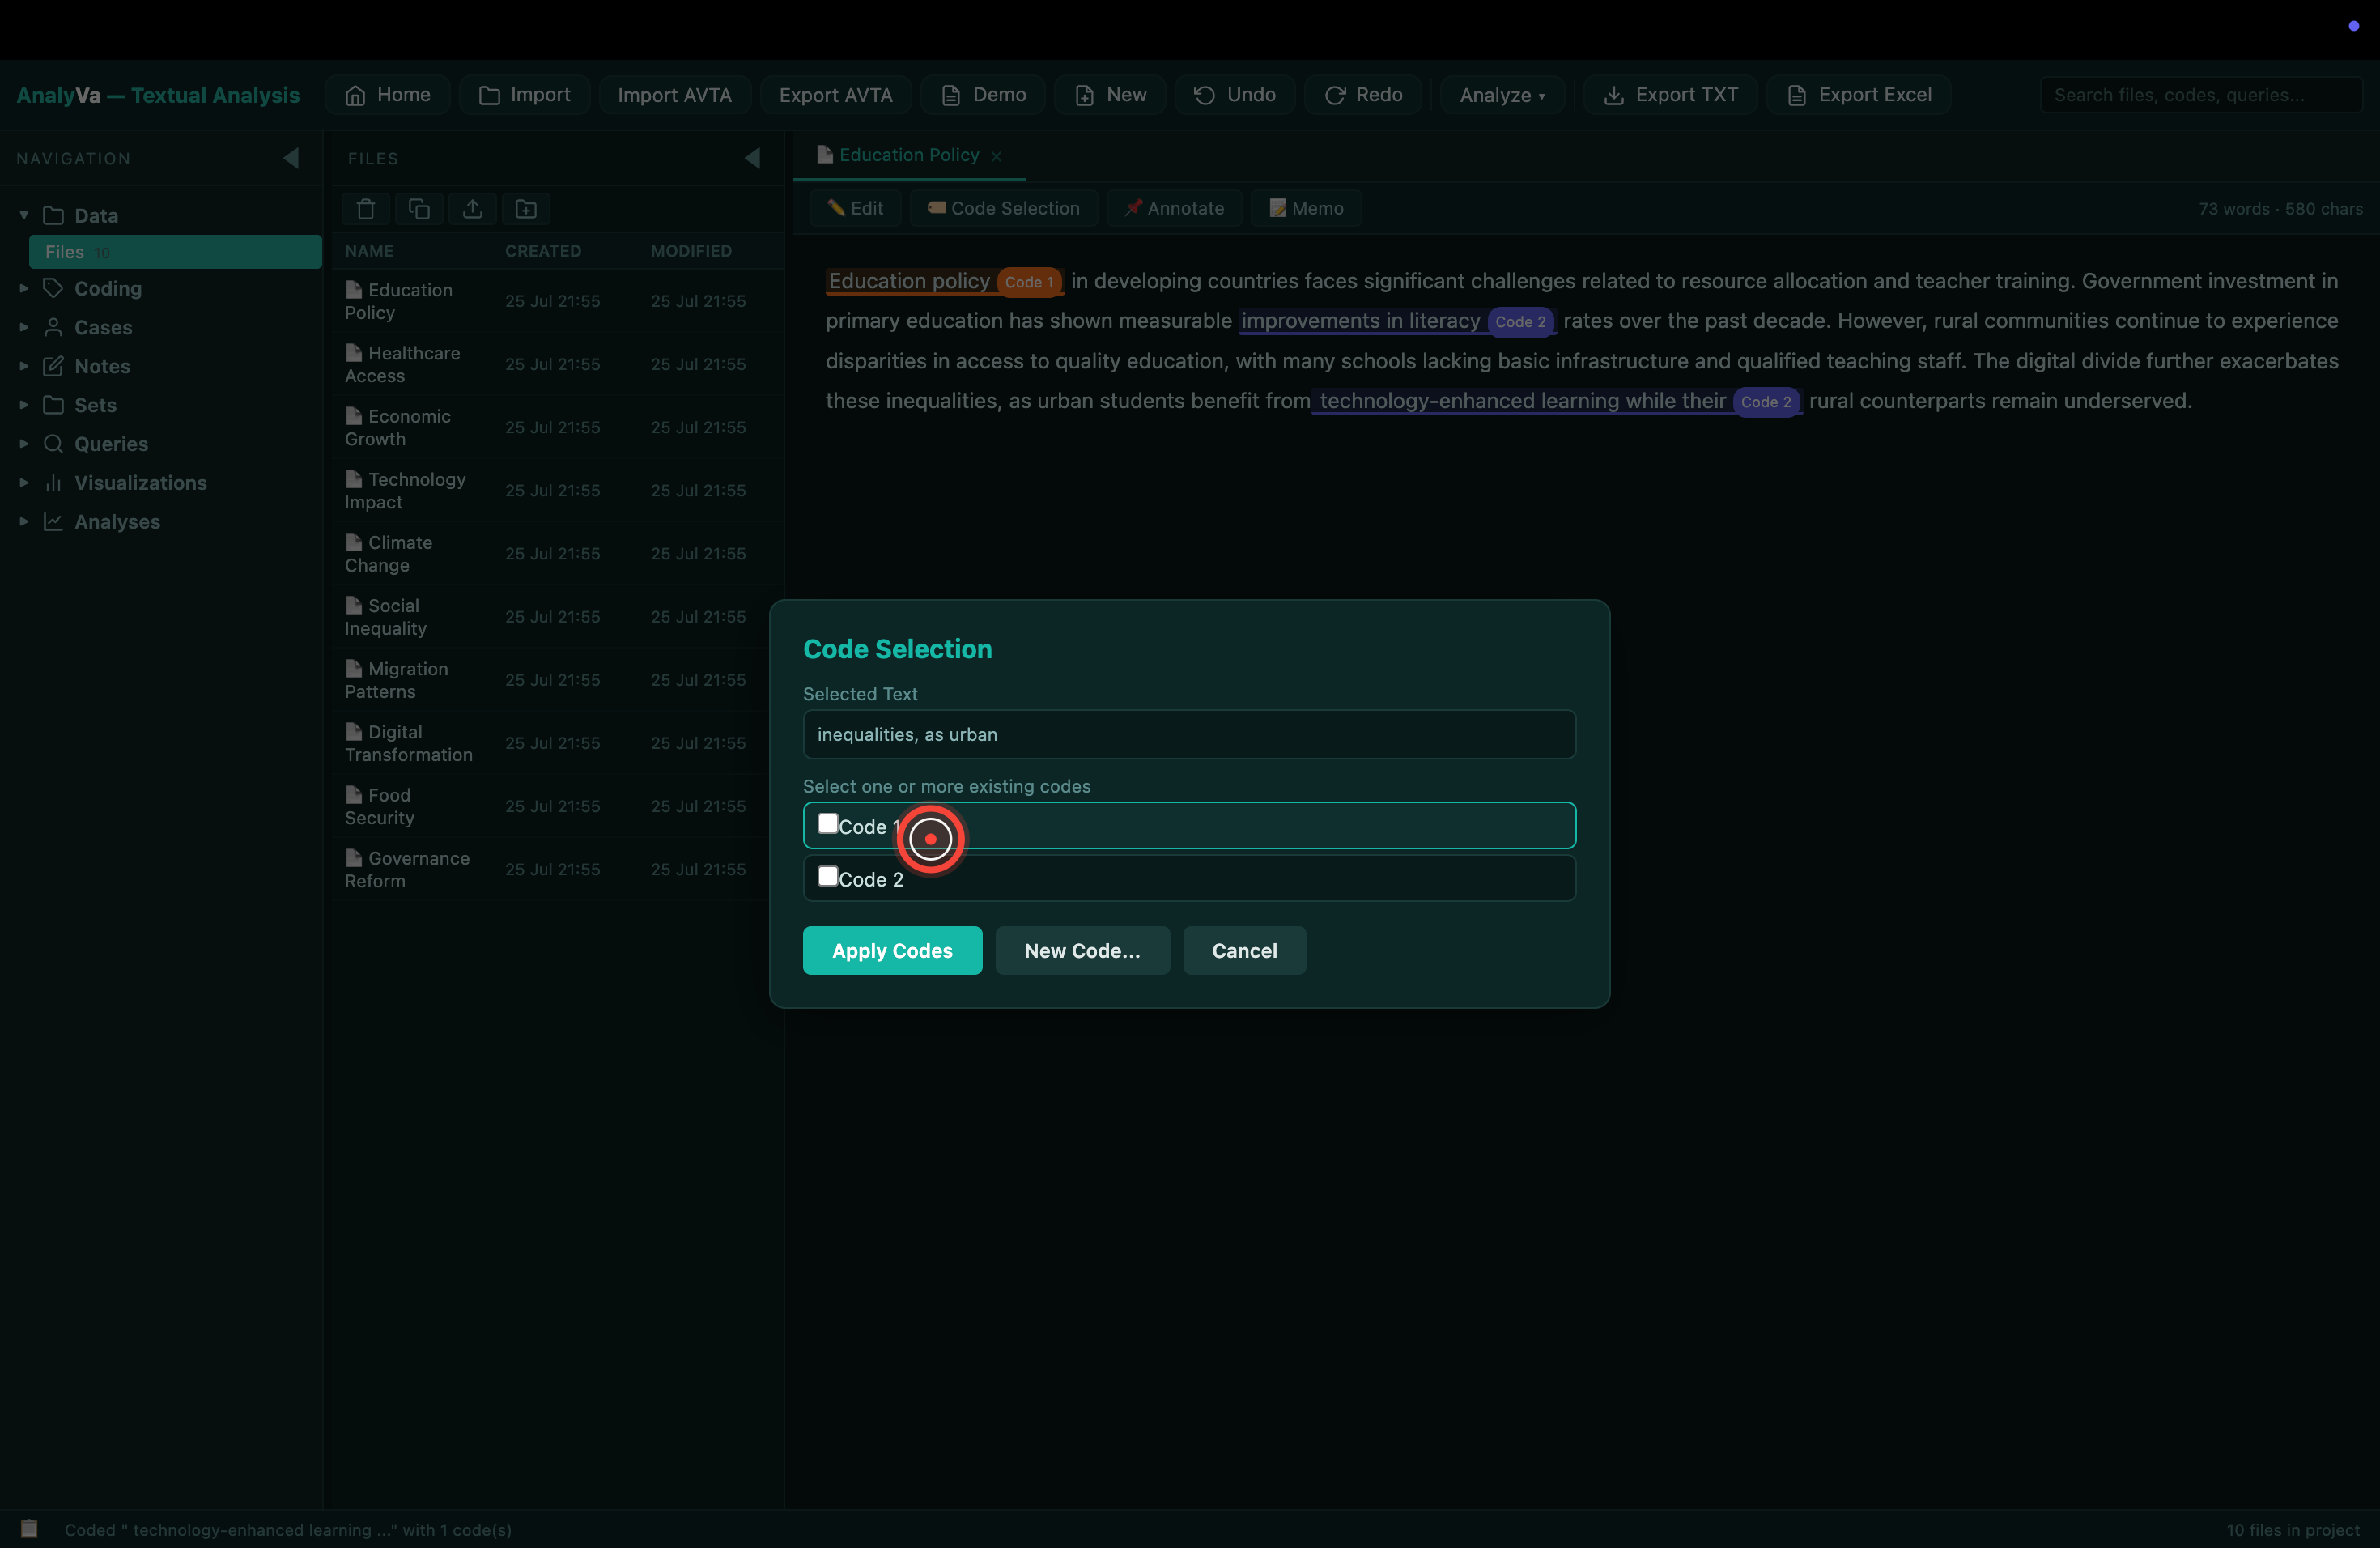
Step 9 — The Code Selection dialog opens. It shows the selected text, plus a list of any existing codes you can apply. On a fresh project this list is empty.
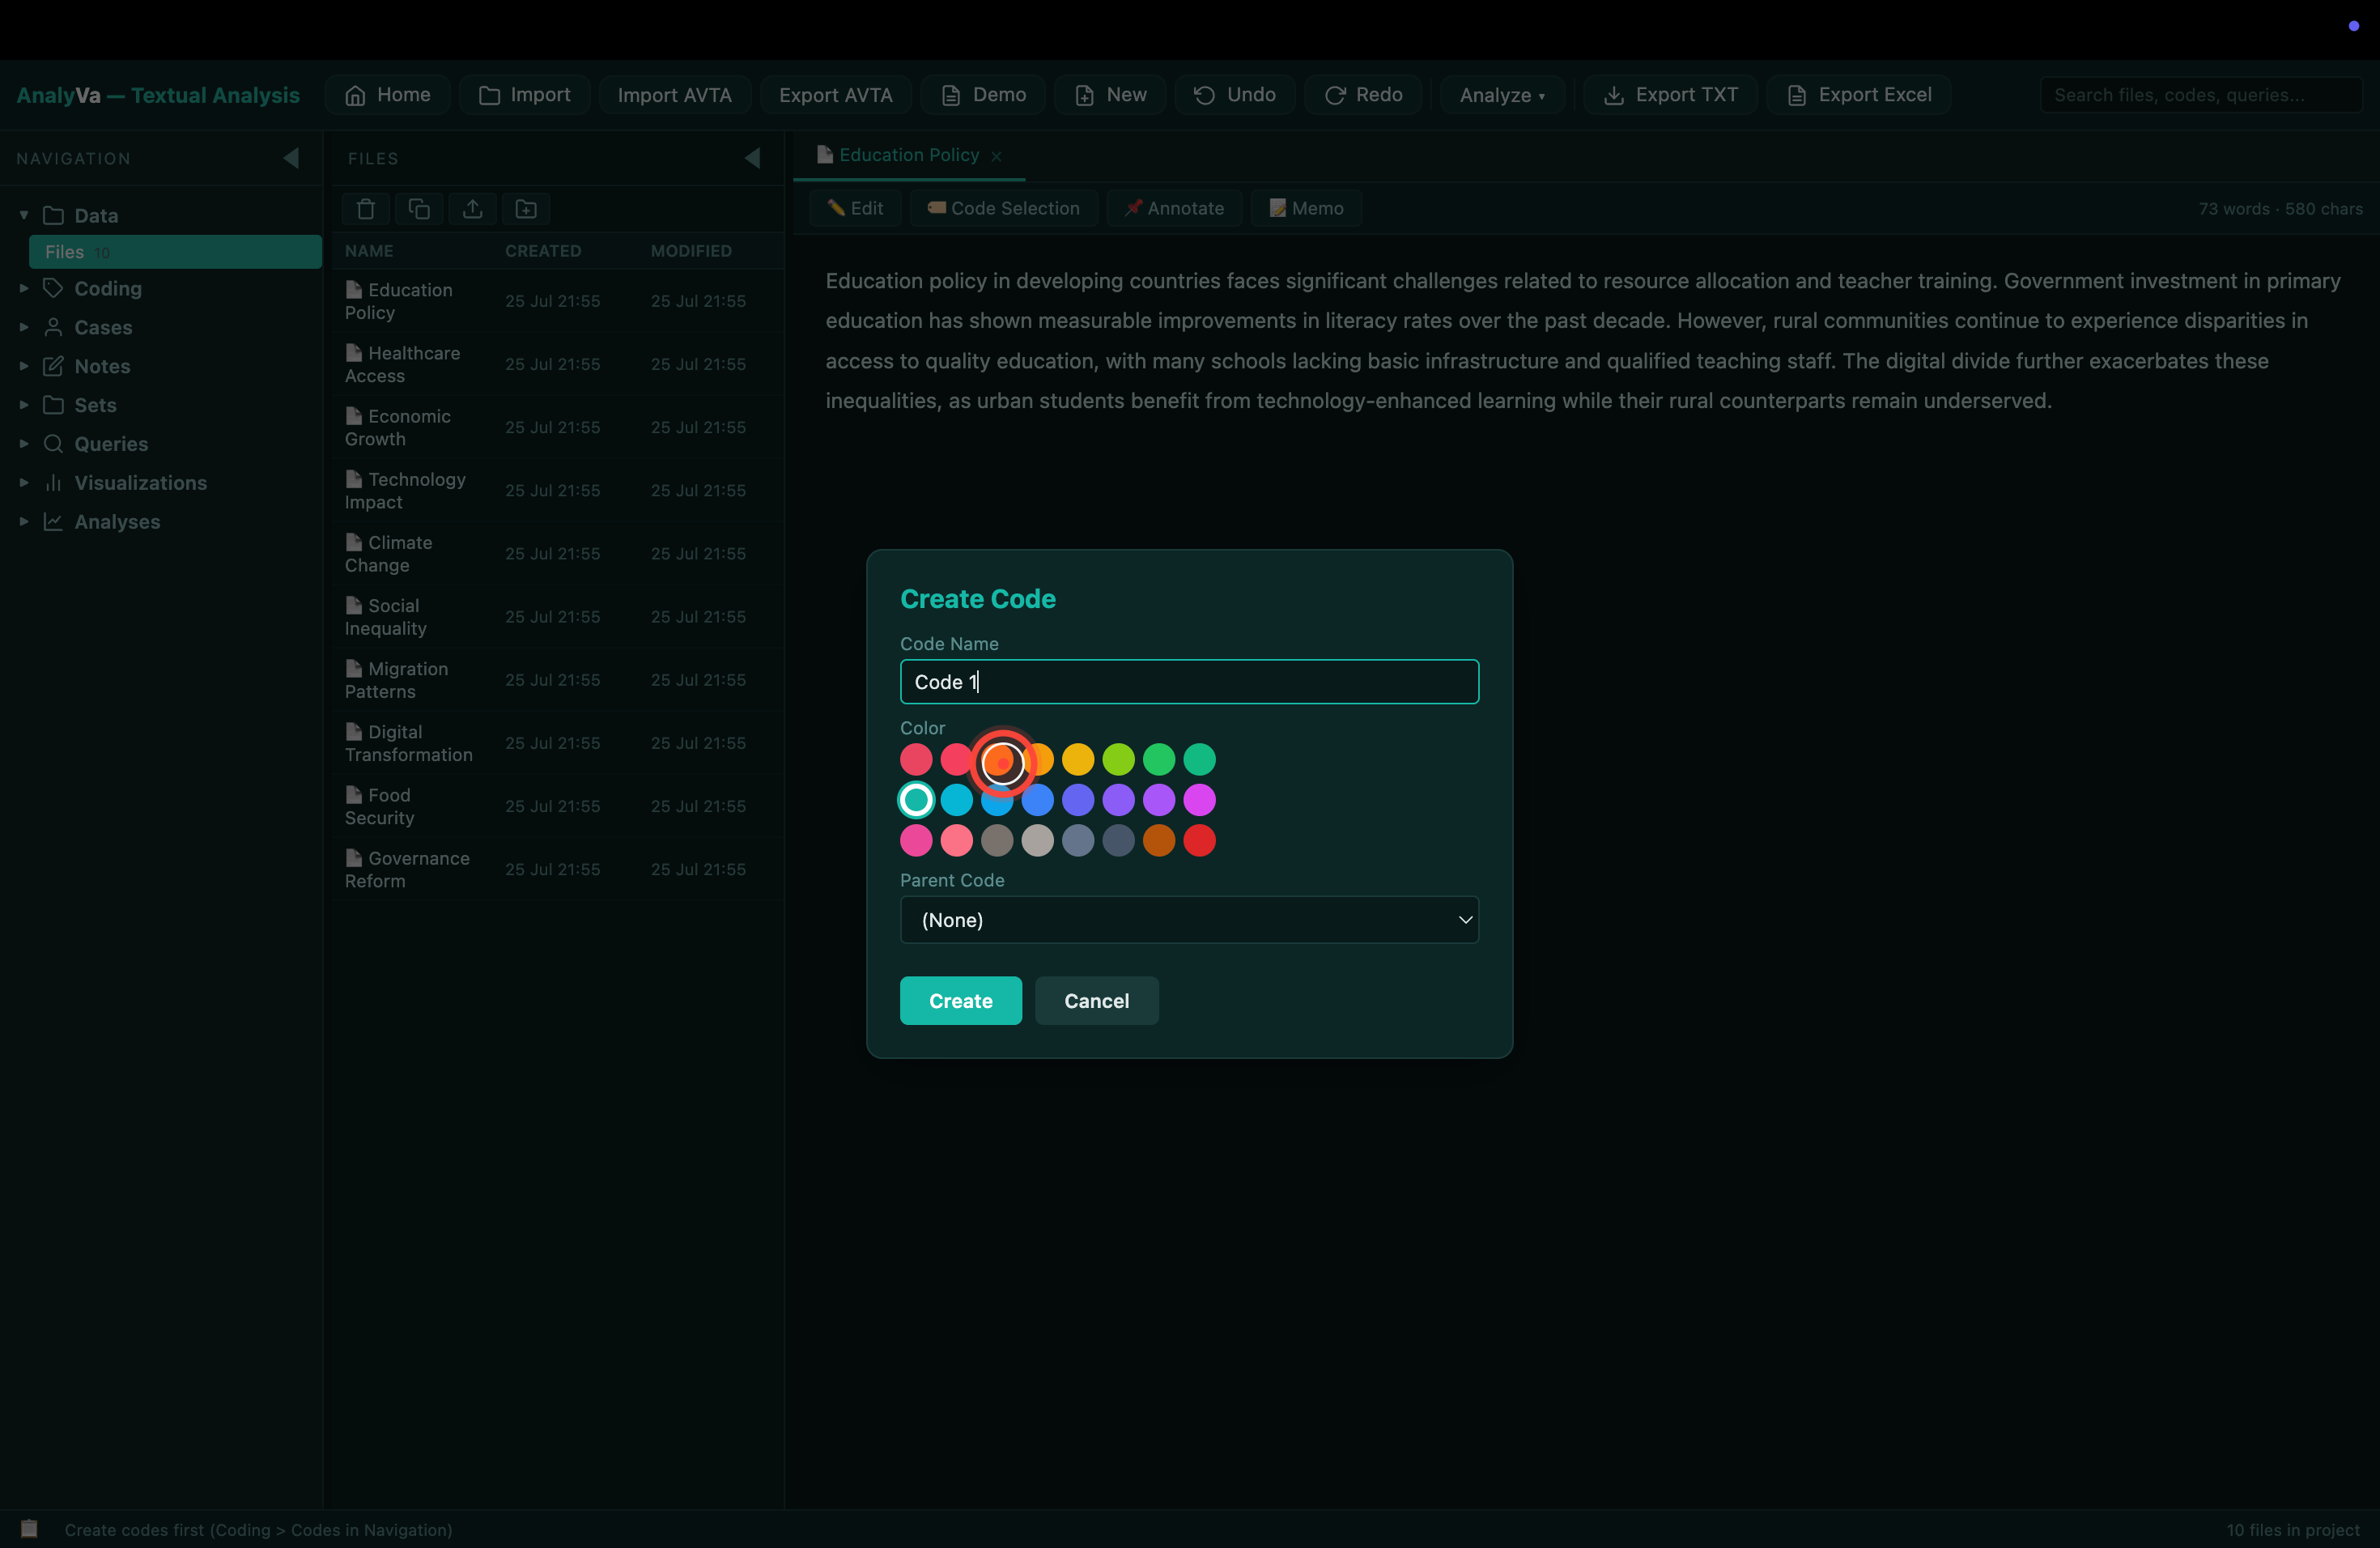
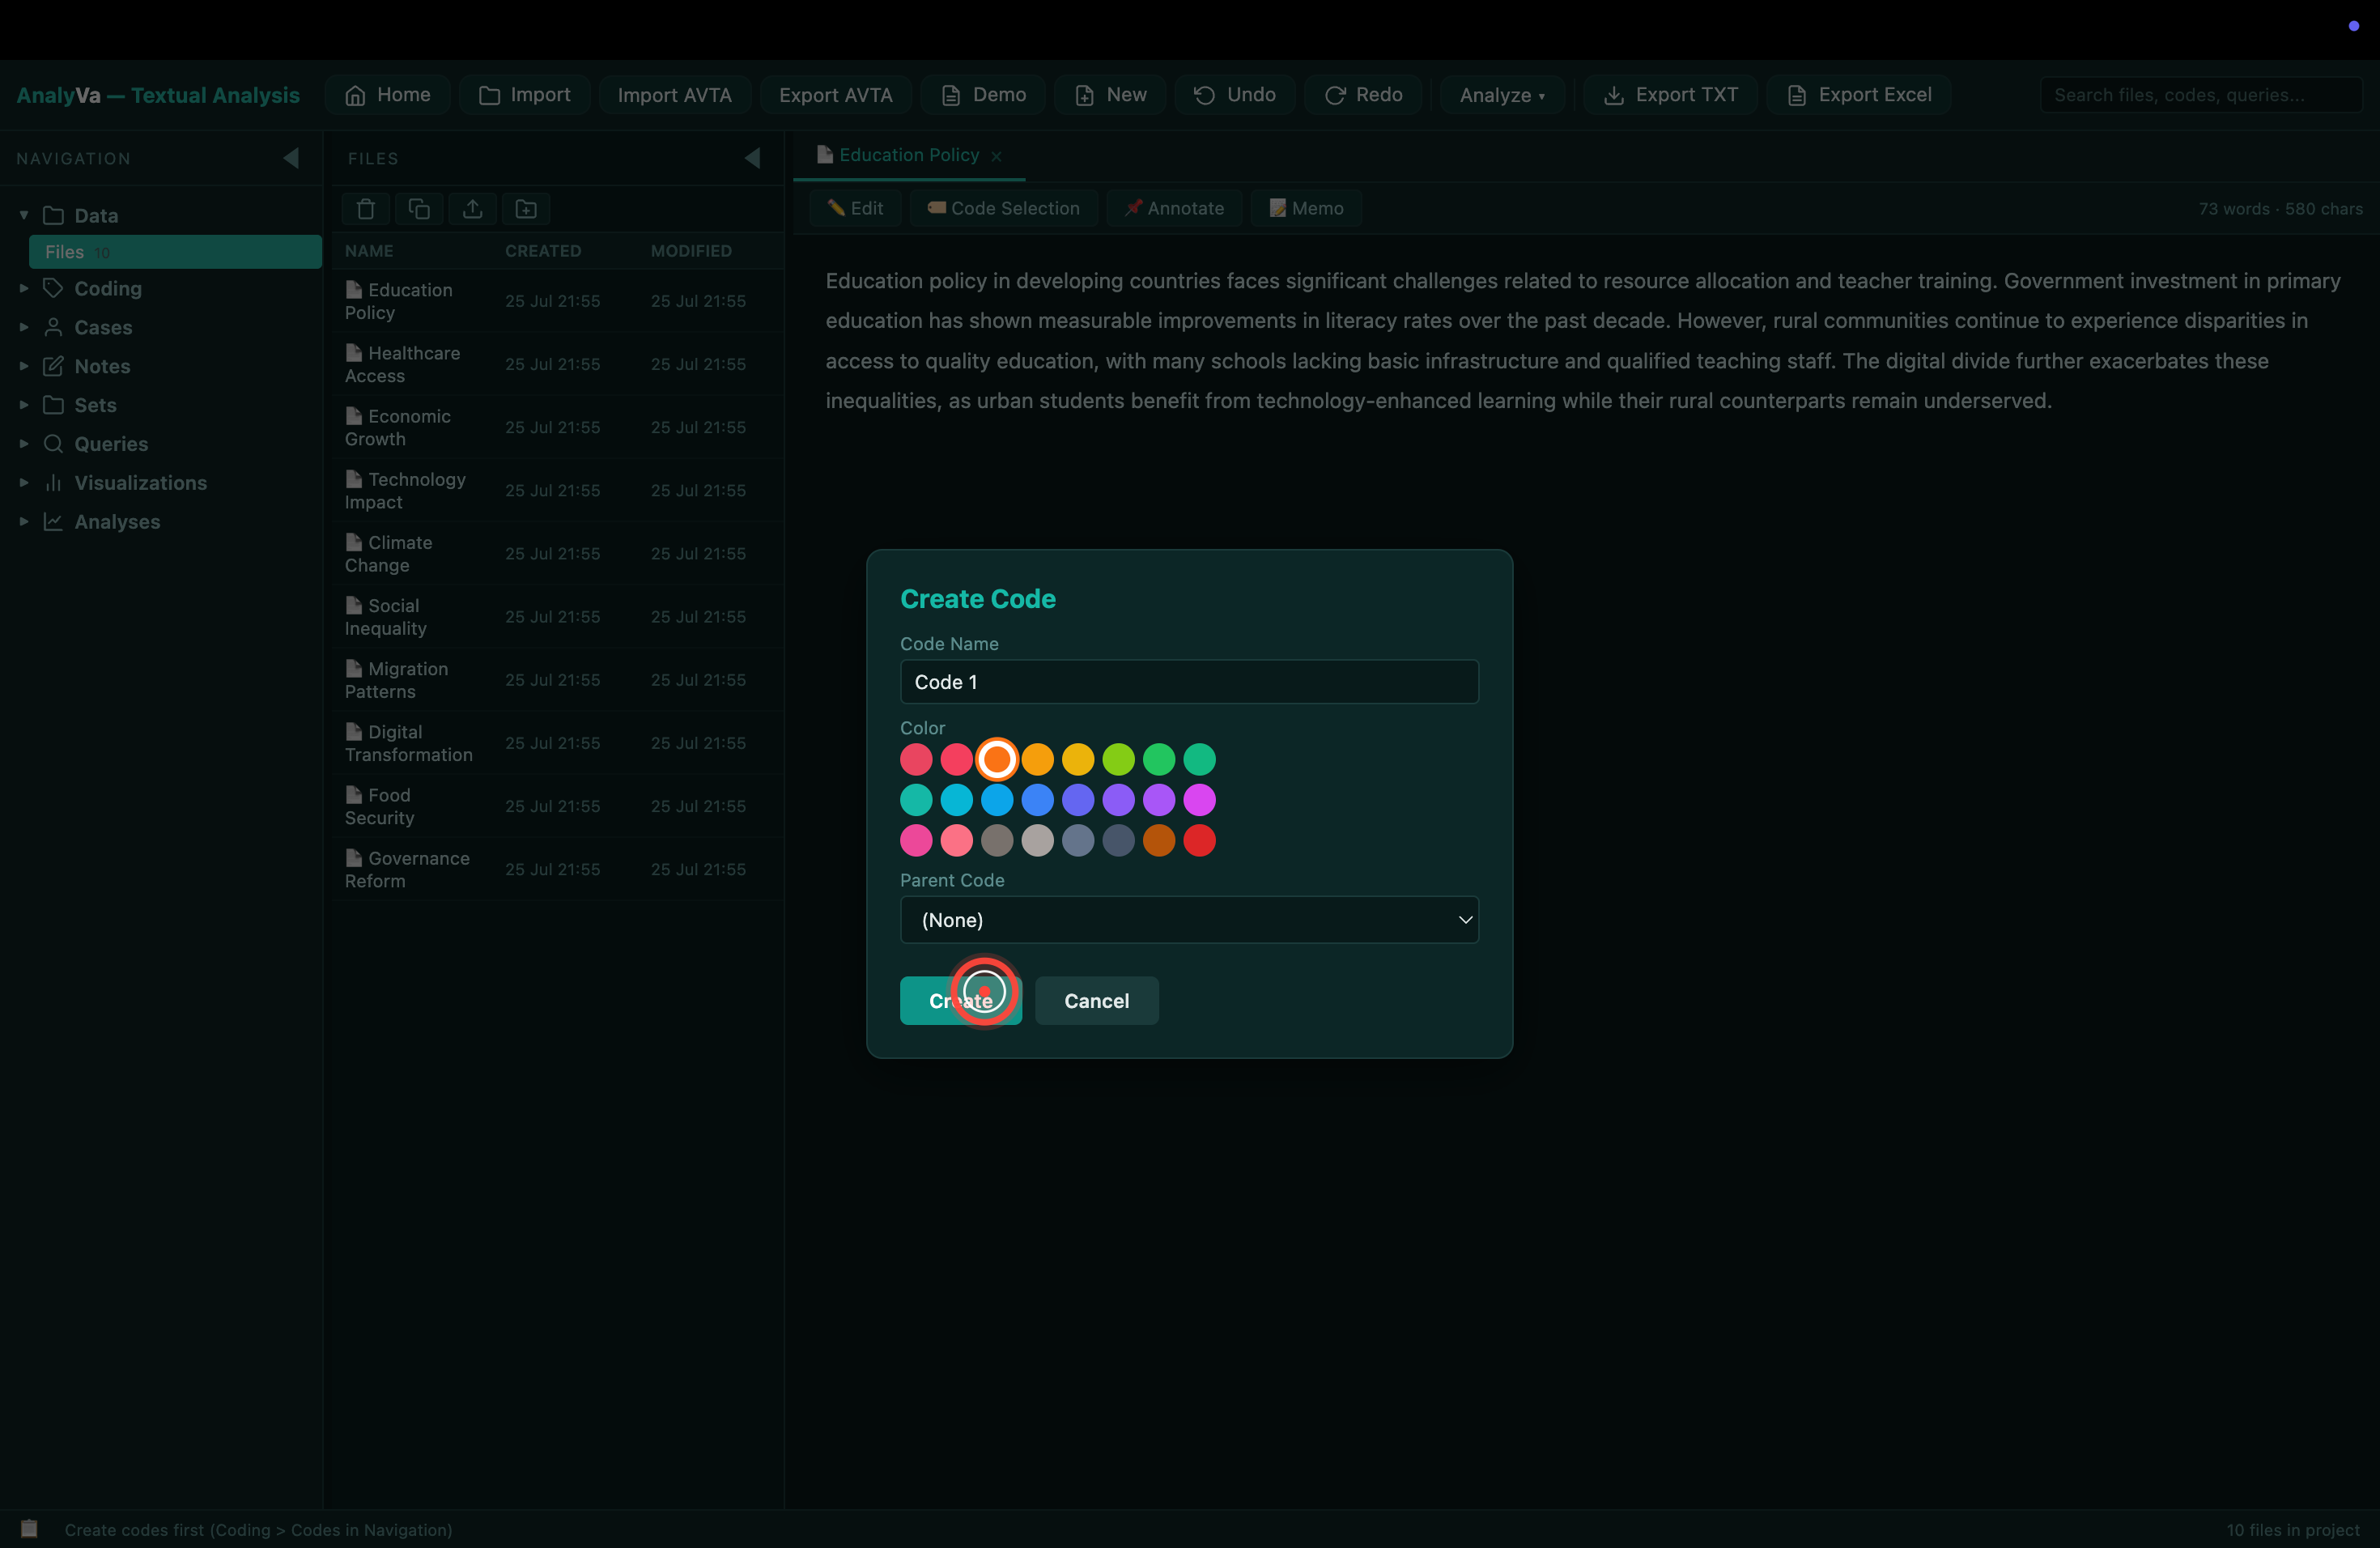
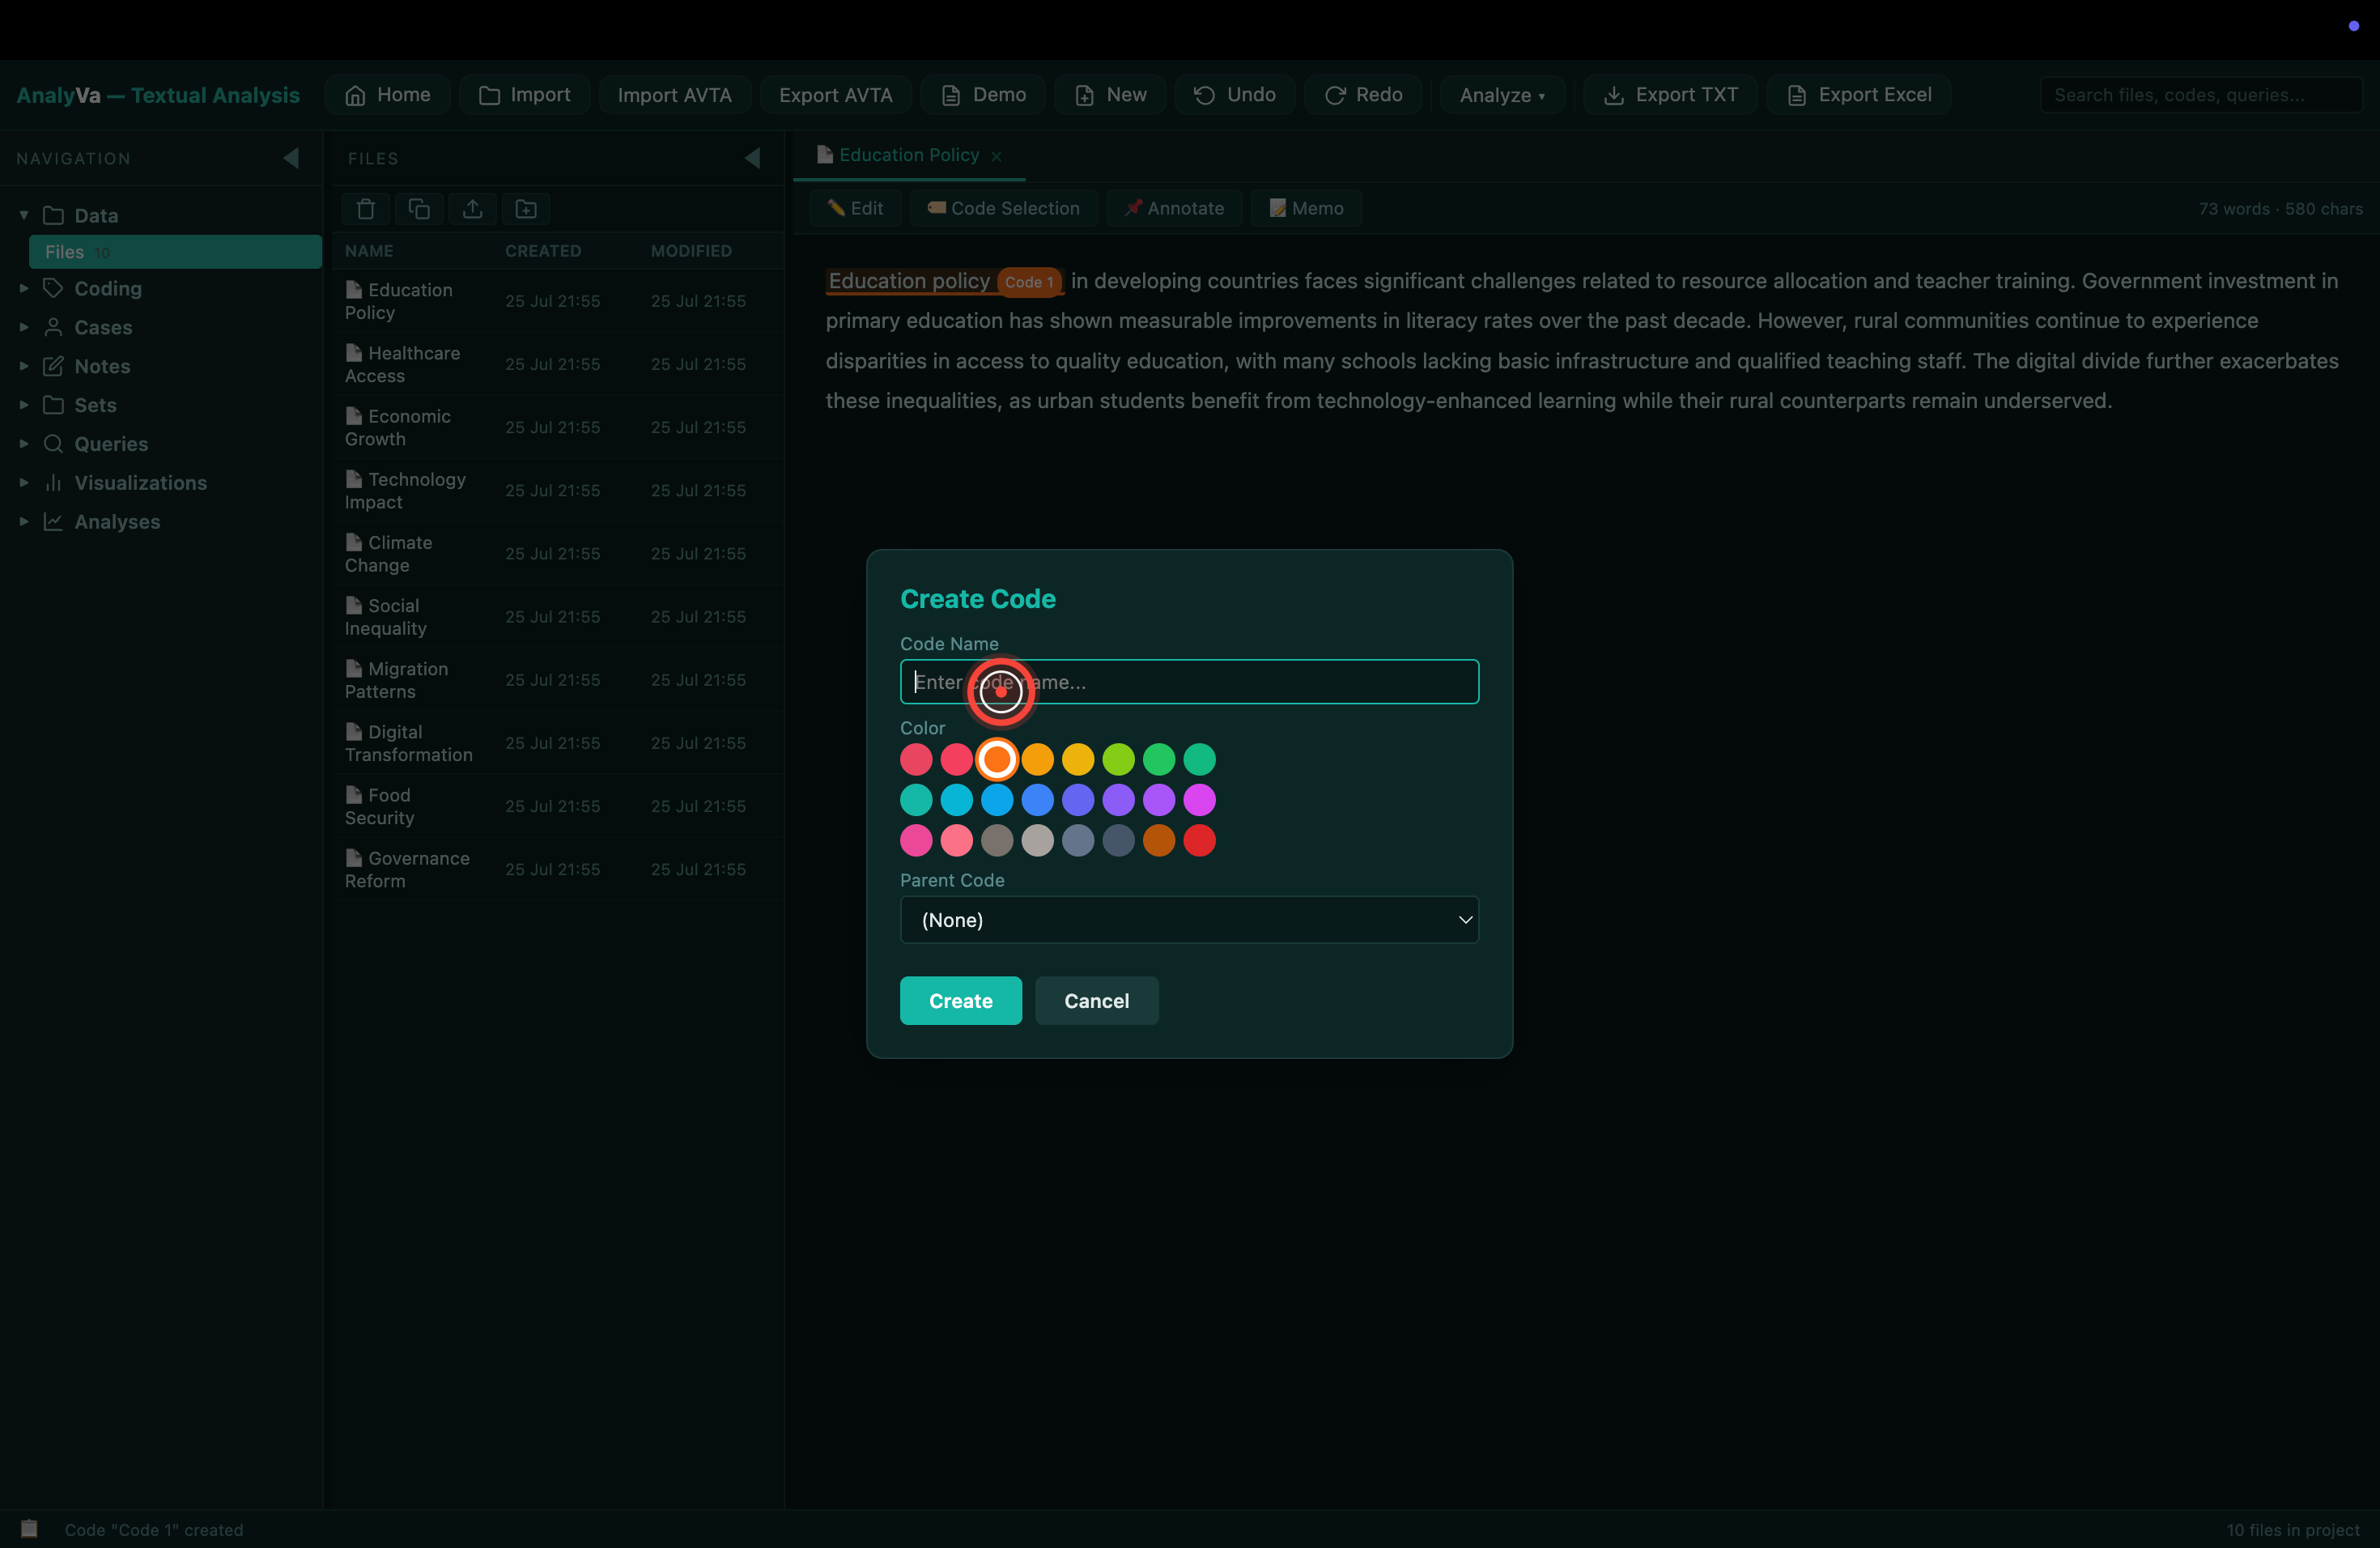
Step 10 — Click New Code to create your first code.
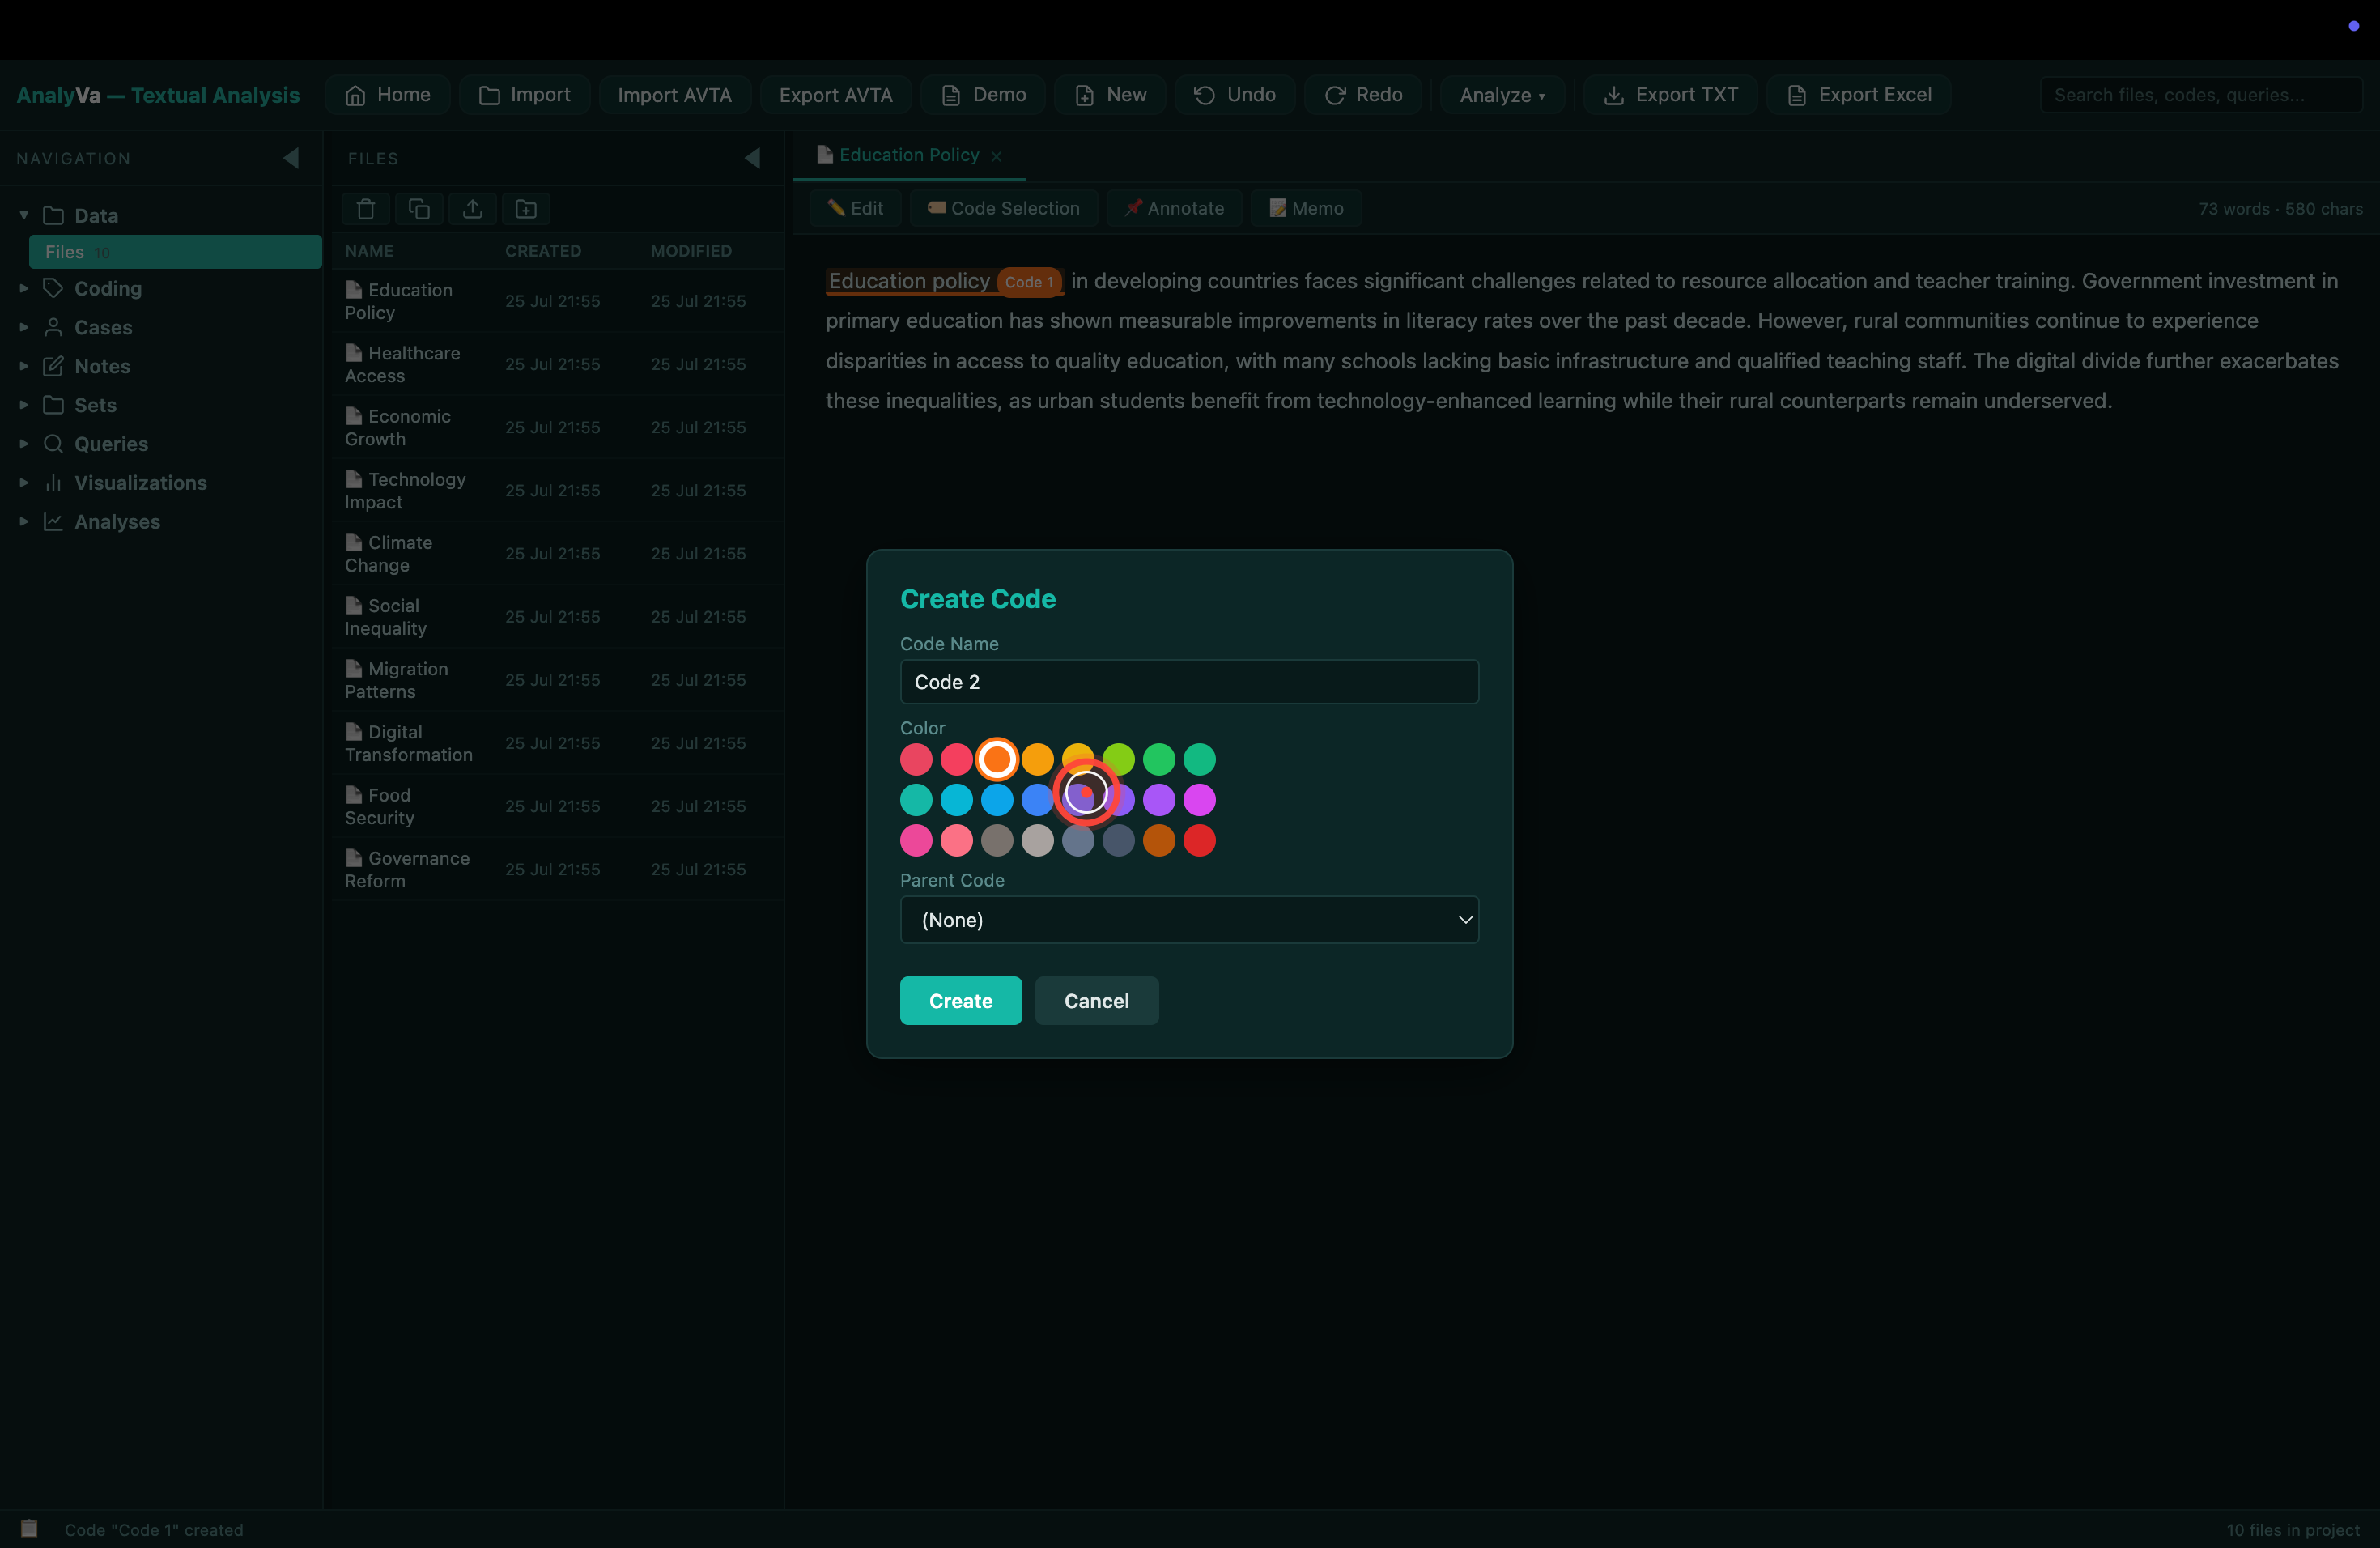
A prompt asks for the code name — keep it short and descriptive
(resource_scarcity, teacher_training, digital_divide).
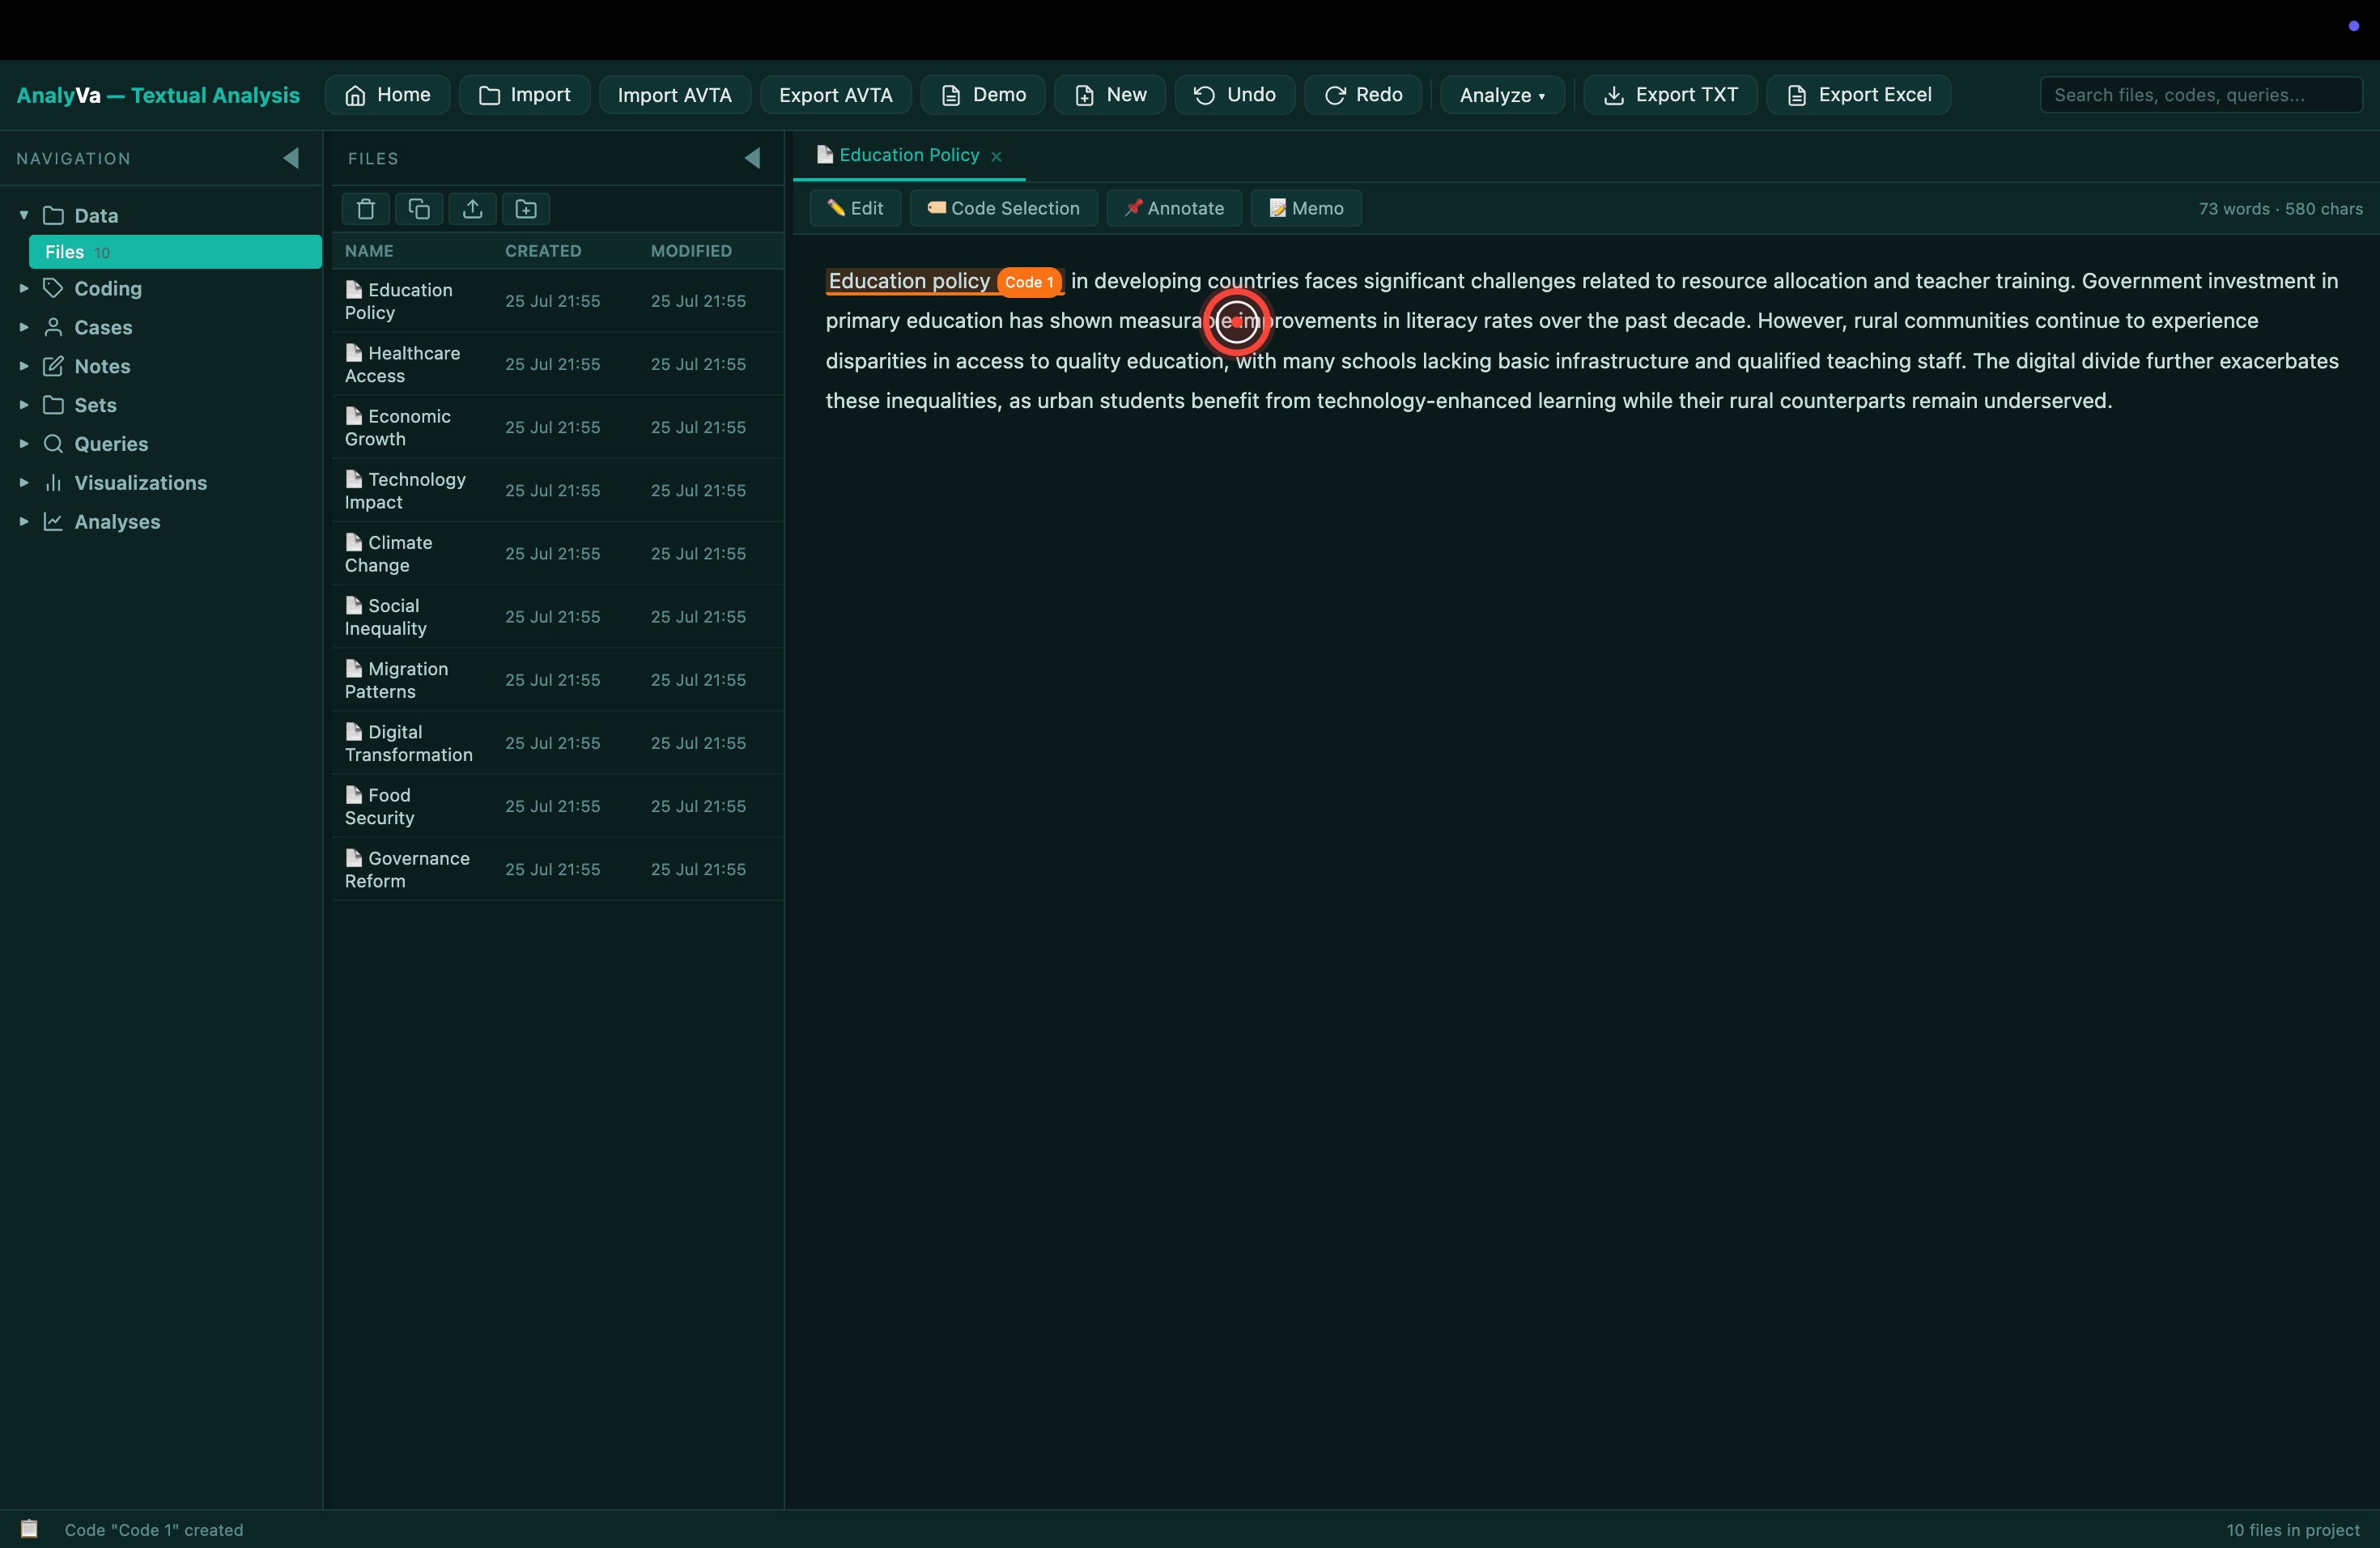
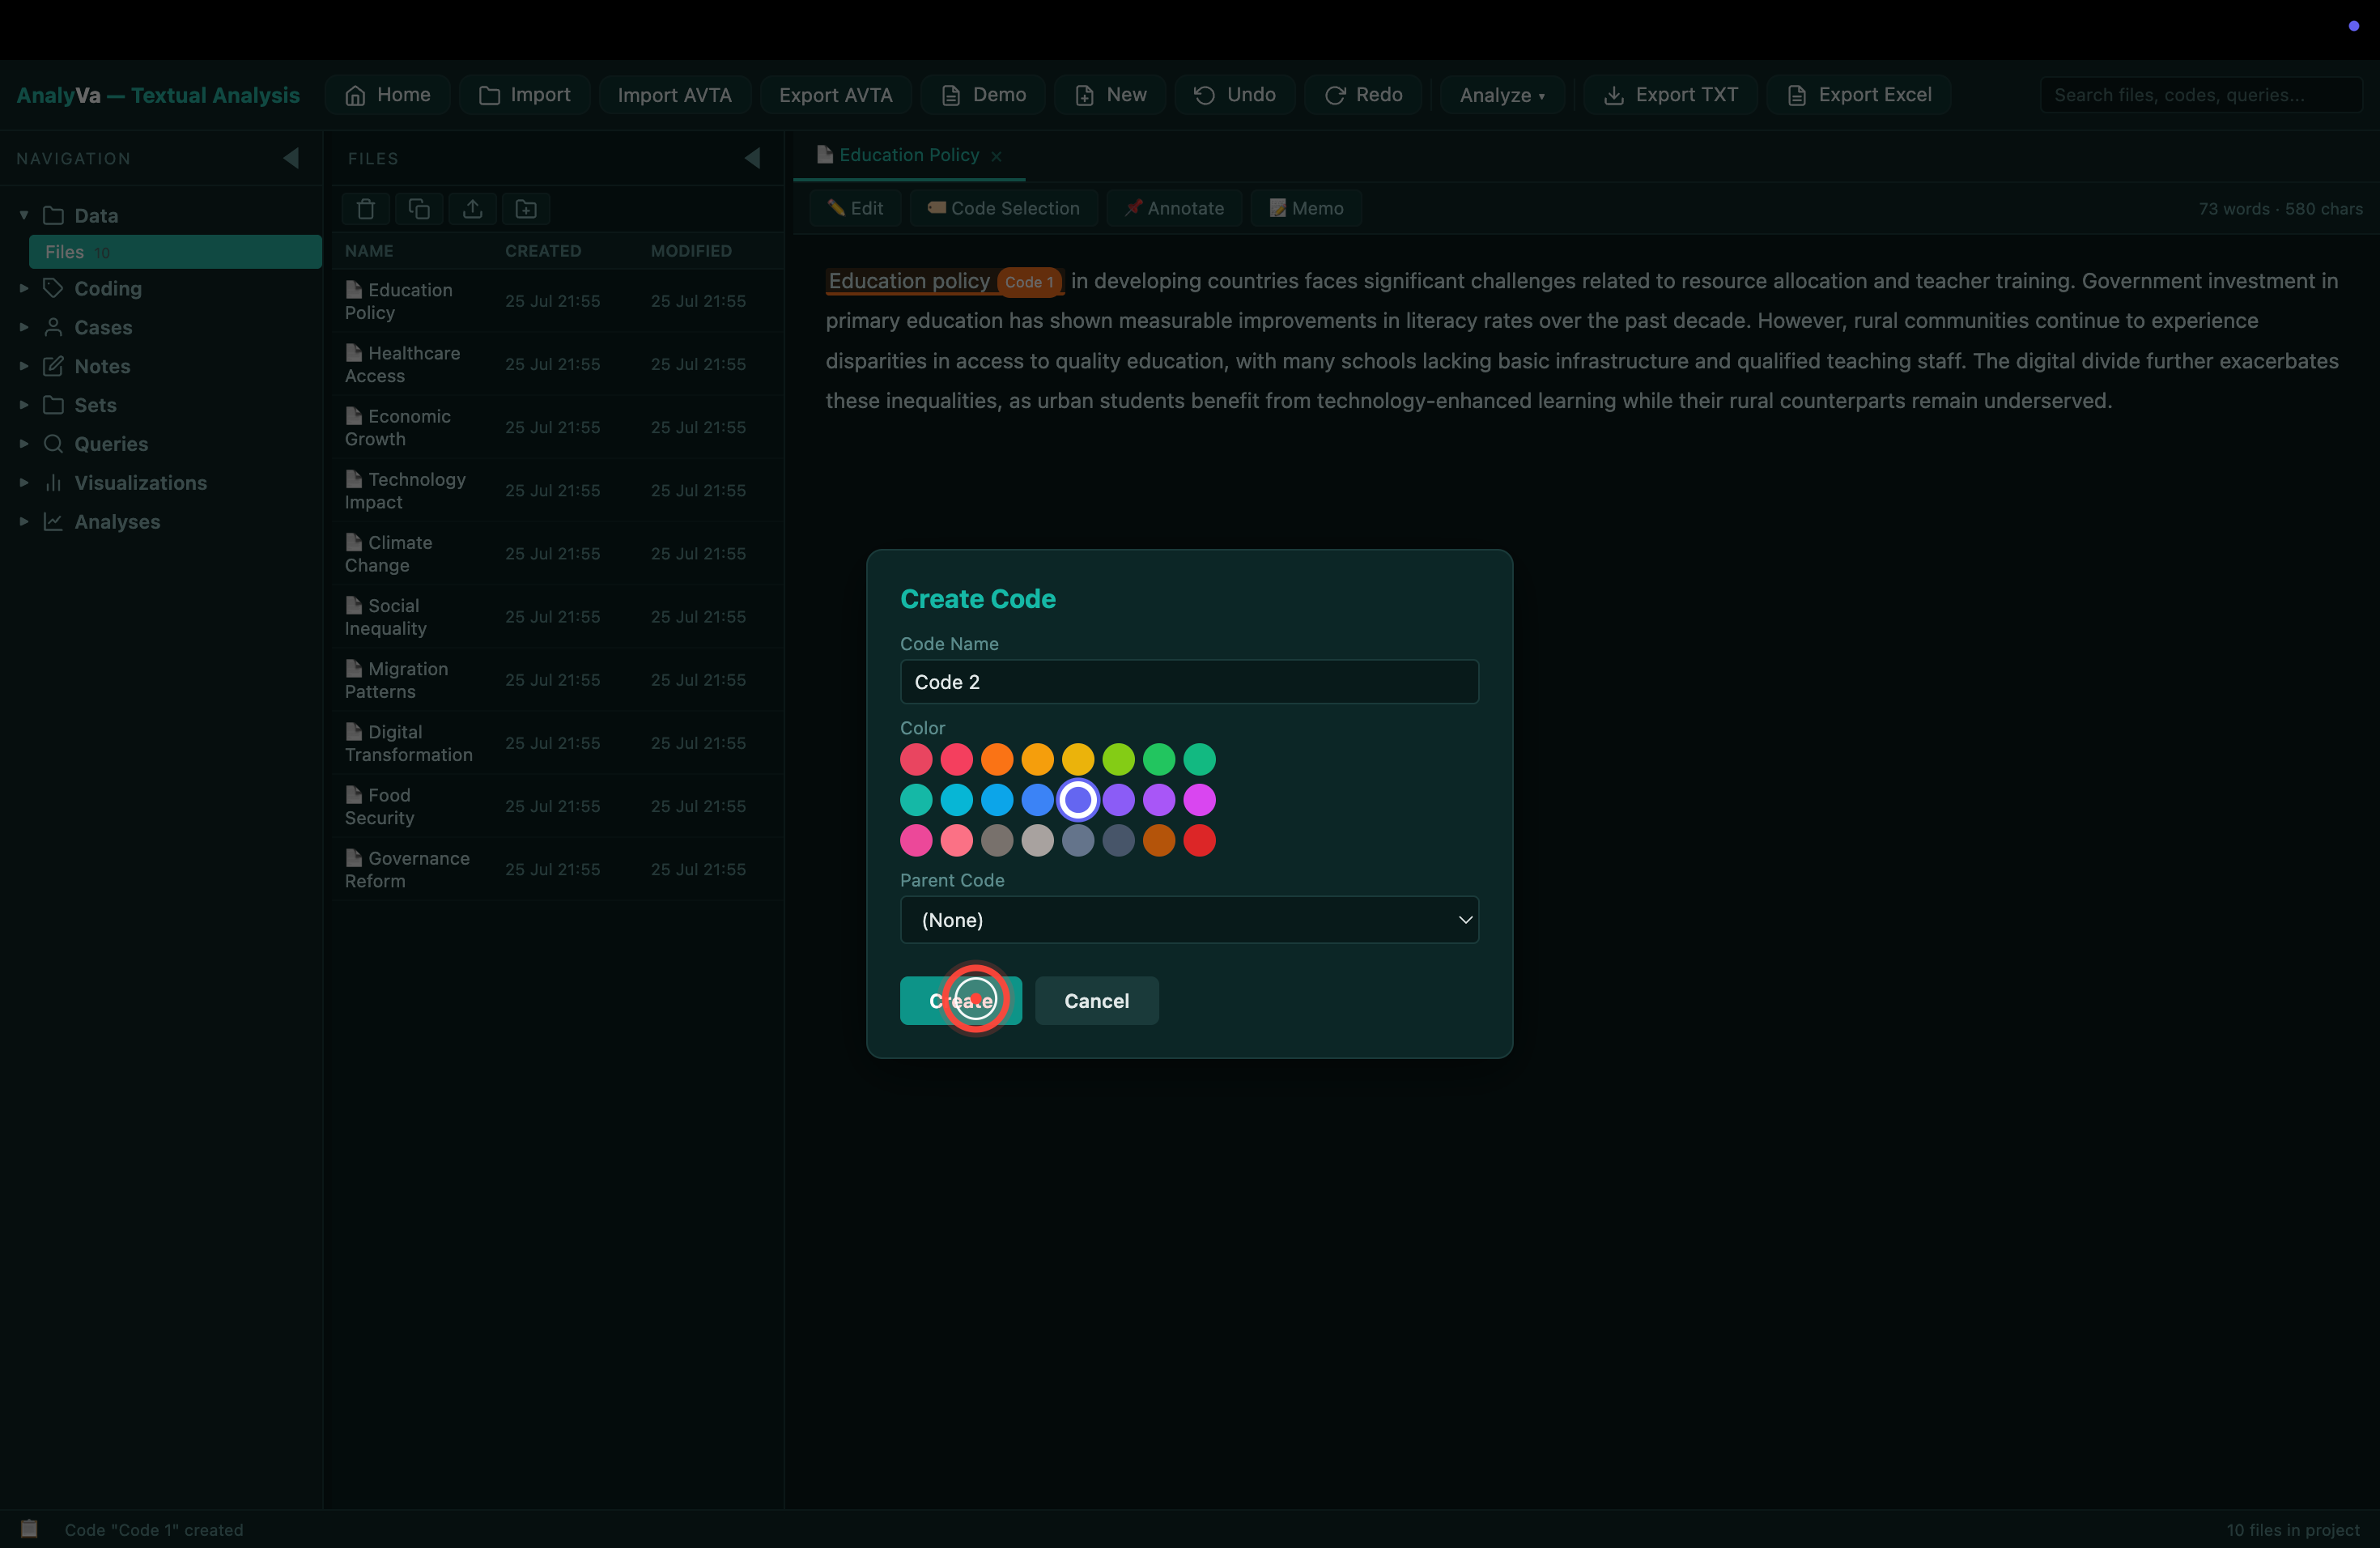
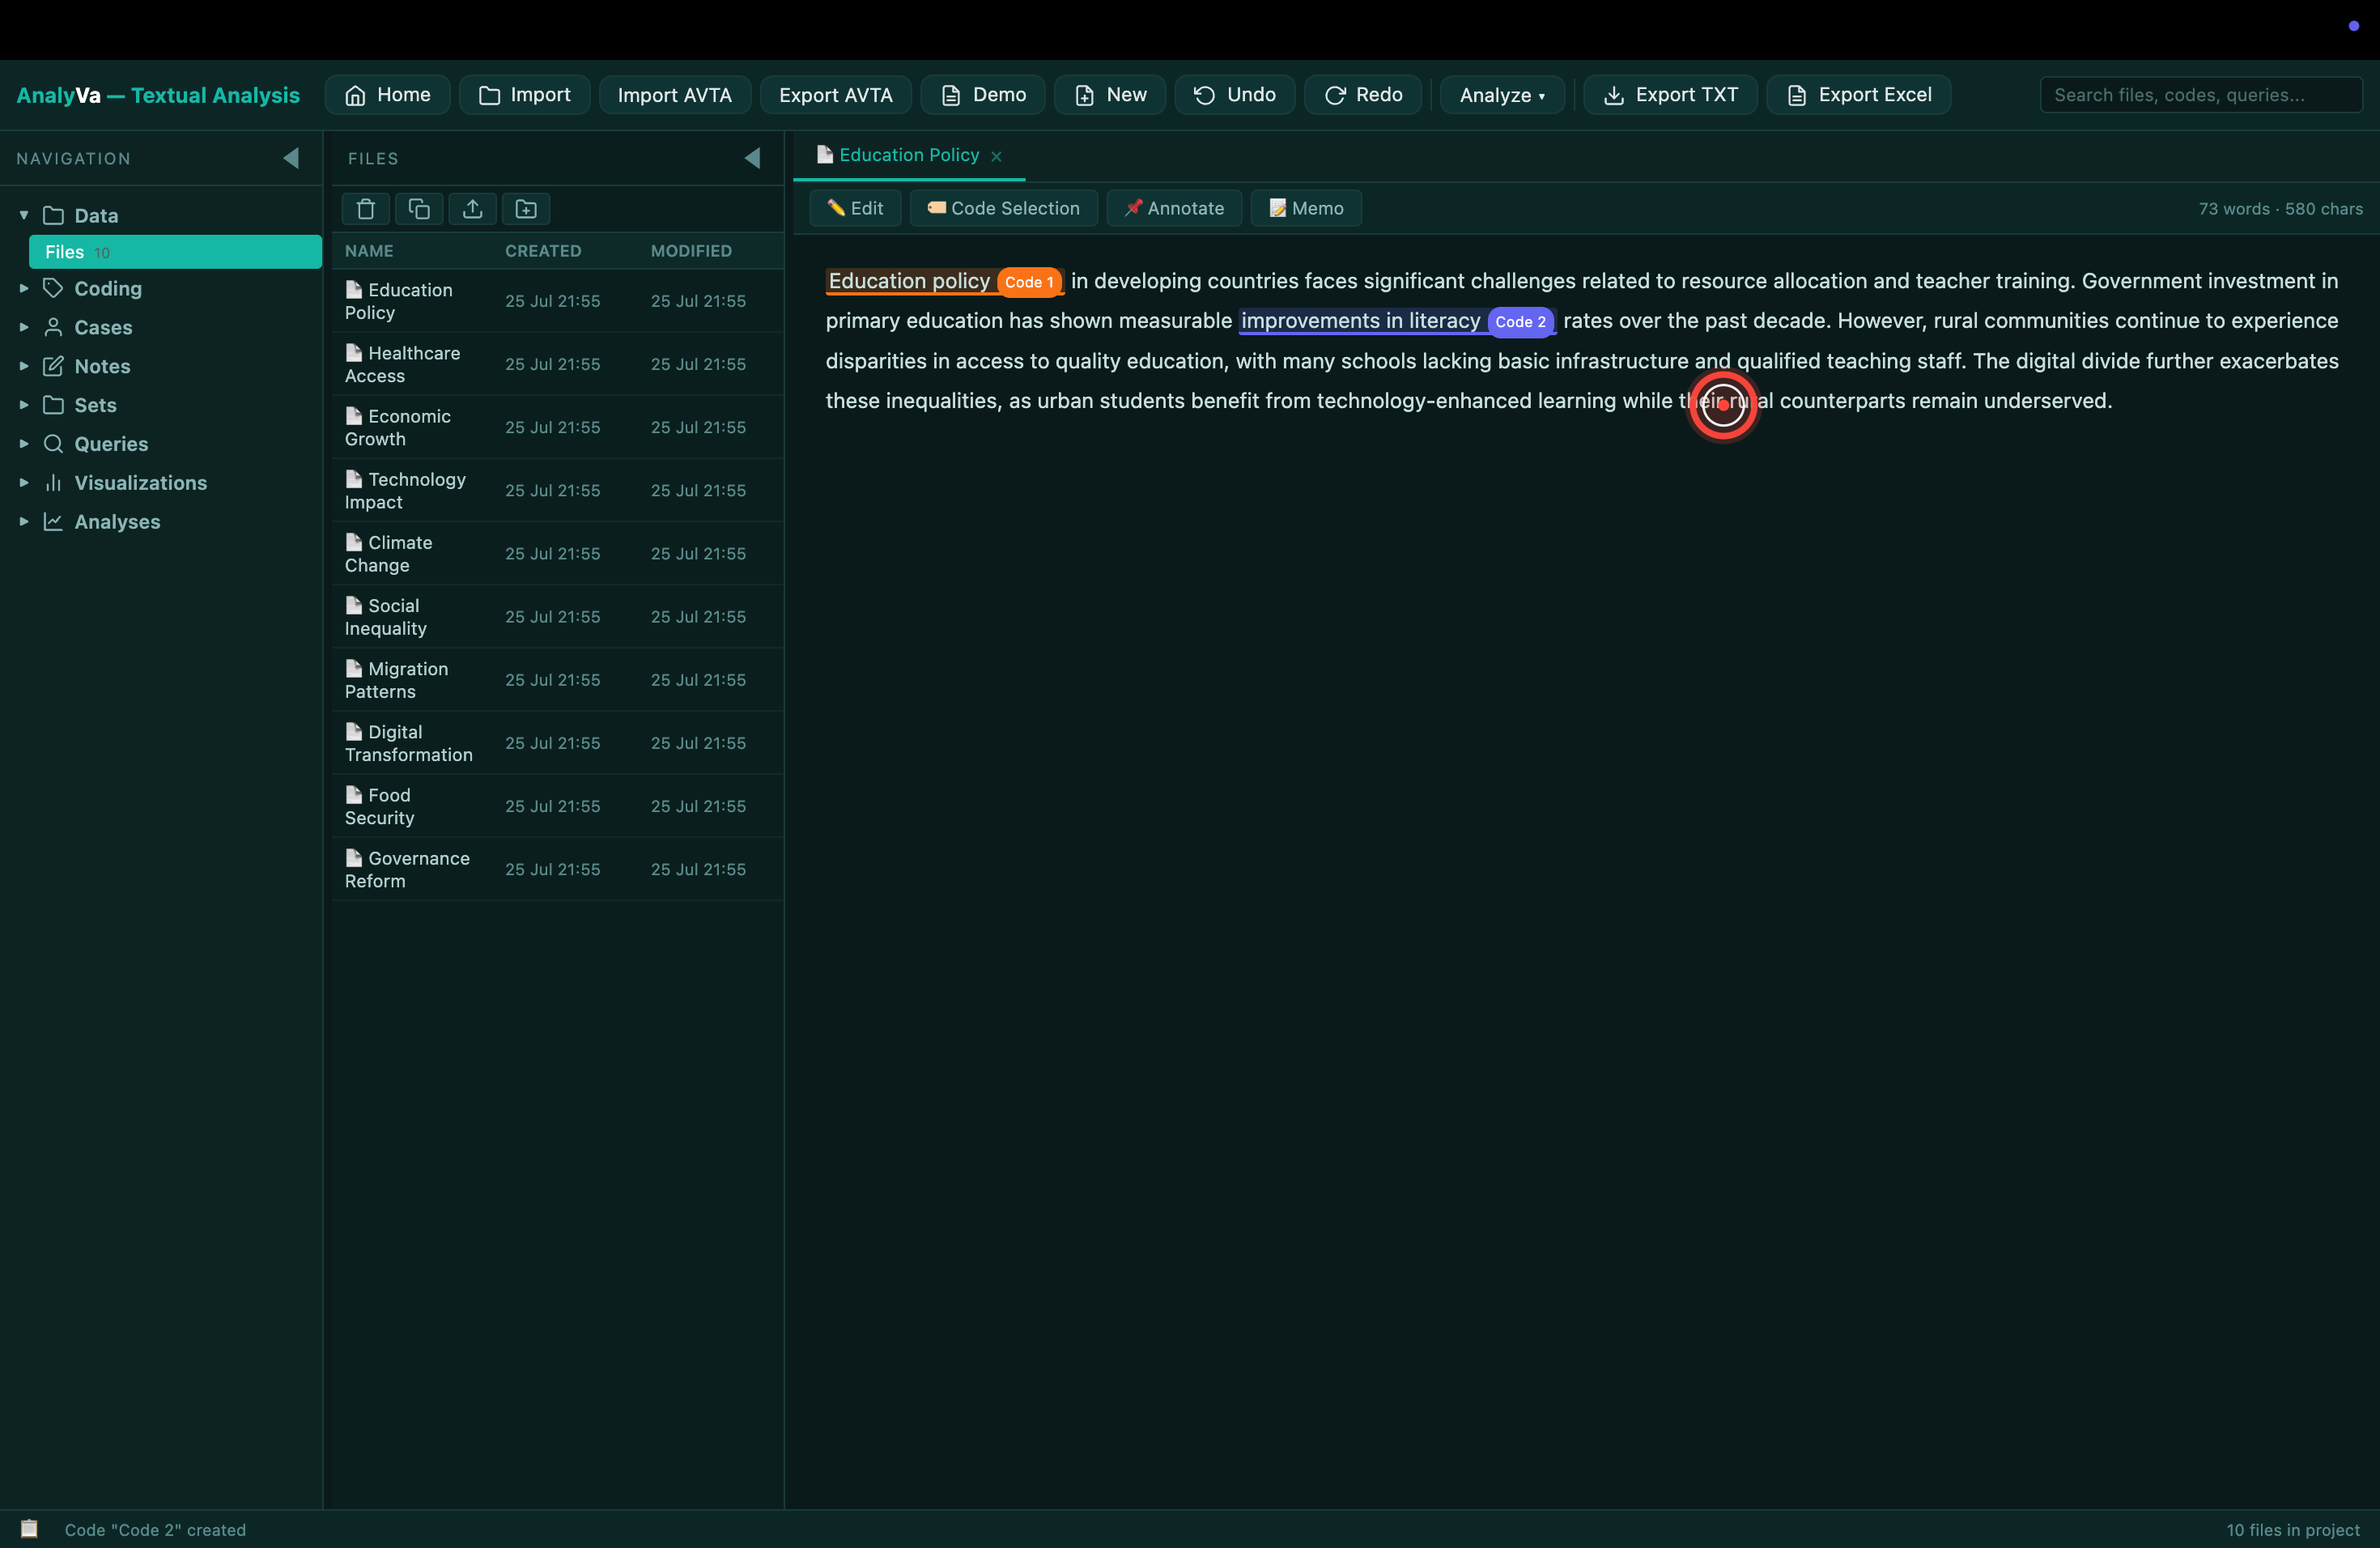
Step 11 — The code is applied. The passage is now marked with a colored highlight and a small chip naming the code. AnalyVa auto-assigns a colour so each code stays visually distinct.
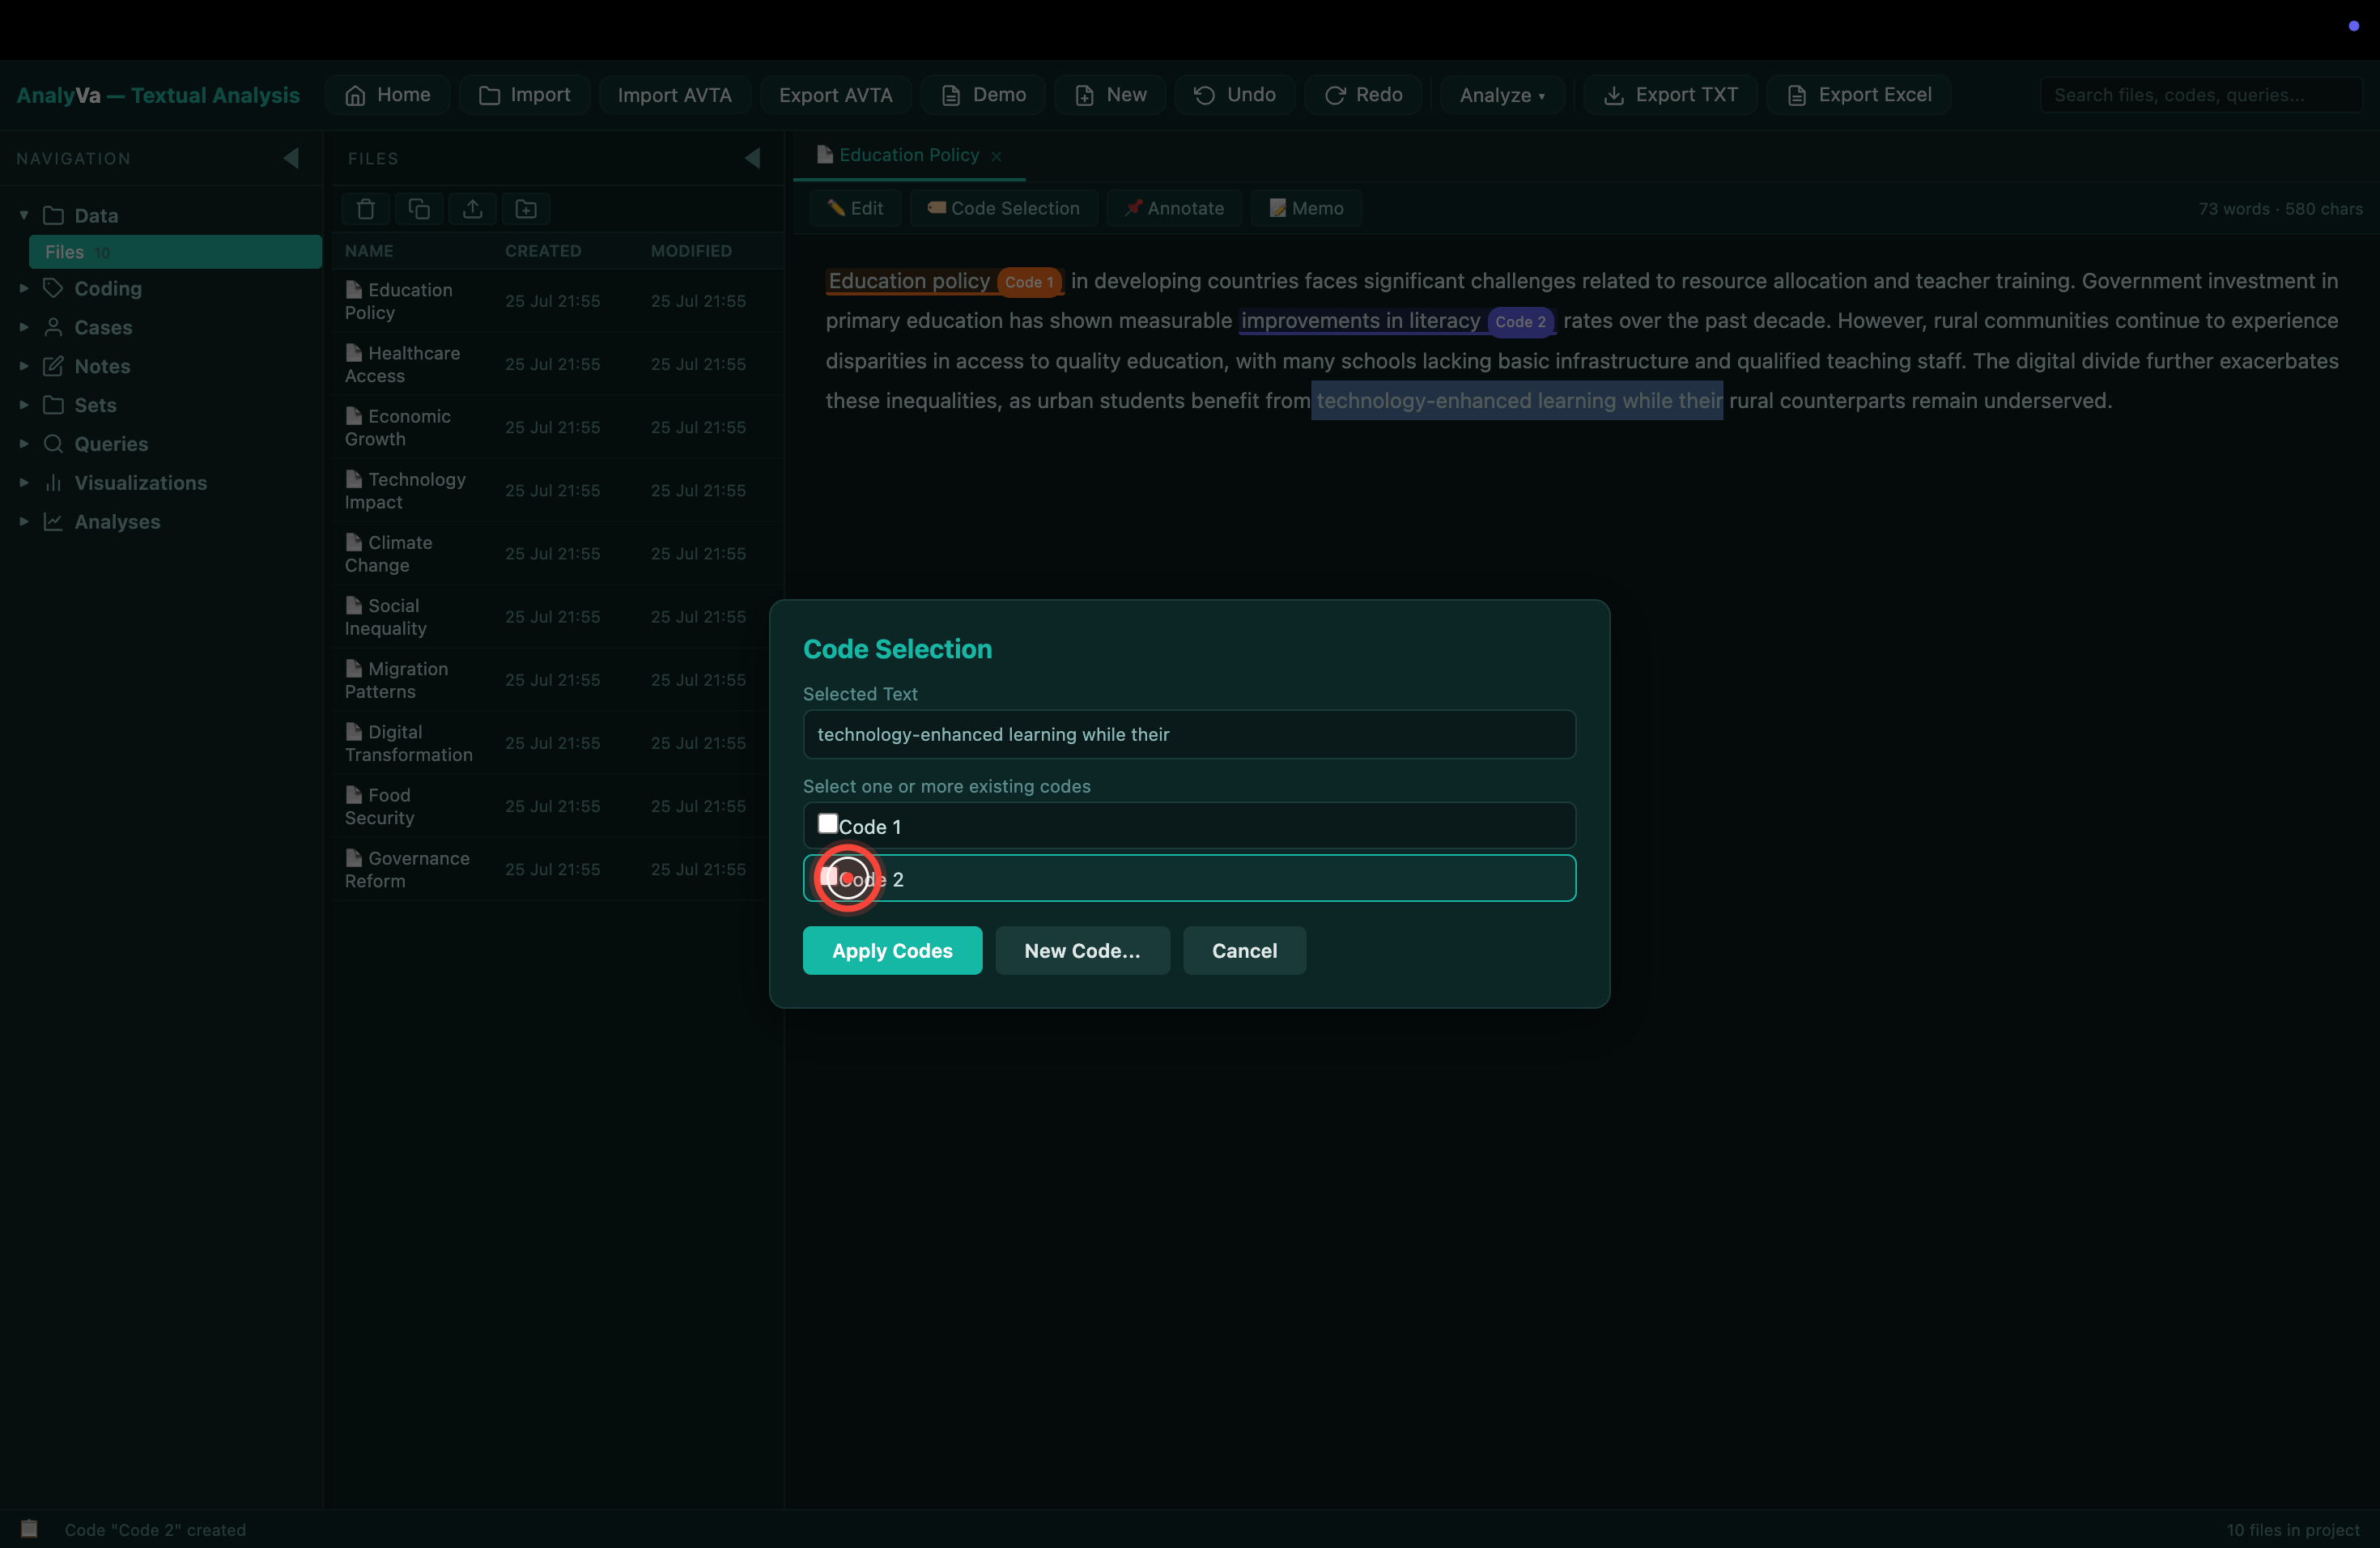
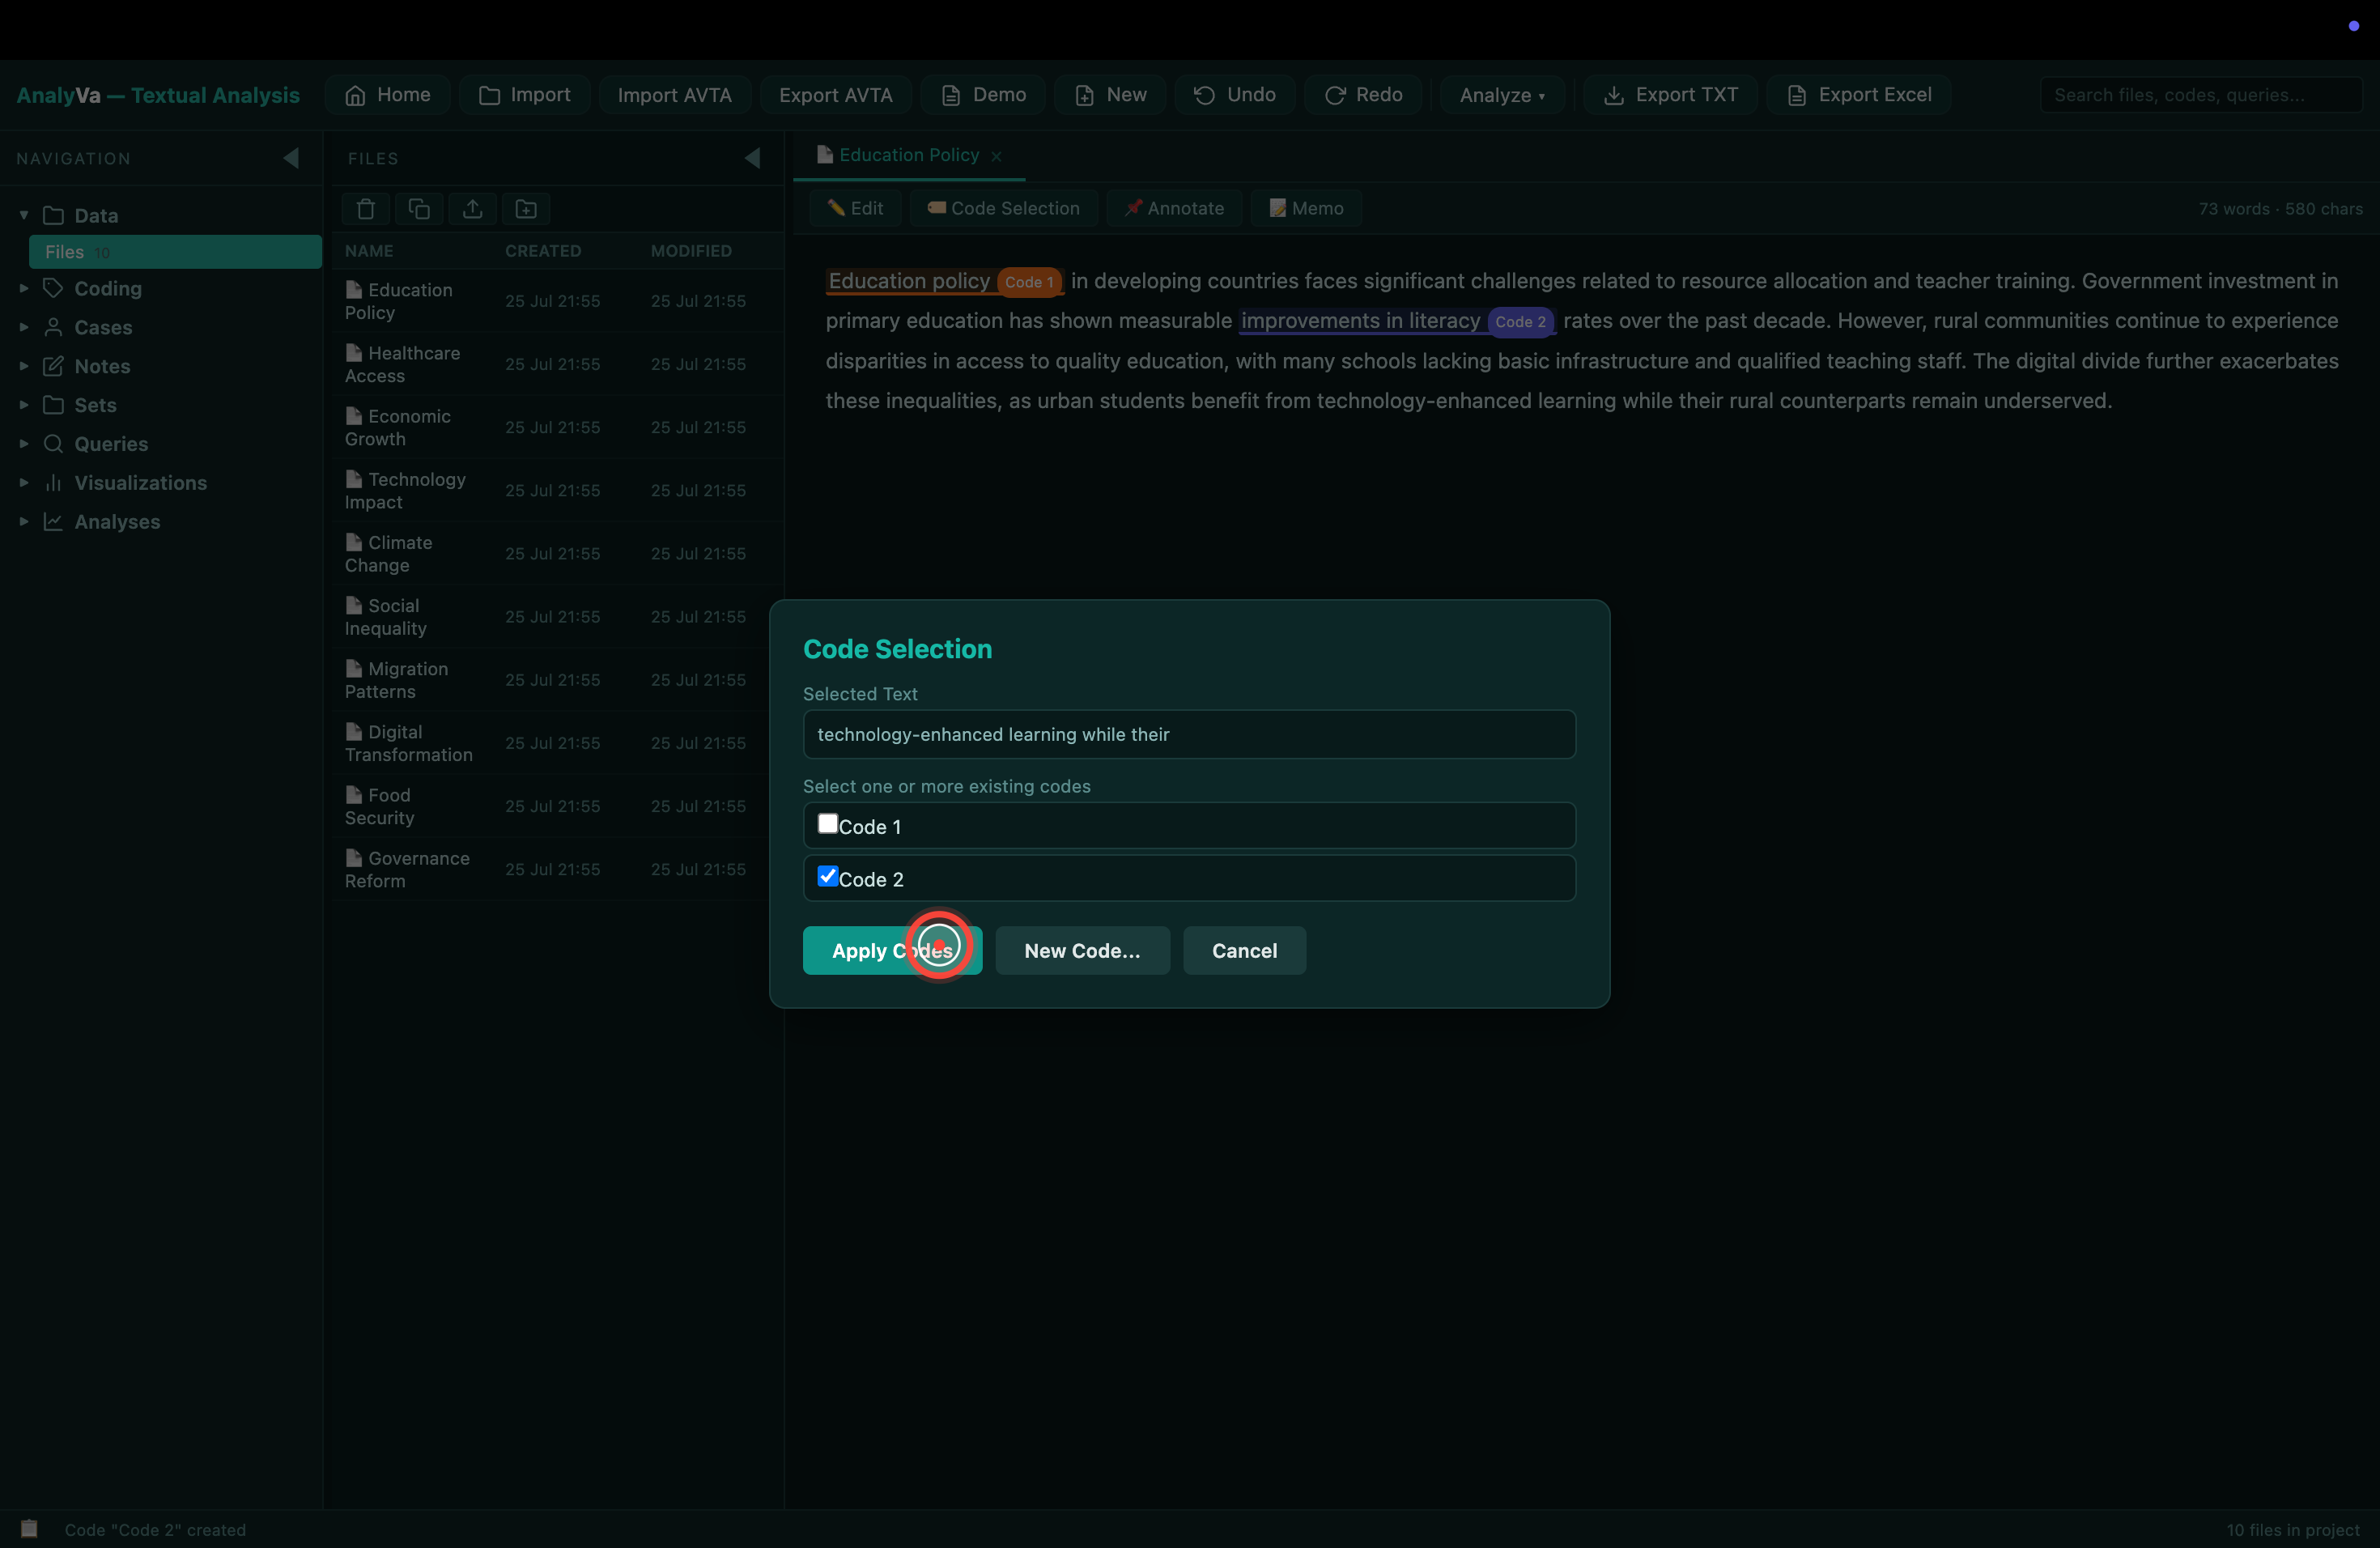
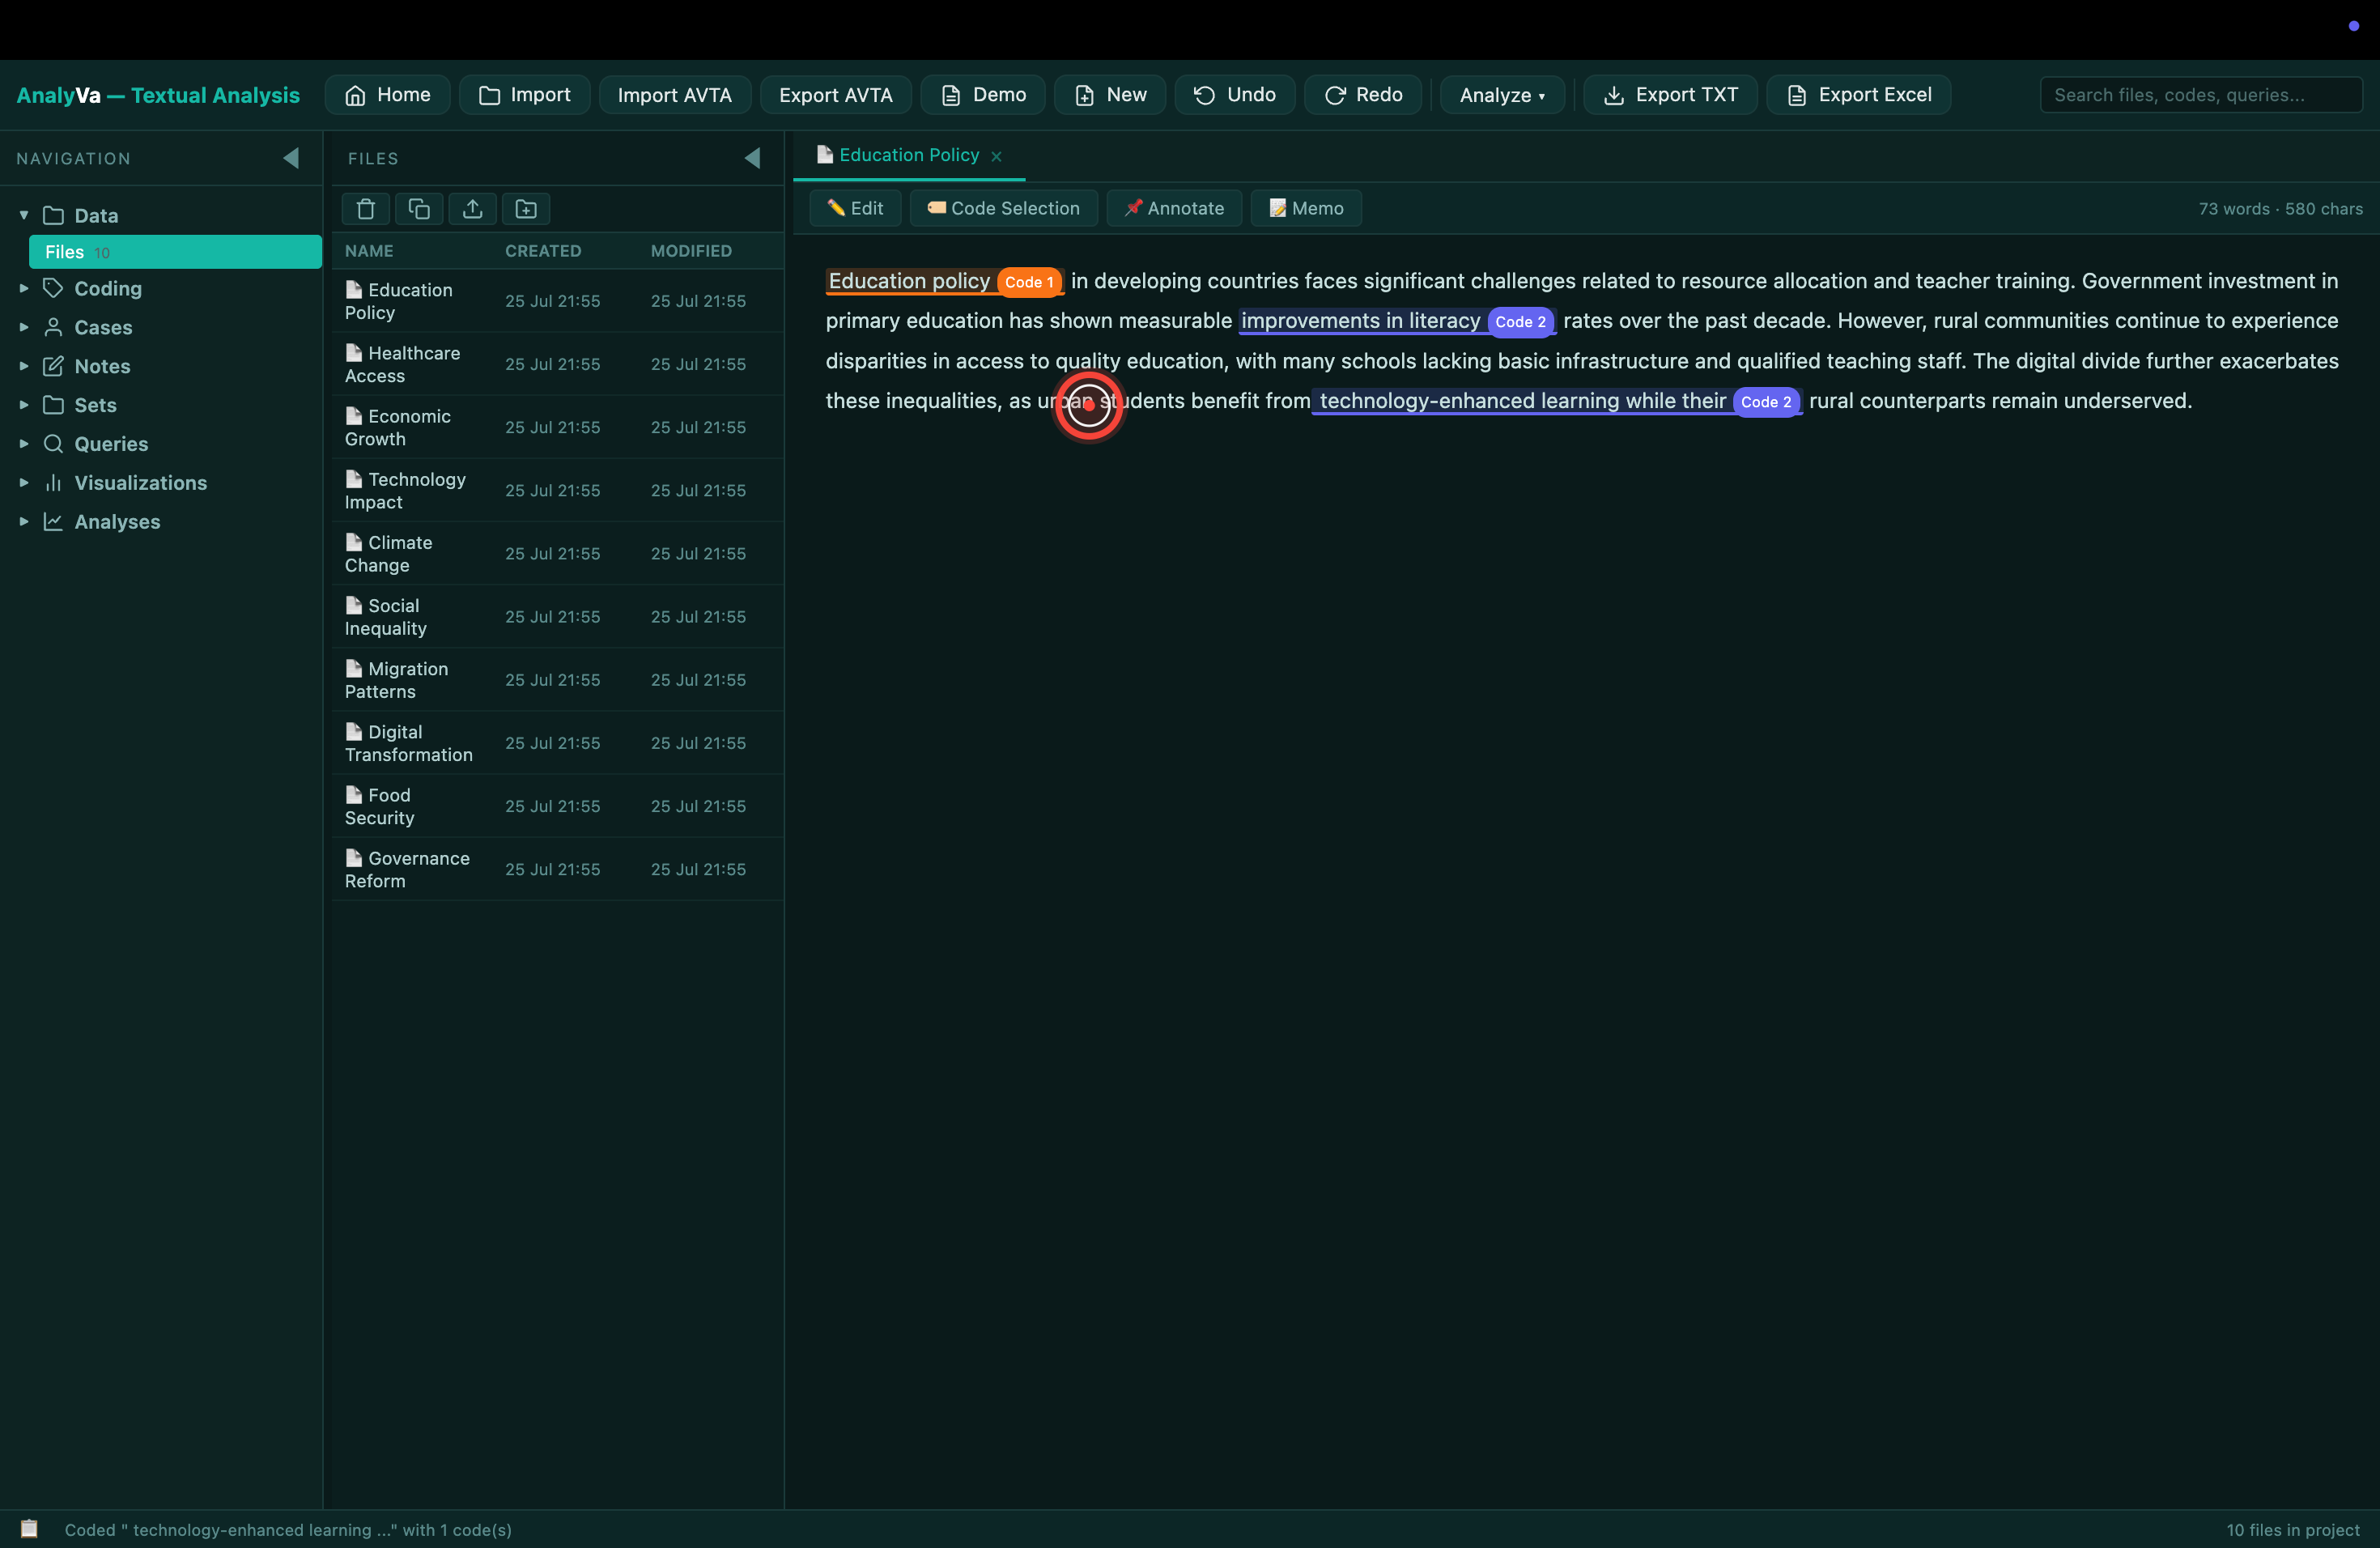
Step 12 — Apply the same code again to a new passage. Highlight another chunk of text, open Code Selection, tick the box next to your existing code, and click Apply Codes. The passage picks up the same colour as before.
Step 13 — Create additional codes as new themes emerge. Grounded-theory-style coding grows the codebook as you read. New concept? New code. Same concept as before? Reuse the existing code.
Step 14 — Work across multiple documents. Codes are project-wide — a code you created on the Education Policy document is available on every other document in the corpus. This is where the value of a systematic codebook pays off: consistent codes across documents let you query them together later.
Step 15 — Overlap and nesting are allowed.
A single passage can carry multiple codes. This is often the point of
qualitative coding — a paragraph about “teachers in rural schools”
might be tagged both teacher_training and rural_inequality.
Reviewing what you have coded
Step 16 — Open Coding in the left Navigation sidebar. The Coding section lists every code in the project, how many segments it appears in, and across how many documents.
Step 17 — Click a code to see every segment tagged with it. The right pane switches to a Coded Segments view — one row per segment, showing the document, the surrounding context, and links back to the original position. This is the review step where you notice inconsistencies (segments that were mis-coded, codes that should be merged, etc.).
Step 18 — Rename, merge, or delete codes. Right-click a code in the Coding sidebar to rename it (updates every segment automatically), merge two codes into one, or delete a code (with a warning about the segments it will affect).
Step 19 — Add memos to codes and to segments. Codes and individual segments both accept memos — free-text reflection about what you were thinking when you tagged something. Reviewers love these; future-you loves them even more.
Step 20 — Add cases if your corpus has speakers or interviewees. The Cases section links documents to sources (interview respondents, workshop groups, focus groups). This is what lets you later ask “did female respondents talk about X more than male respondents?” — a demographic query on the qualitative data.
Running analyses on the coded corpus
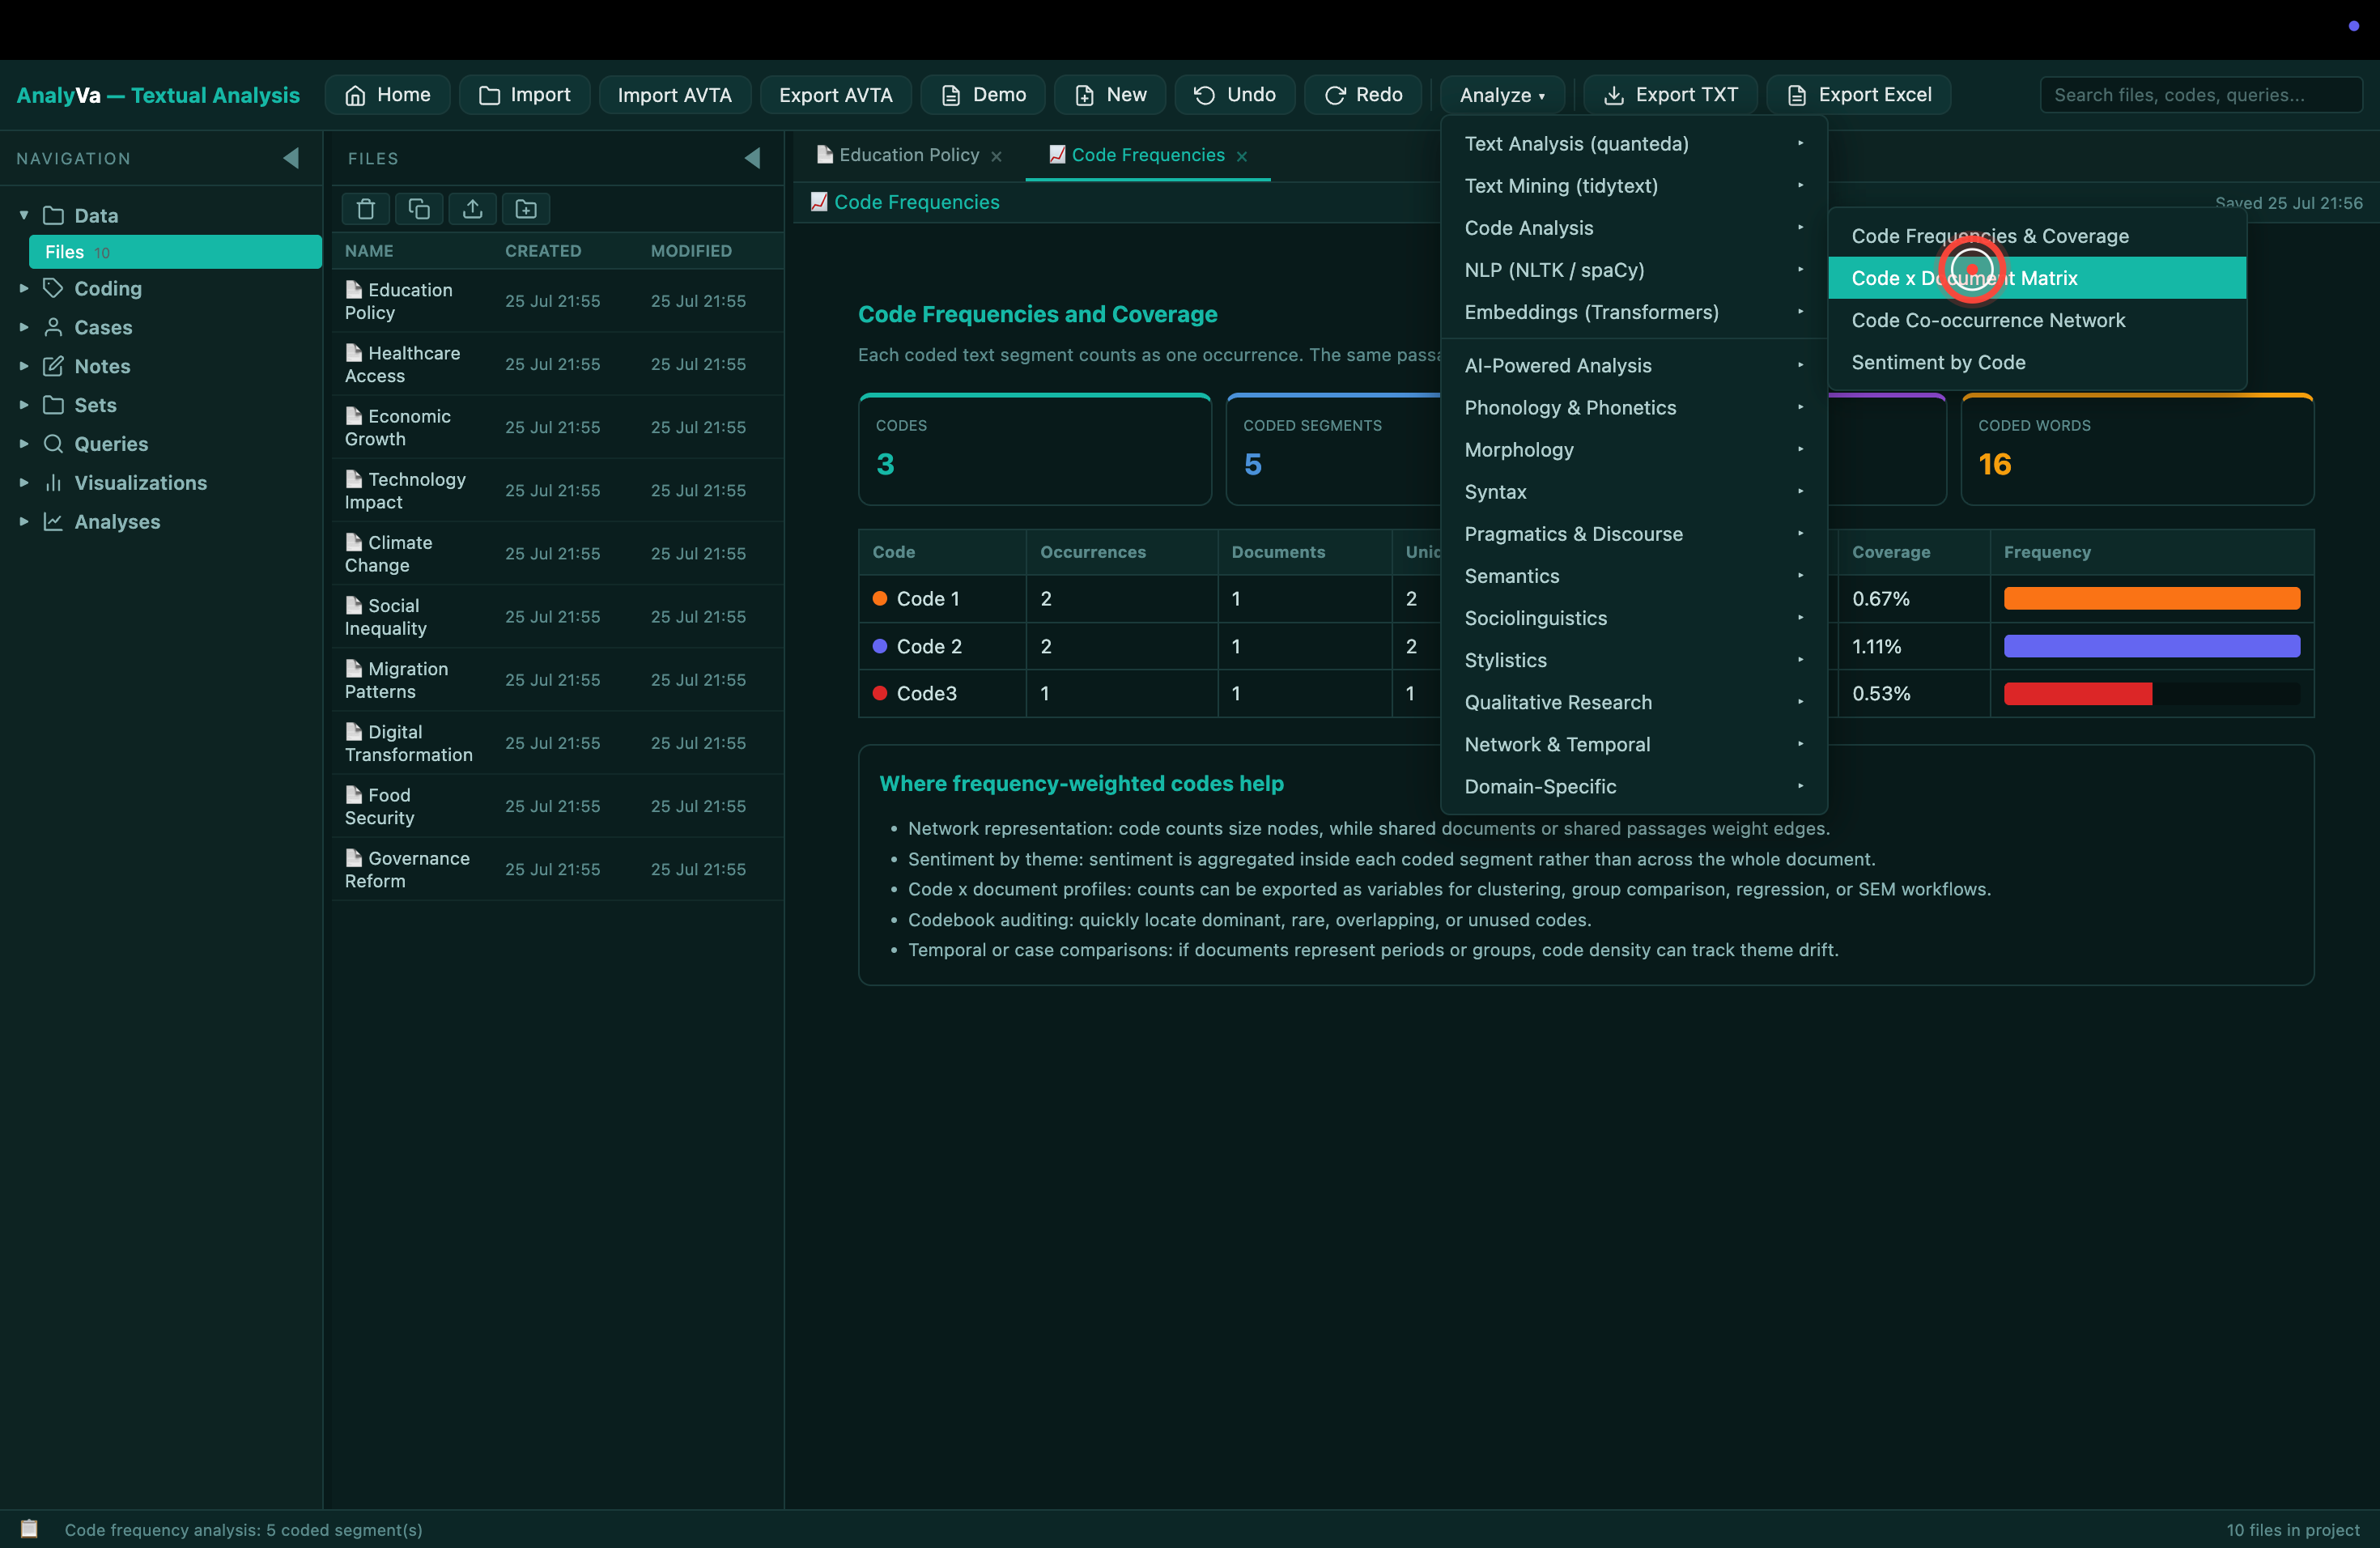
Step 21 — Open Analyses in the sidebar. This is where AnalyVa’s quantitative-qualitative bridge shows up. Every code-count, code-cooccurrence, and code-by-case matrix is one click away.
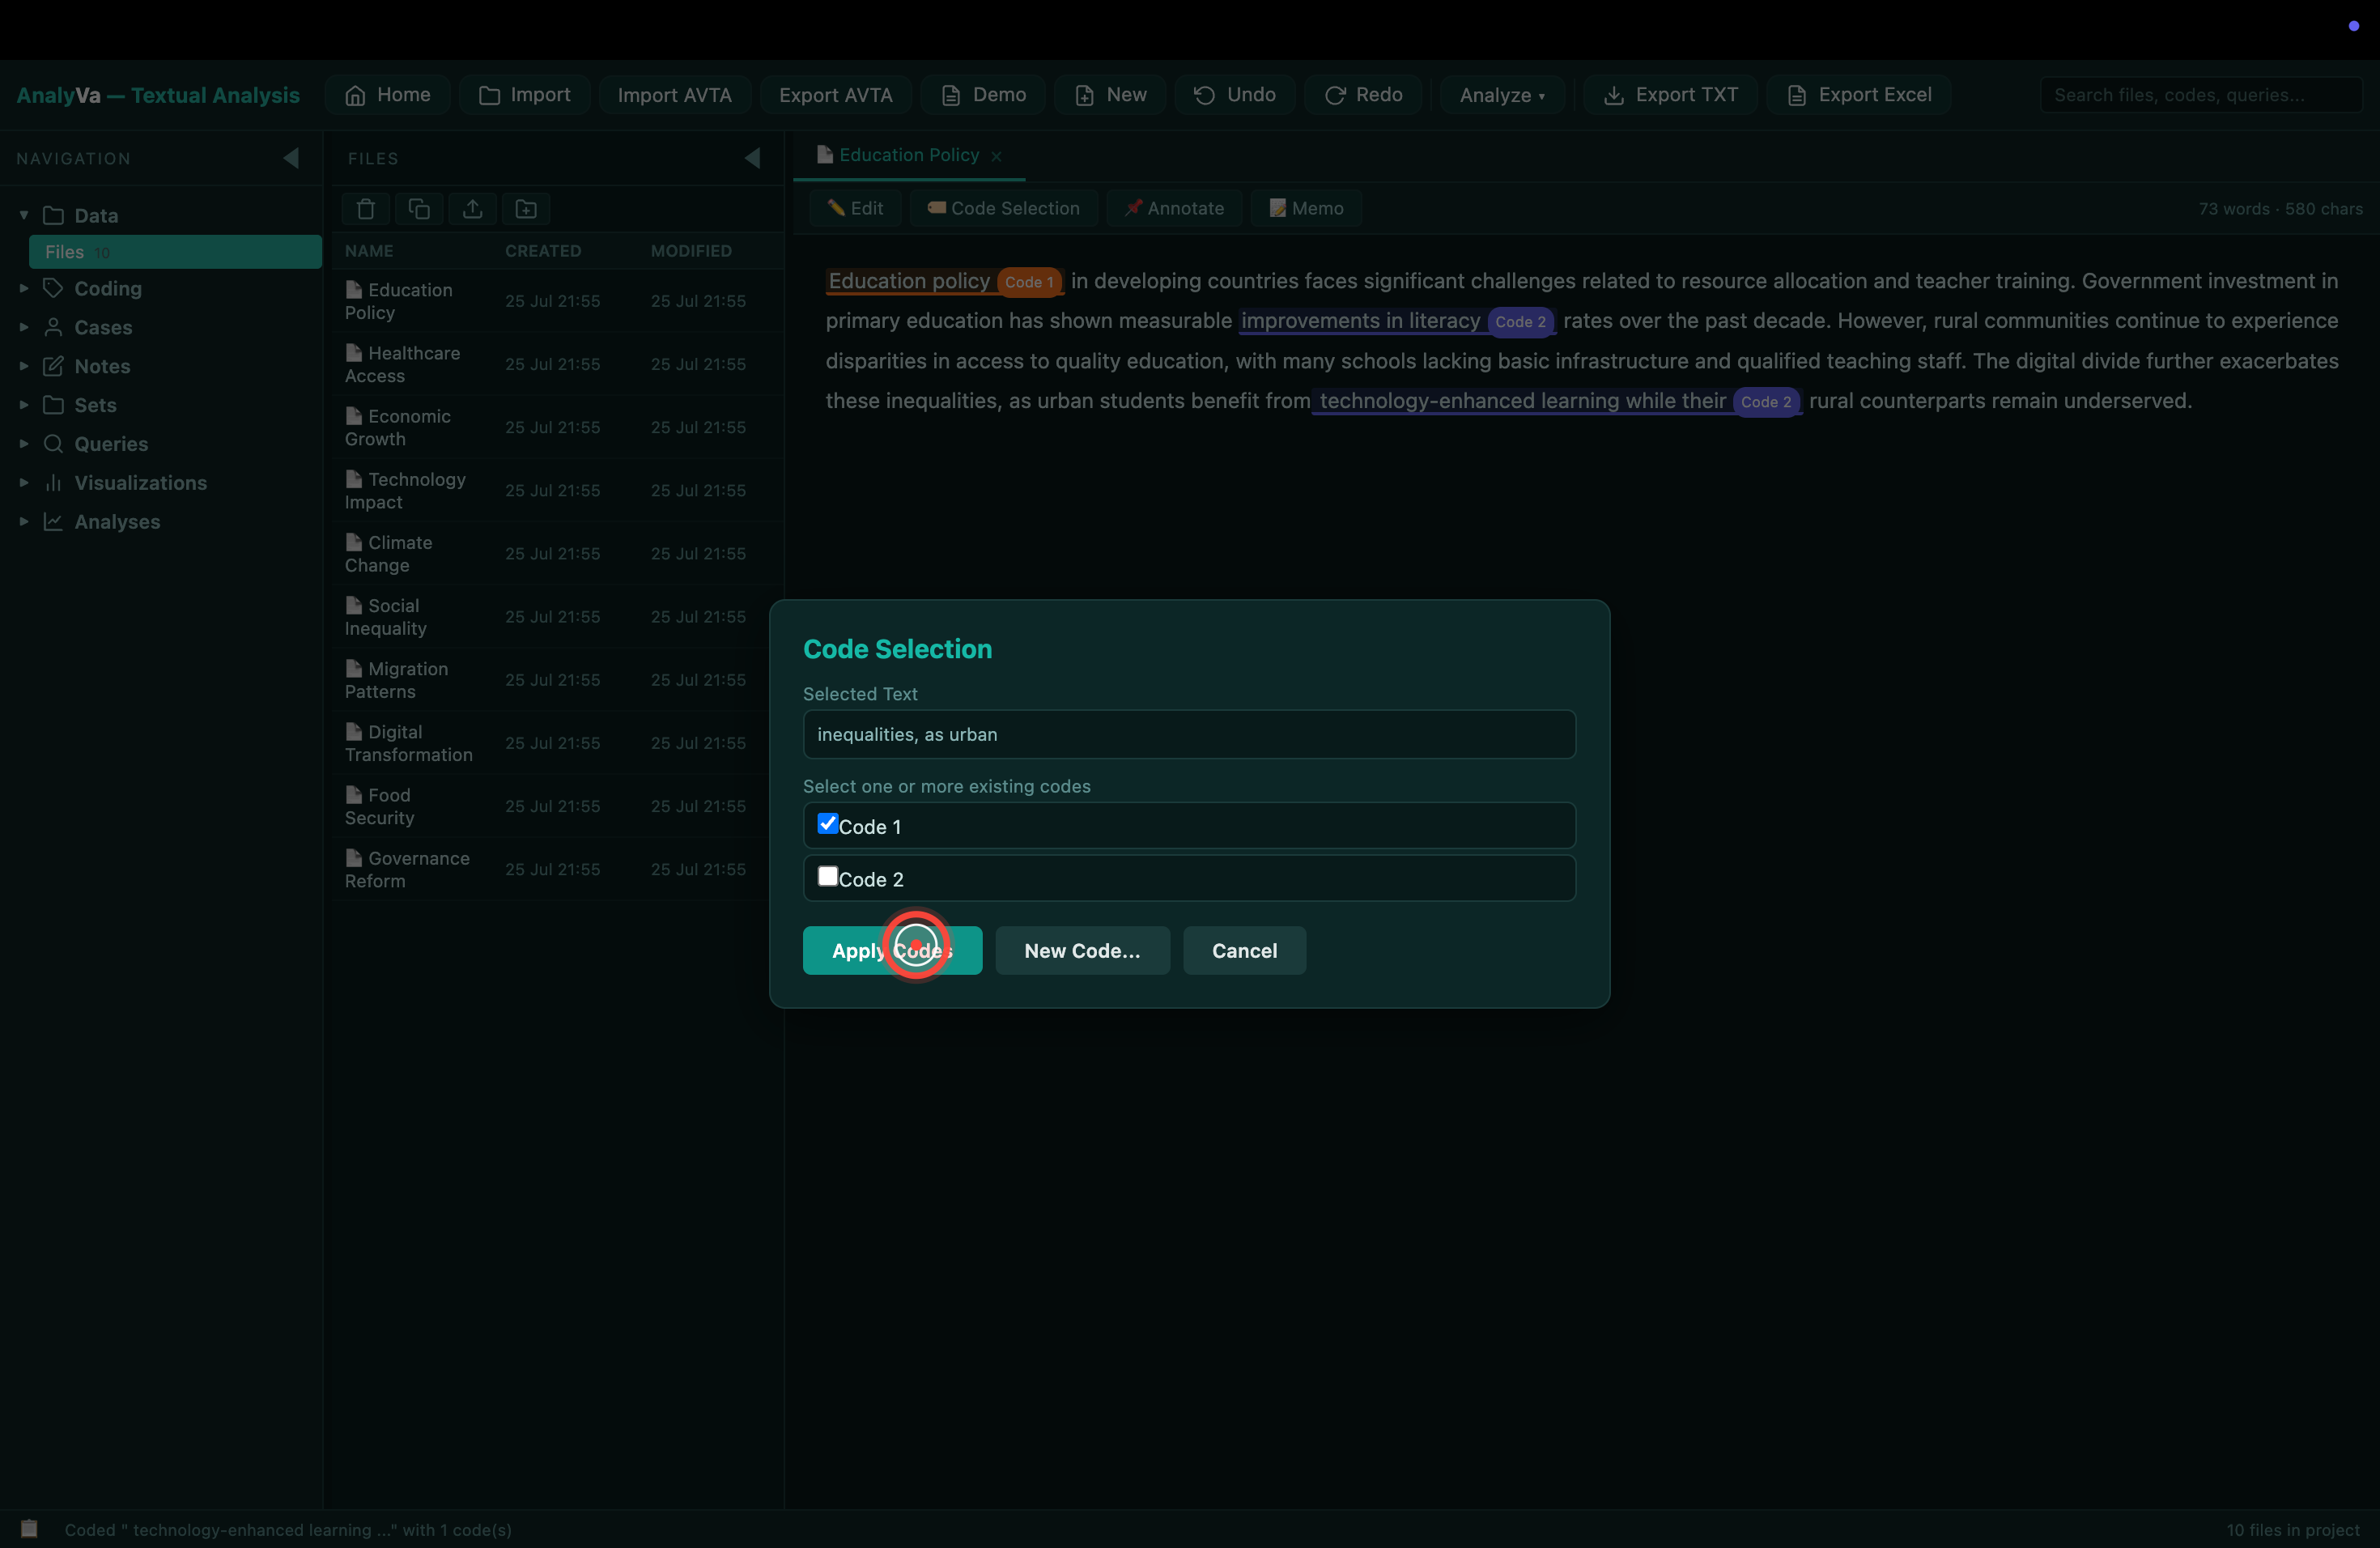
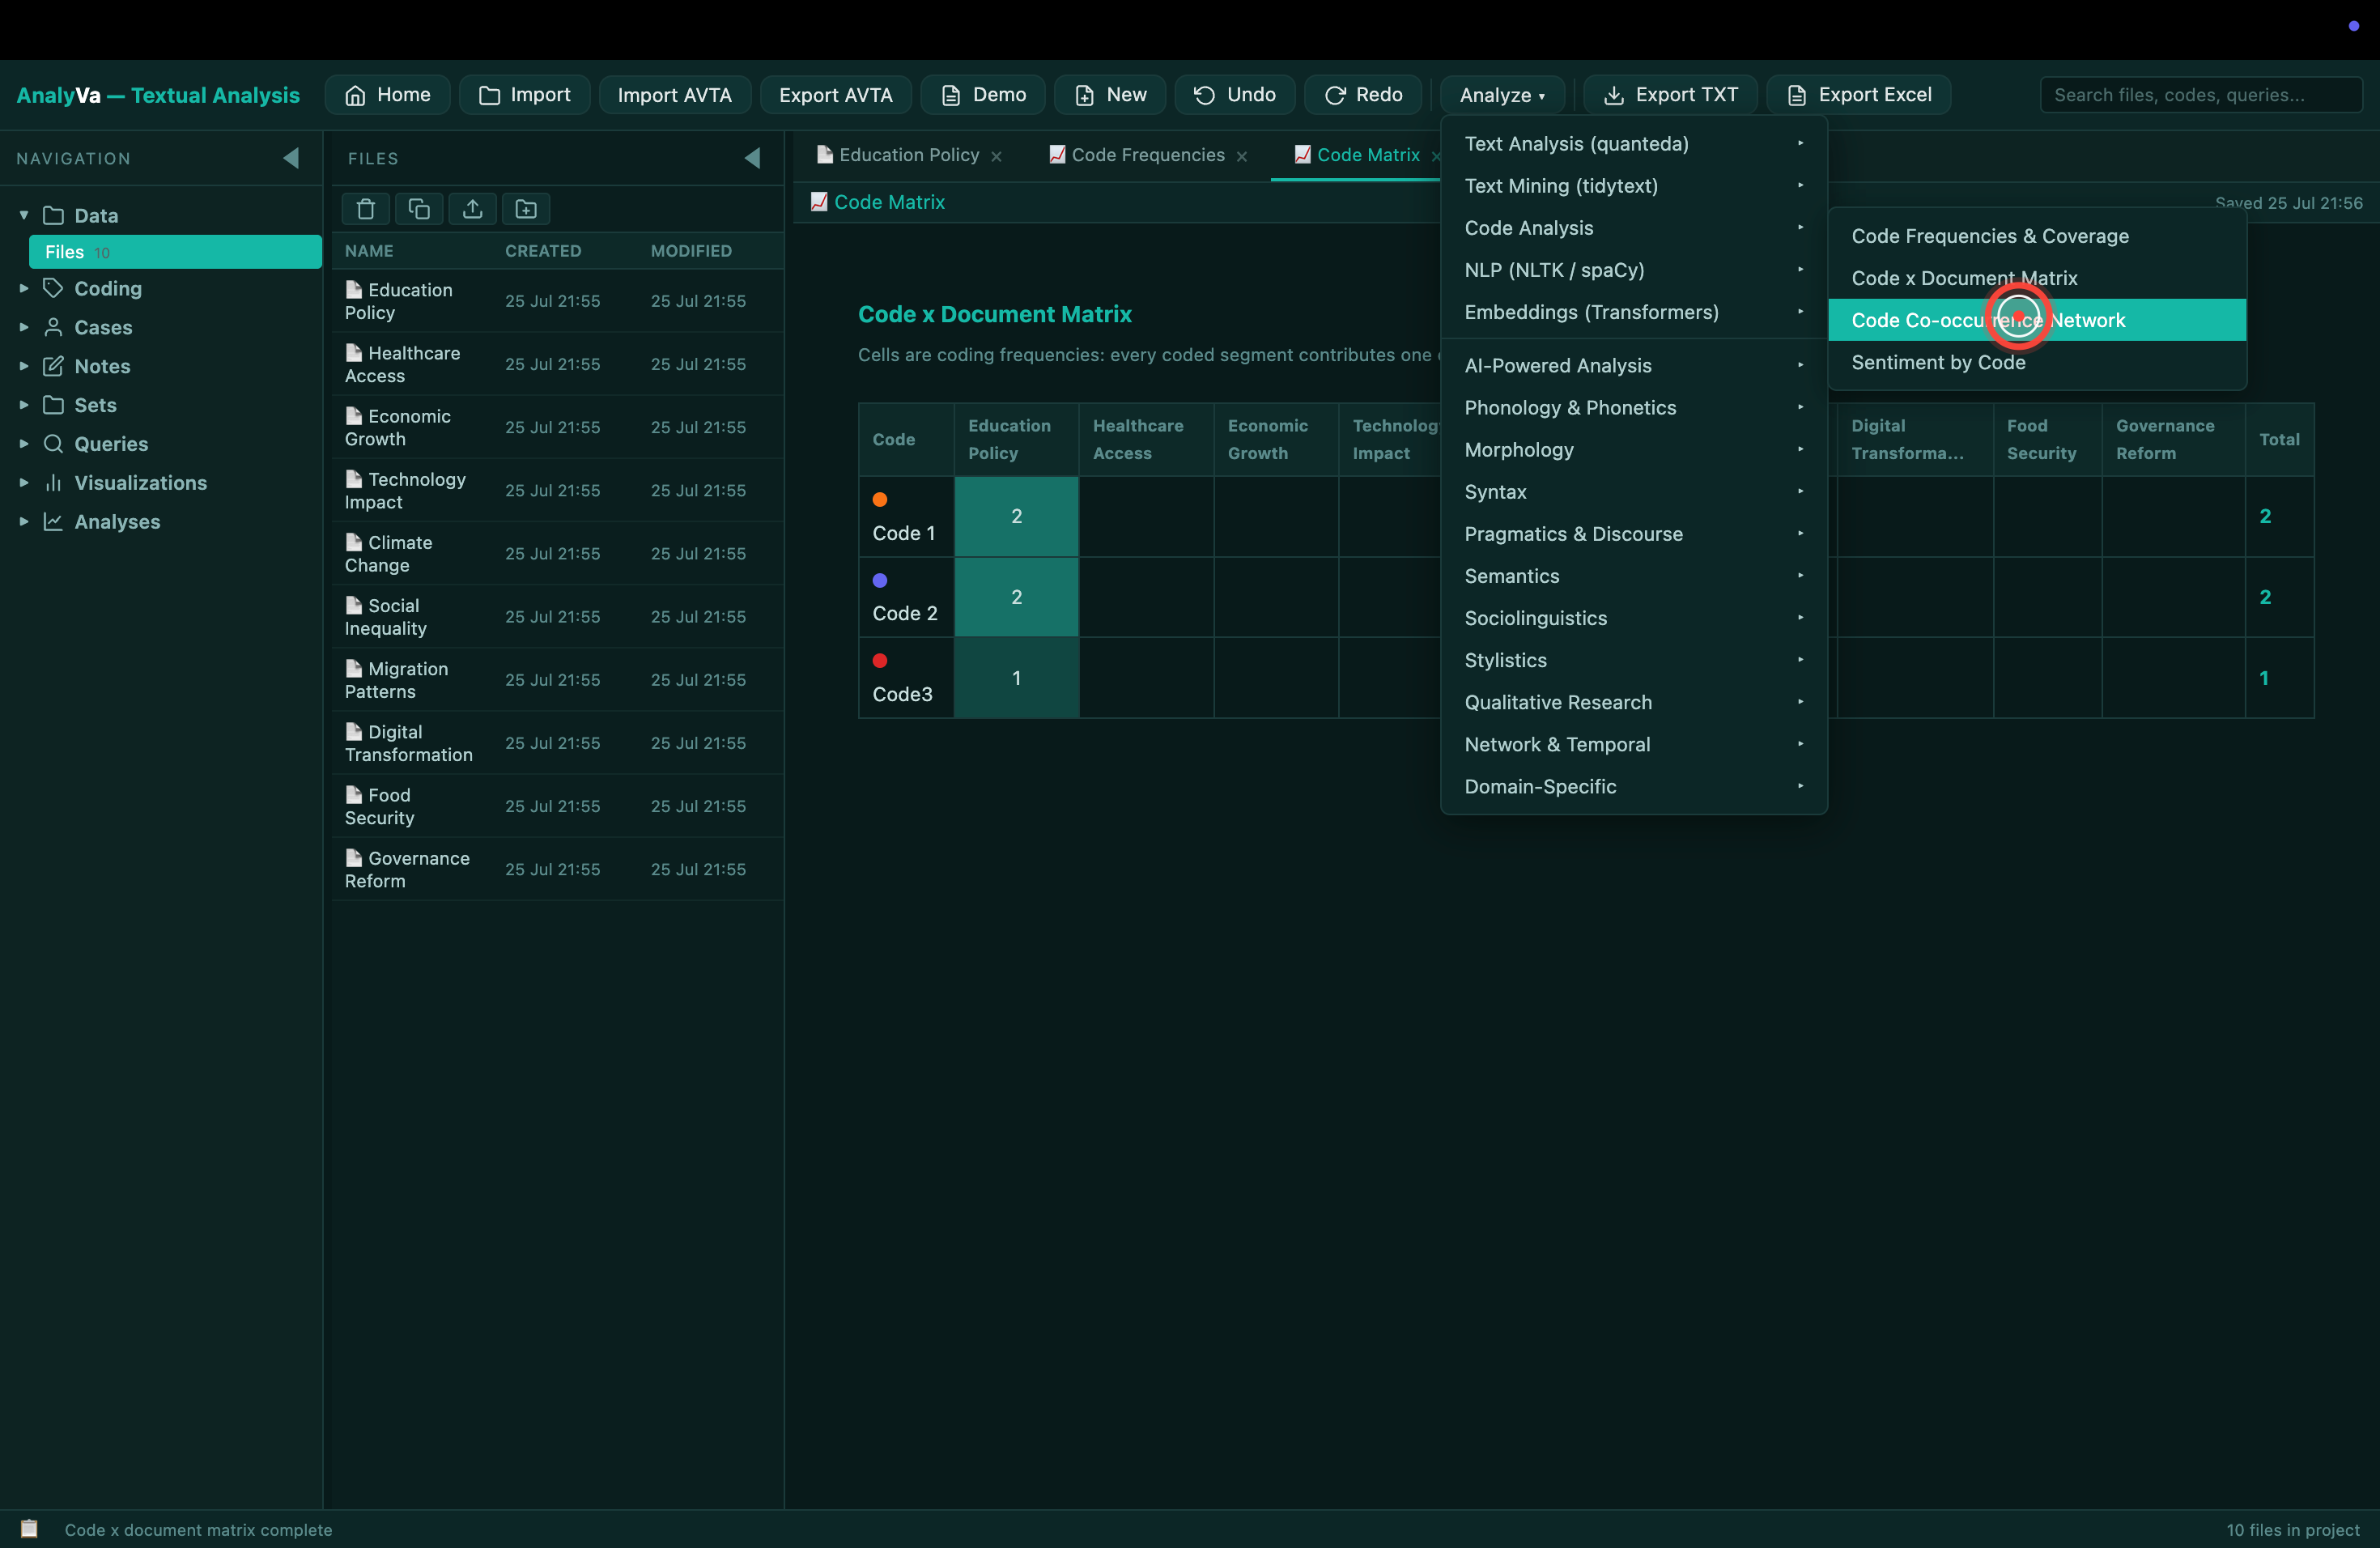
Step 22 — Run a Codes-by-cases matrix. For every code and every case, the matrix shows how many segments that case contributed to that code. Instantly reveals which codes are concentrated in which respondents, and which are broadly distributed.
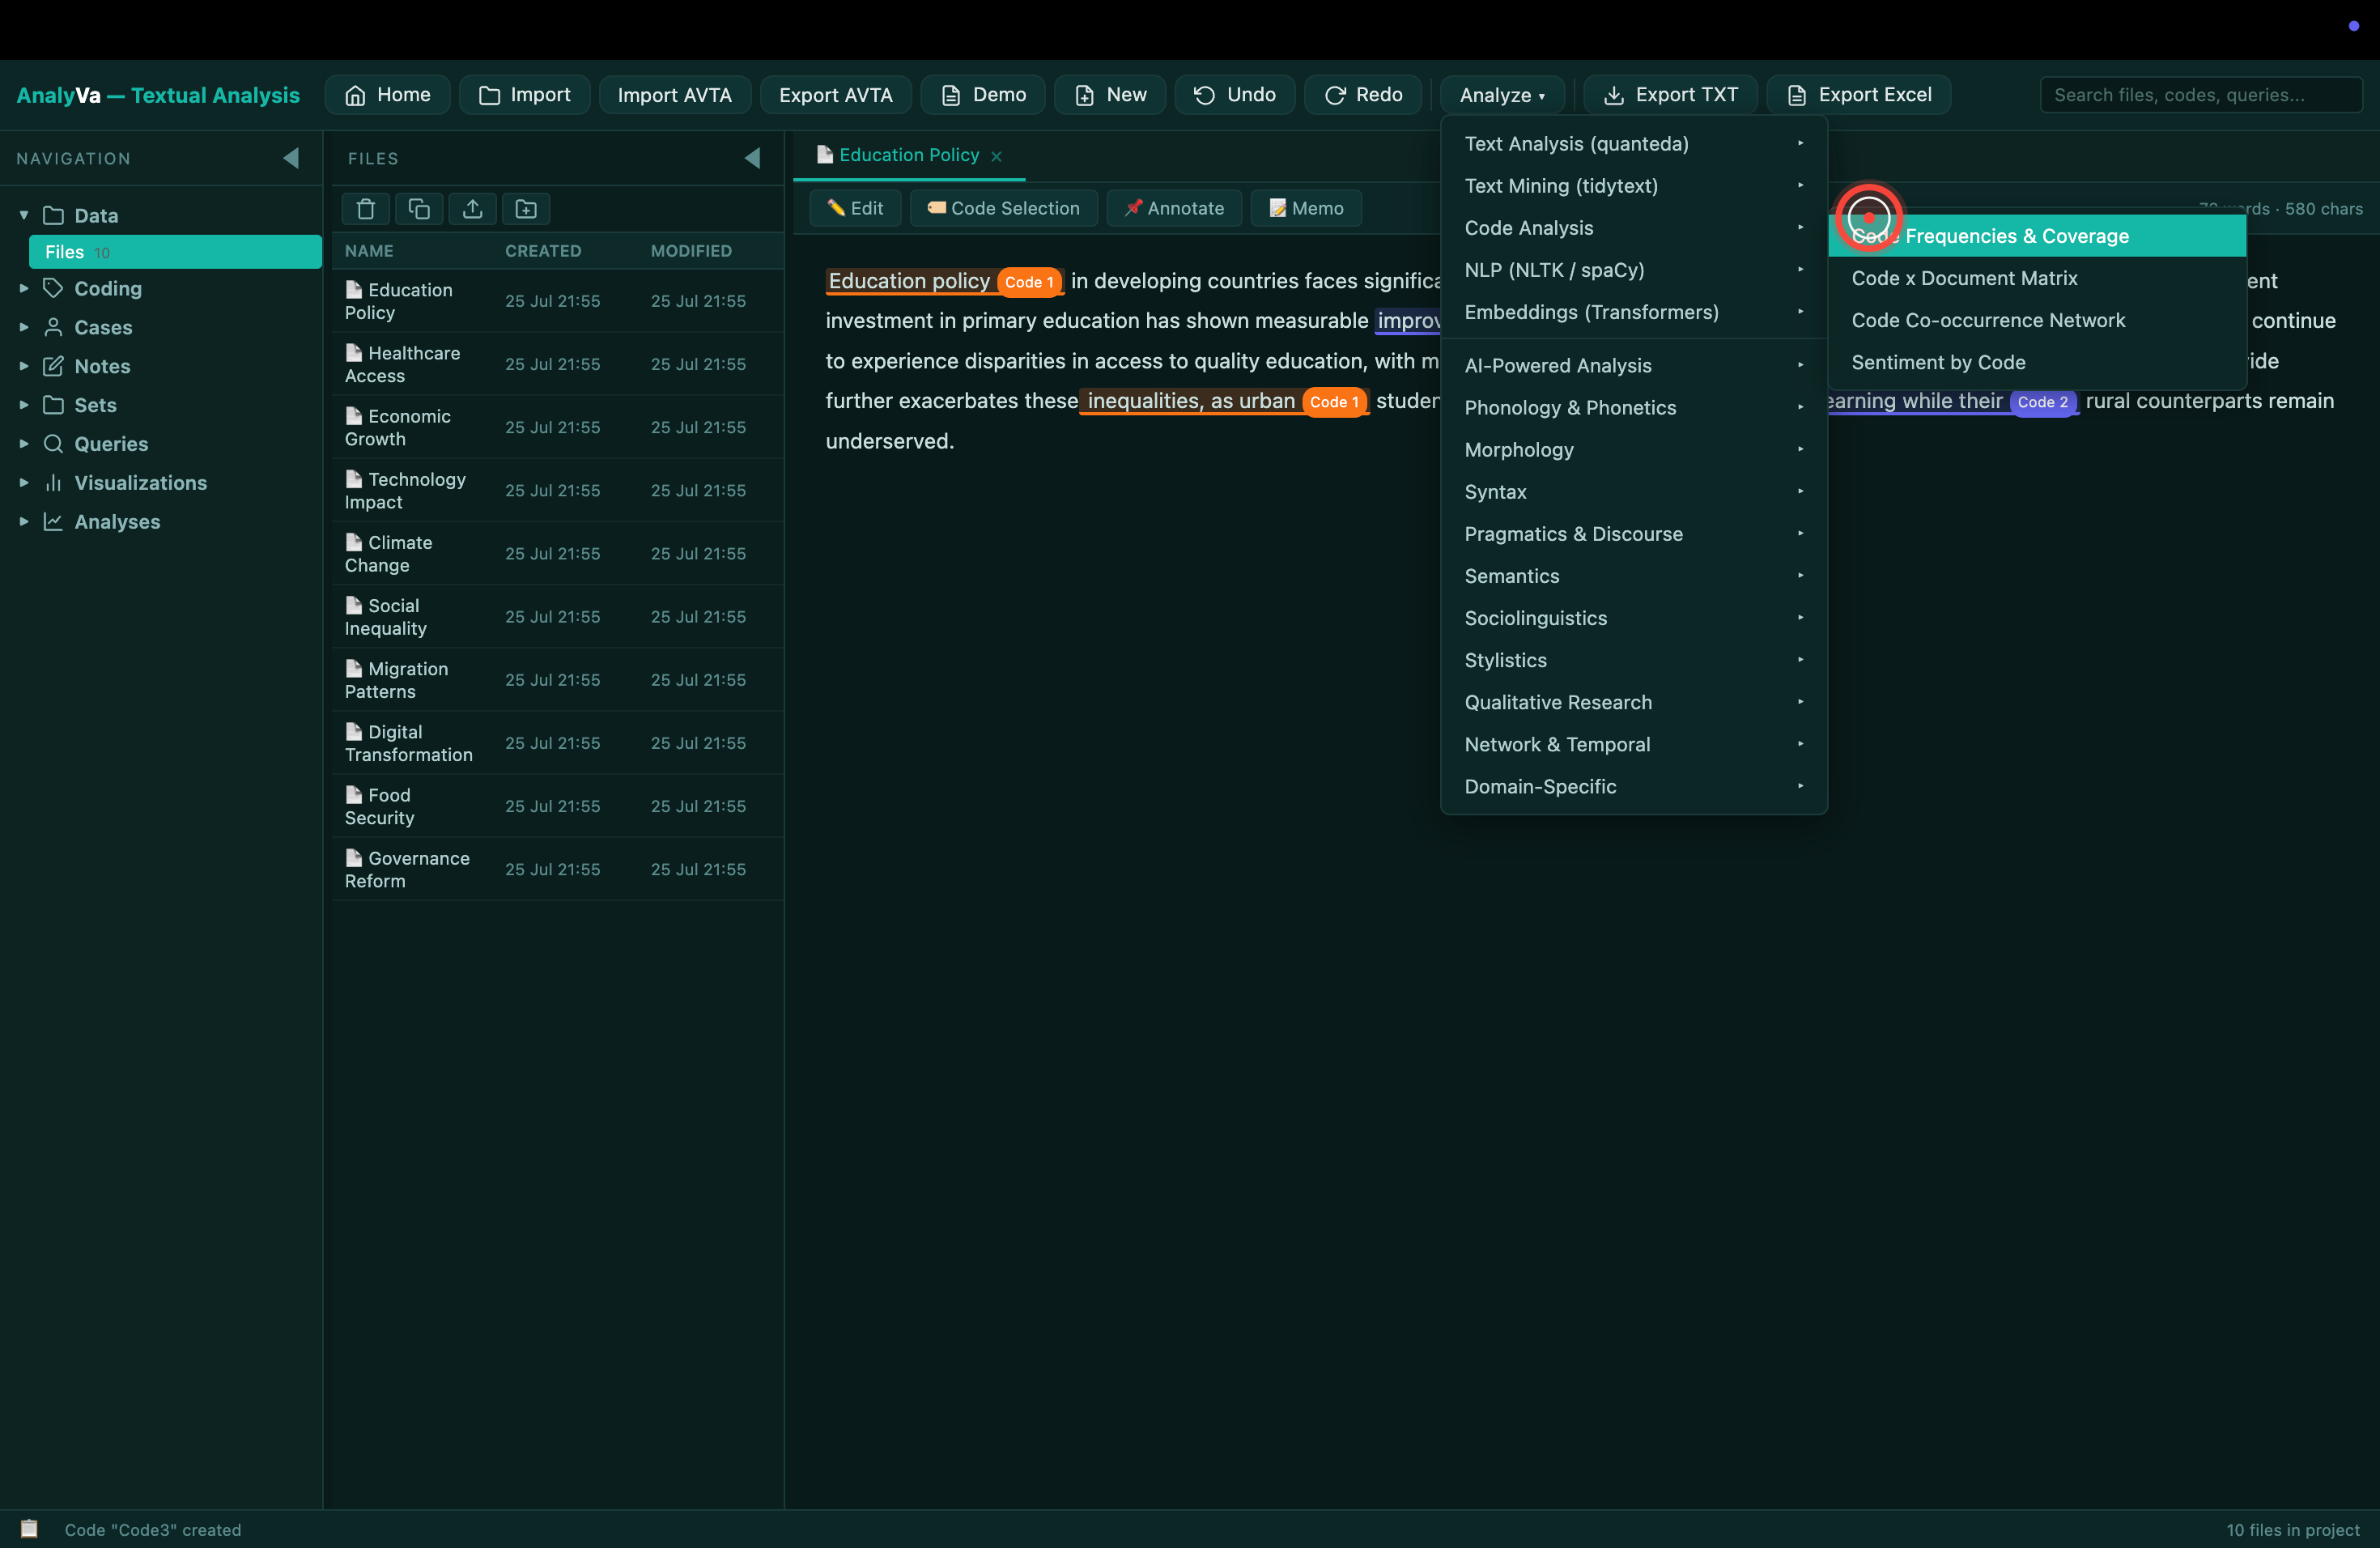
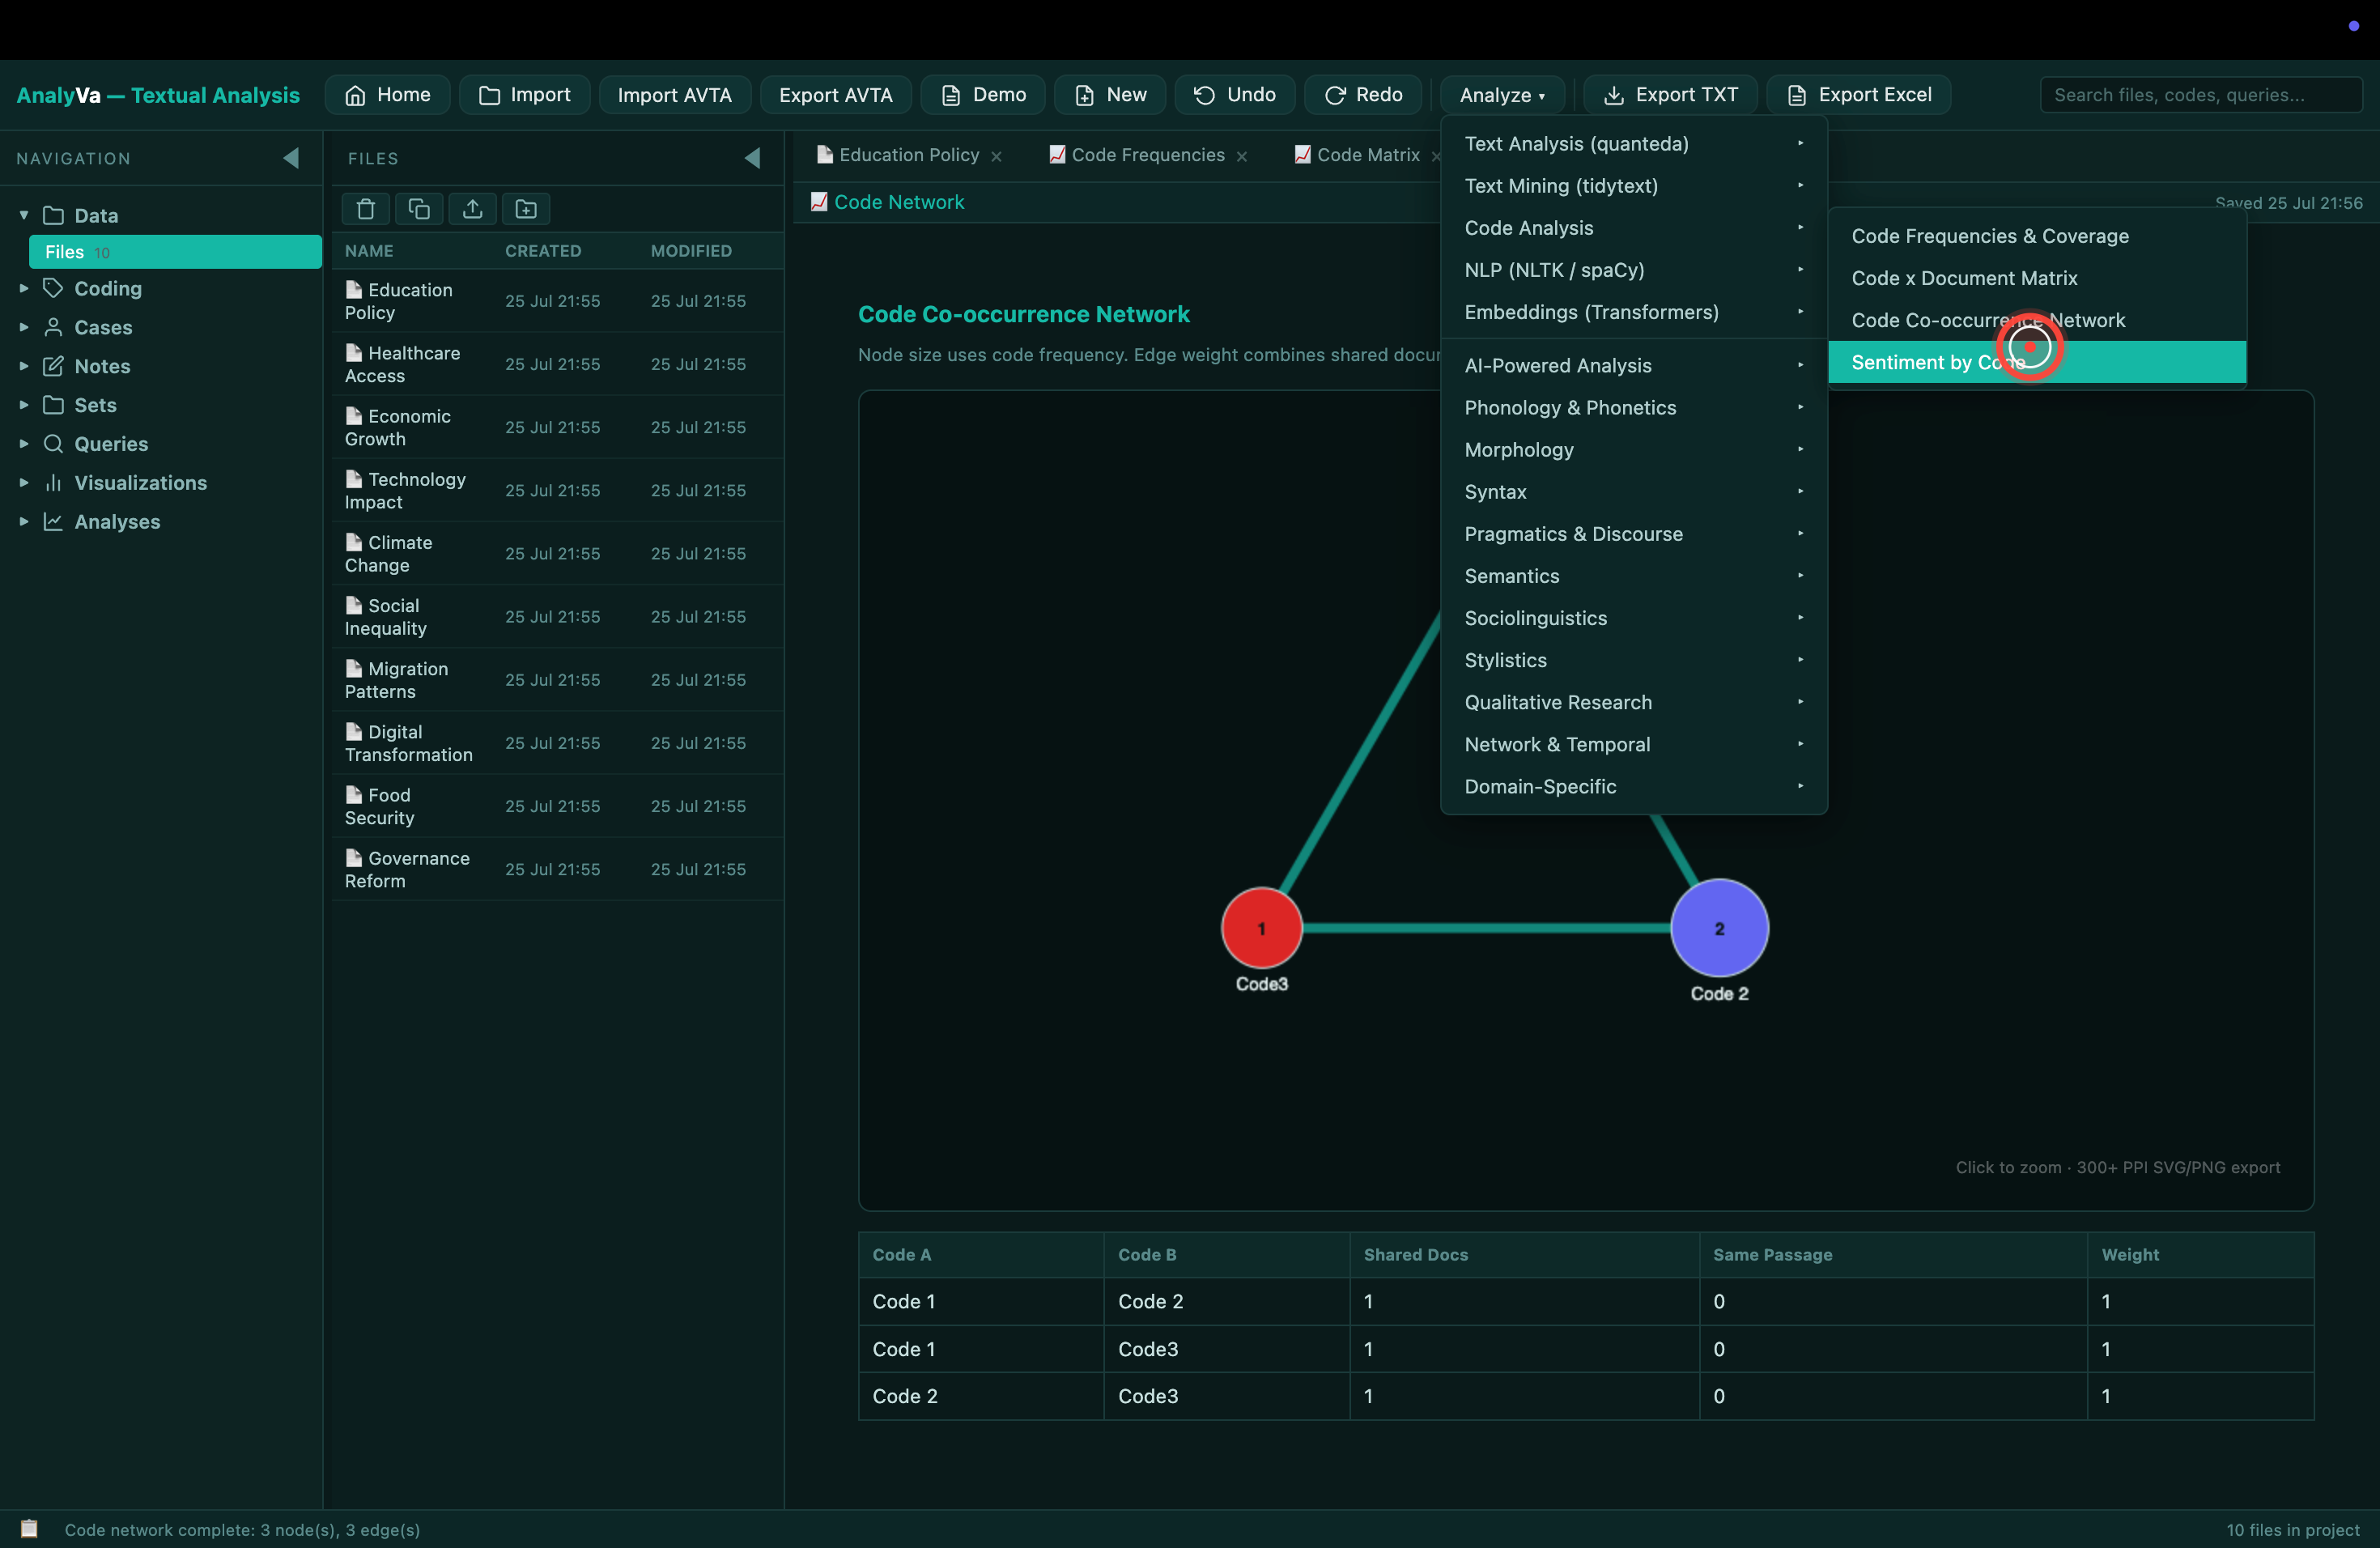
Step 23 — Run a Code co-occurrence analysis. For every pair of codes, this counts how often they appear in the same segment — the qualitative analogue of correlation. High co-occurrence between two codes often points to a merger or a higher-order theme.
Step 24 — Open Visualizations for the graphical view. Word clouds, code frequency charts, code hierarchies. Useful in manuscript figures and as a first-look sanity check on the code distribution.
Step 25 — Export. The top toolbar has Export TXT, Export Excel, and Export AVTA (AnalyVa’s own portable format for a full project including codes, memos, and cases). Export AVTA when handing the project to a collaborator; export Excel when moving a code frequency table into a paper.
What to remember
Qualitative coding in AnalyVa follows the same four-stage rhythm as in NVivo, MAXQDA, or Atlas.ti:
- Import your documents (or use the demo corpus first).
- Code passages — one at a time, growing your codebook as new themes emerge, applying existing codes to reuse them.
- Review every code’s segments in the Coding sidebar. Rename, merge, delete as needed.
- Analyse via Codes-by-cases, Co-occurrence, or Visualizations.
The two things AnalyVa gives you that stand-alone qualitative tools do not: your quantitative variables are still available in the other workspace (switch anytime via Home), and you get an integrated Export AVTA format that packages everything for peer review or collaborator handoff.