Between importing a dataset and running an analysis sits a step almost every applied paper glosses over: data preparation. Are your Likert items typed as ordinal or scale? Did you remember to reverse-code the three negatively-worded items in the rumination scale? Did you collapse the age variable into meaningful bands?
AnalyVa handles all of these inside a single Data → Variable View panel — one that will feel familiar if you have ever used SPSS.
Getting to the Data view
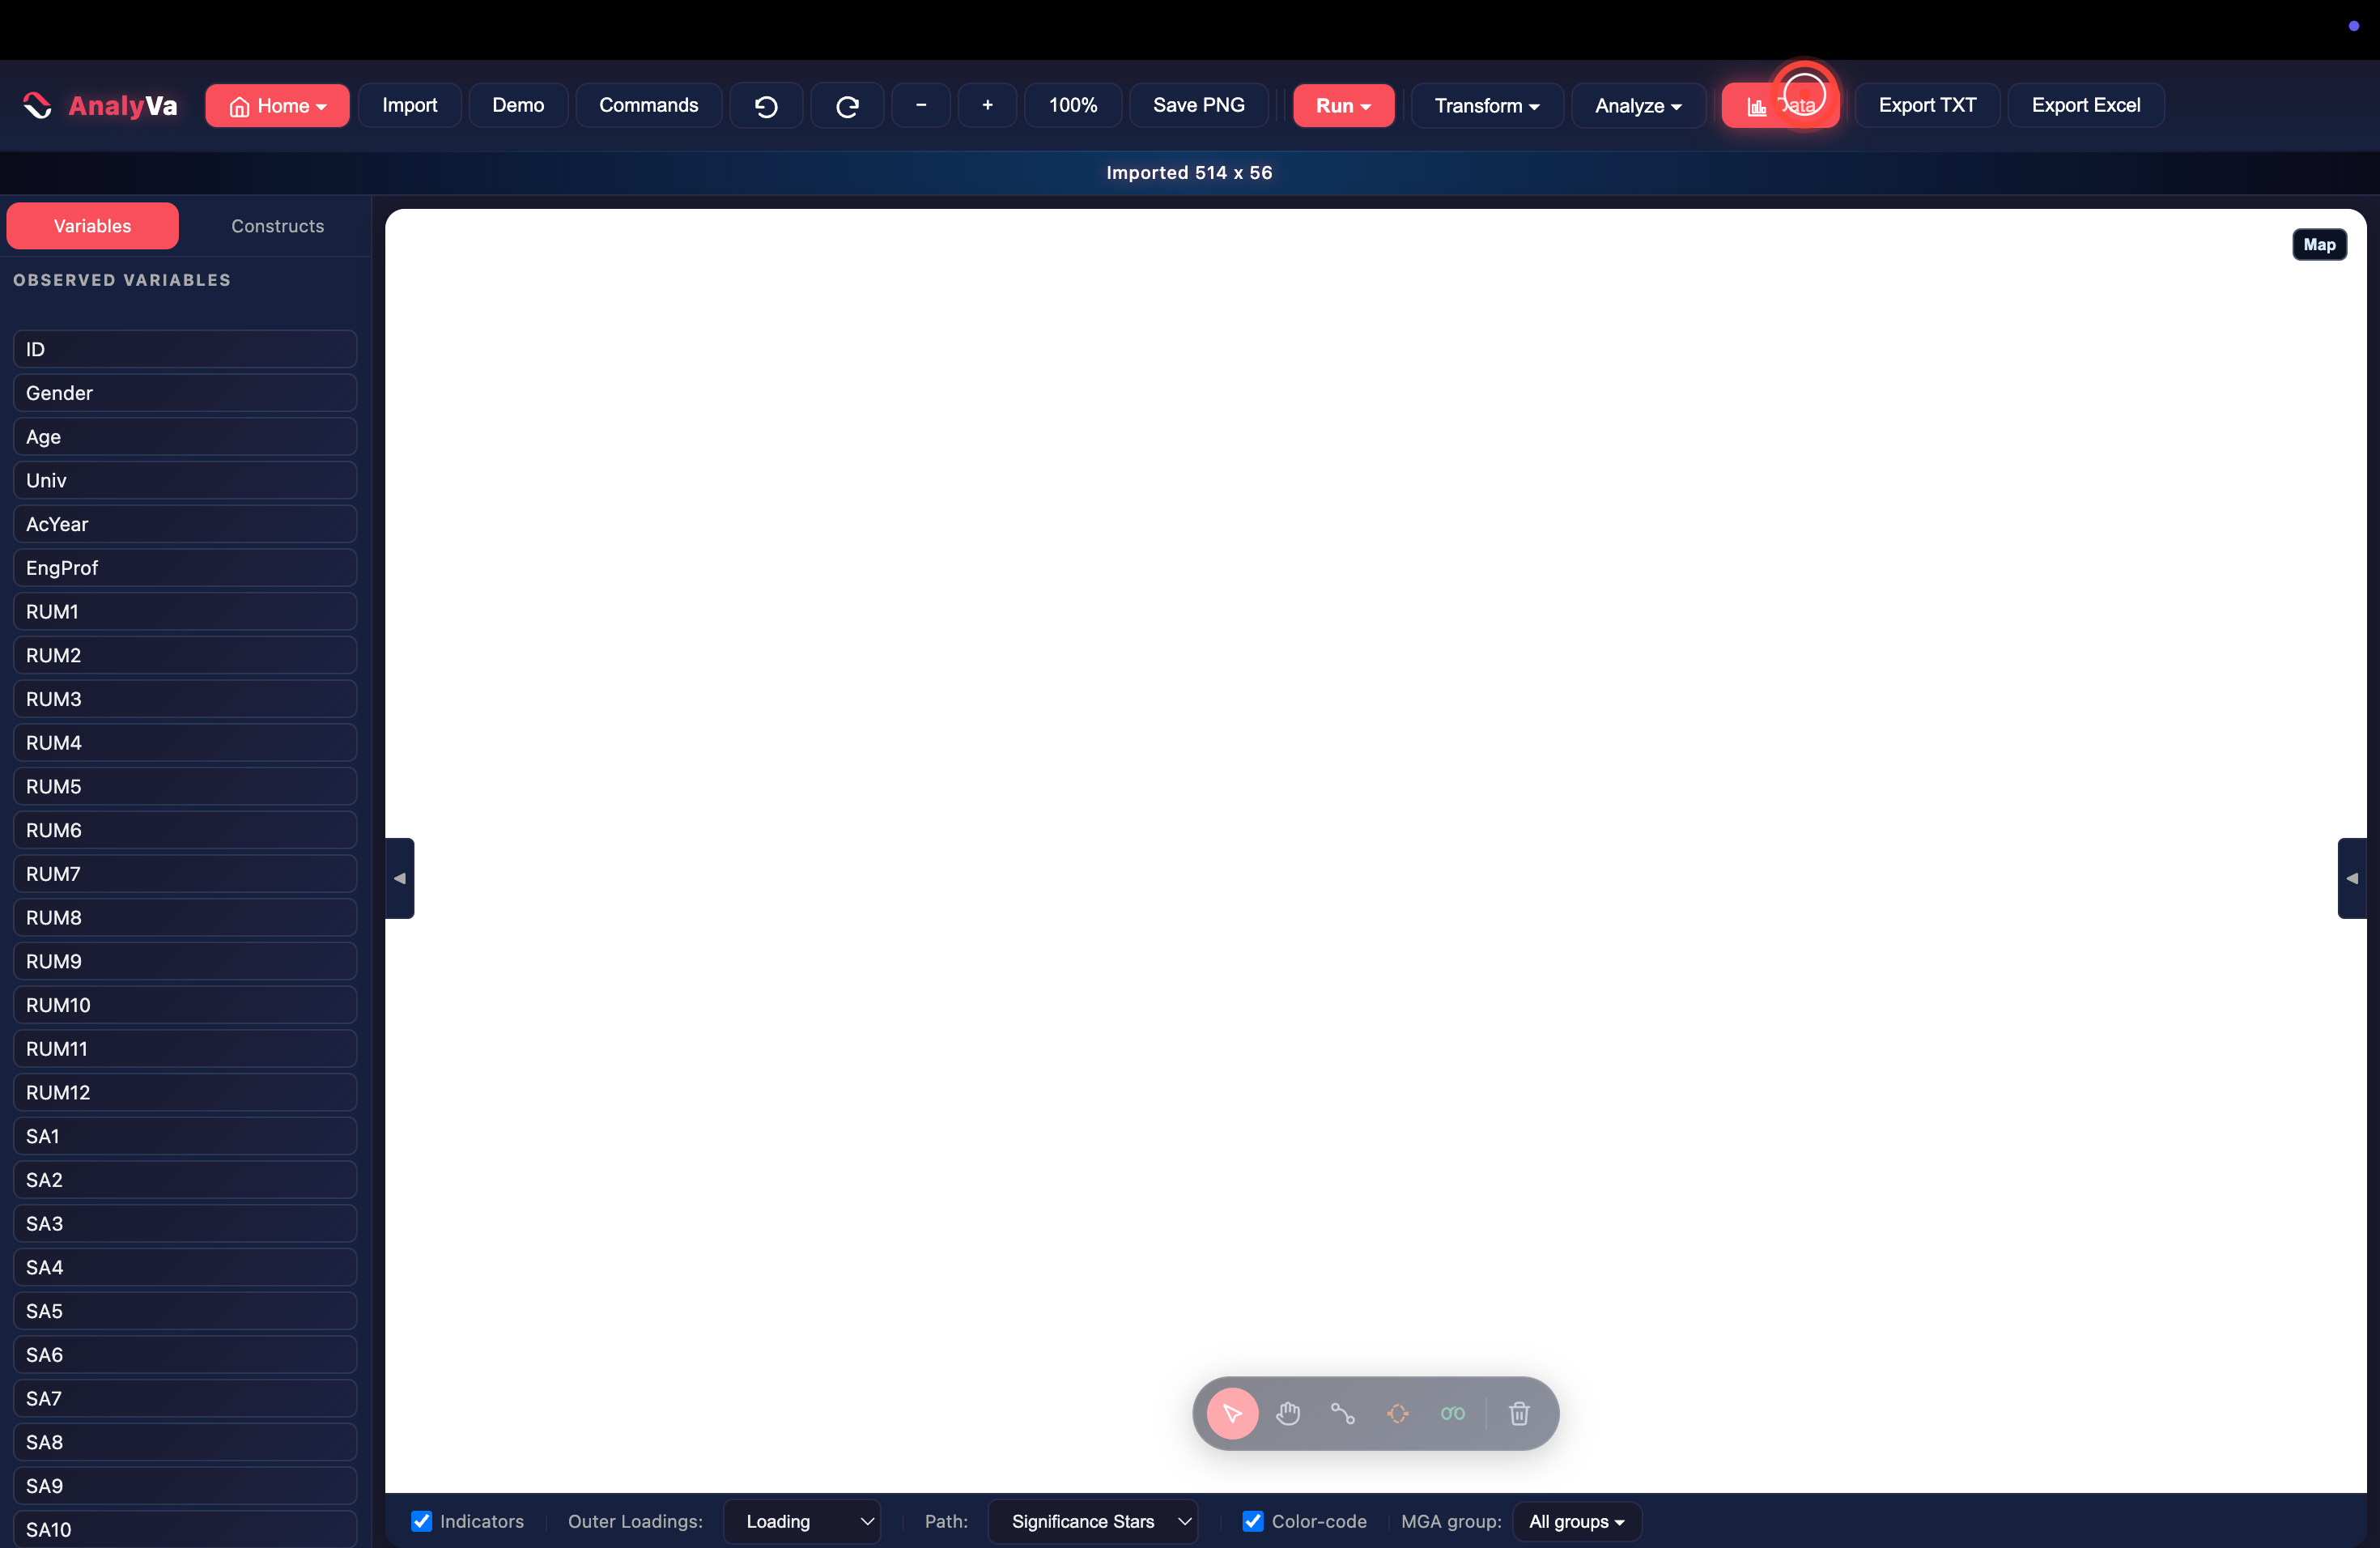
Step 1 — Click Data in the top toolbar. Once your dataset is imported, the Data button (rightmost cluster, next to Export) opens a full-screen data browser.
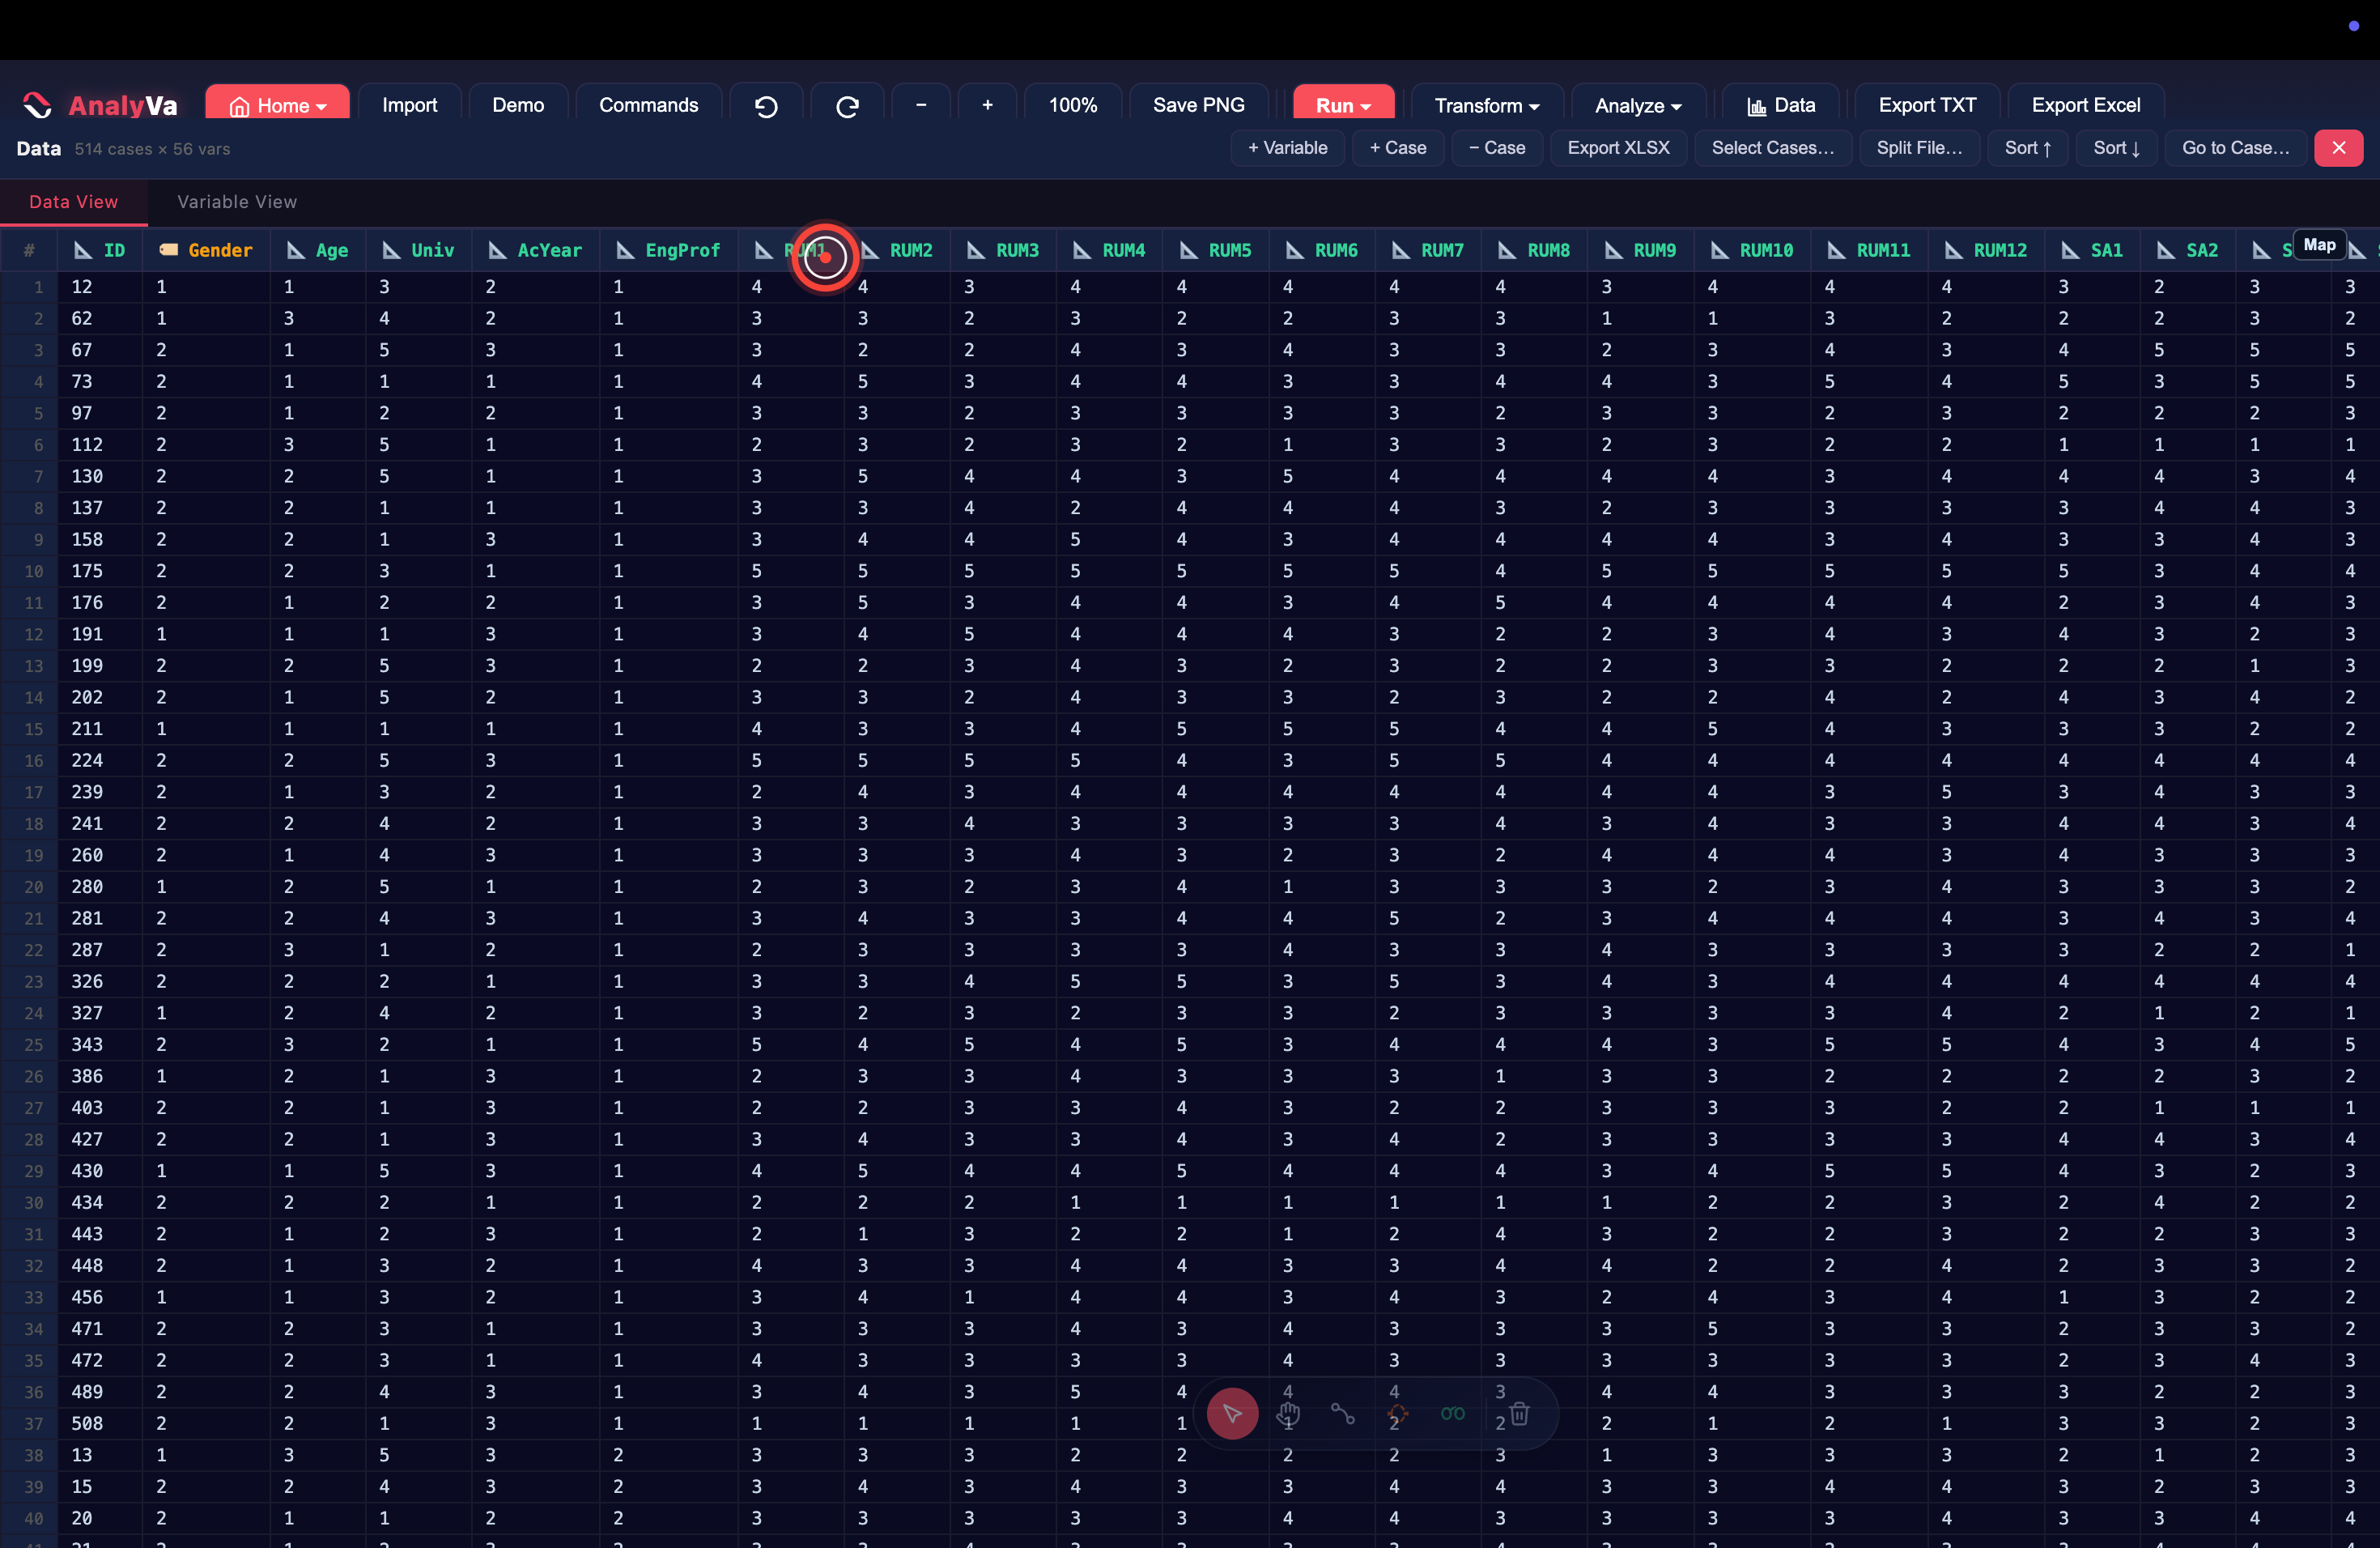
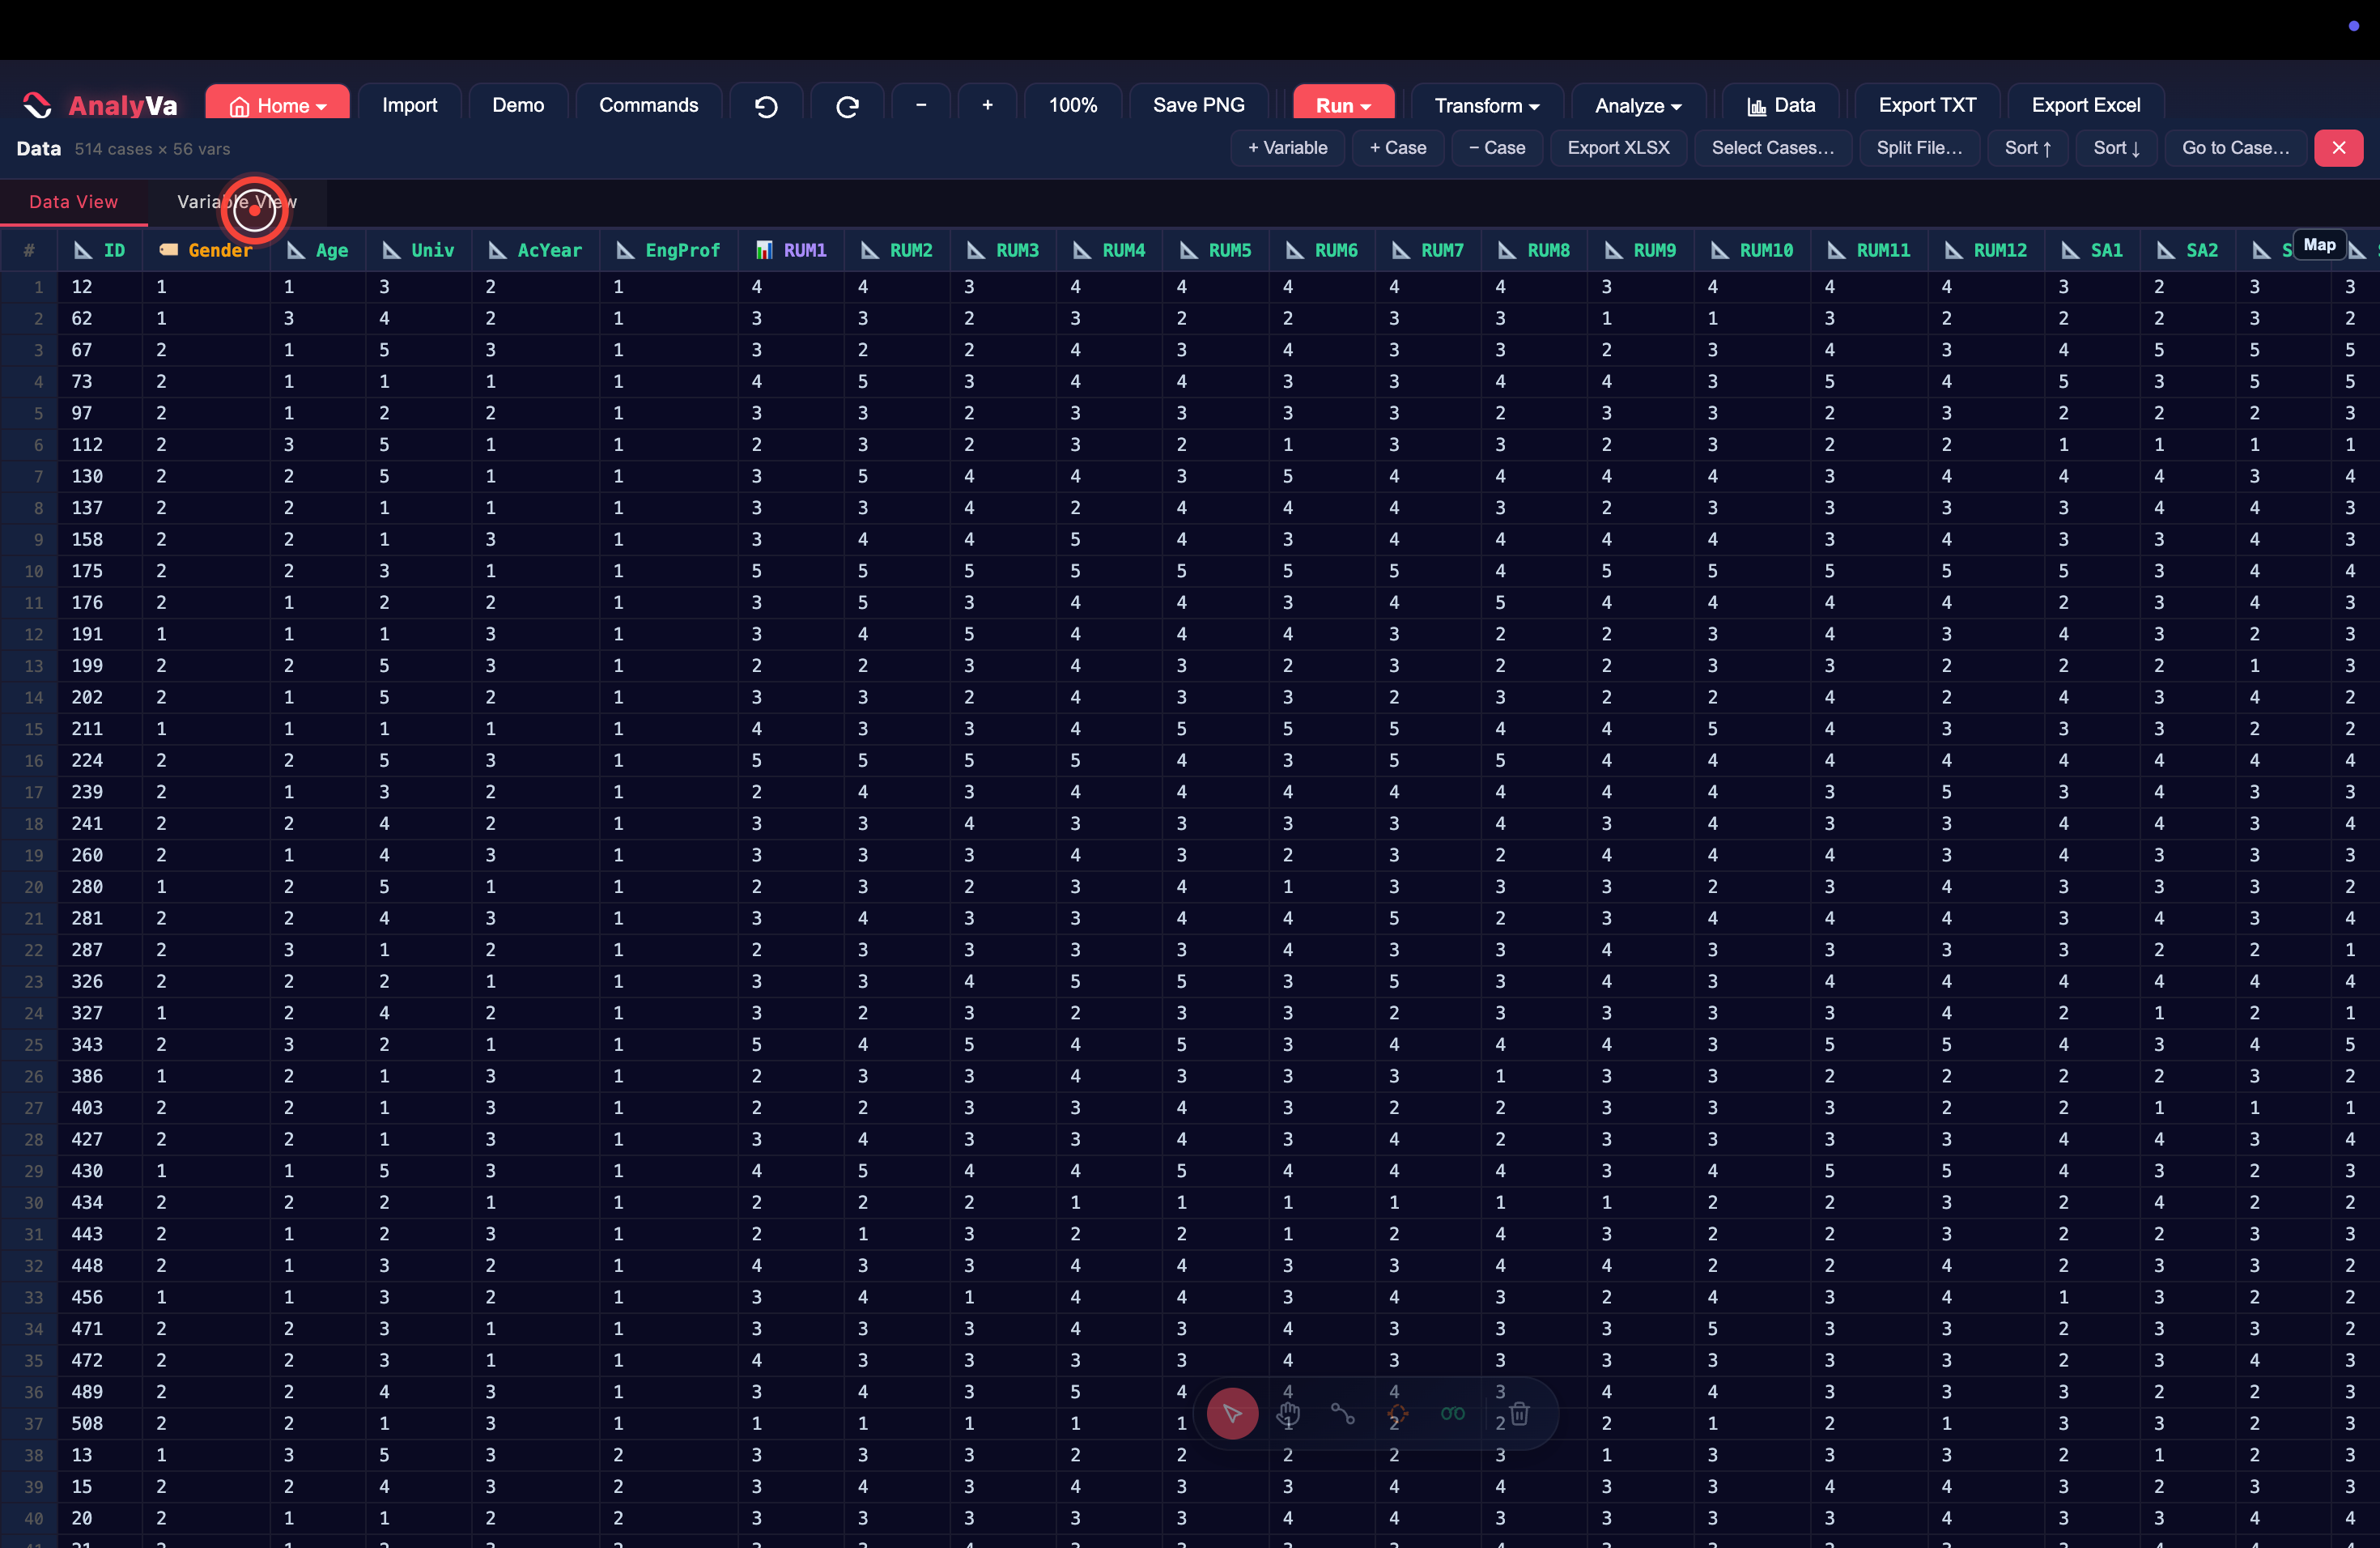
Step 2 — Switch to Variable View. The Data browser has two tabs: Data View (rows and cells, like a spreadsheet) and Variable View (one row per variable, listing type, label, values, missing-value codes).
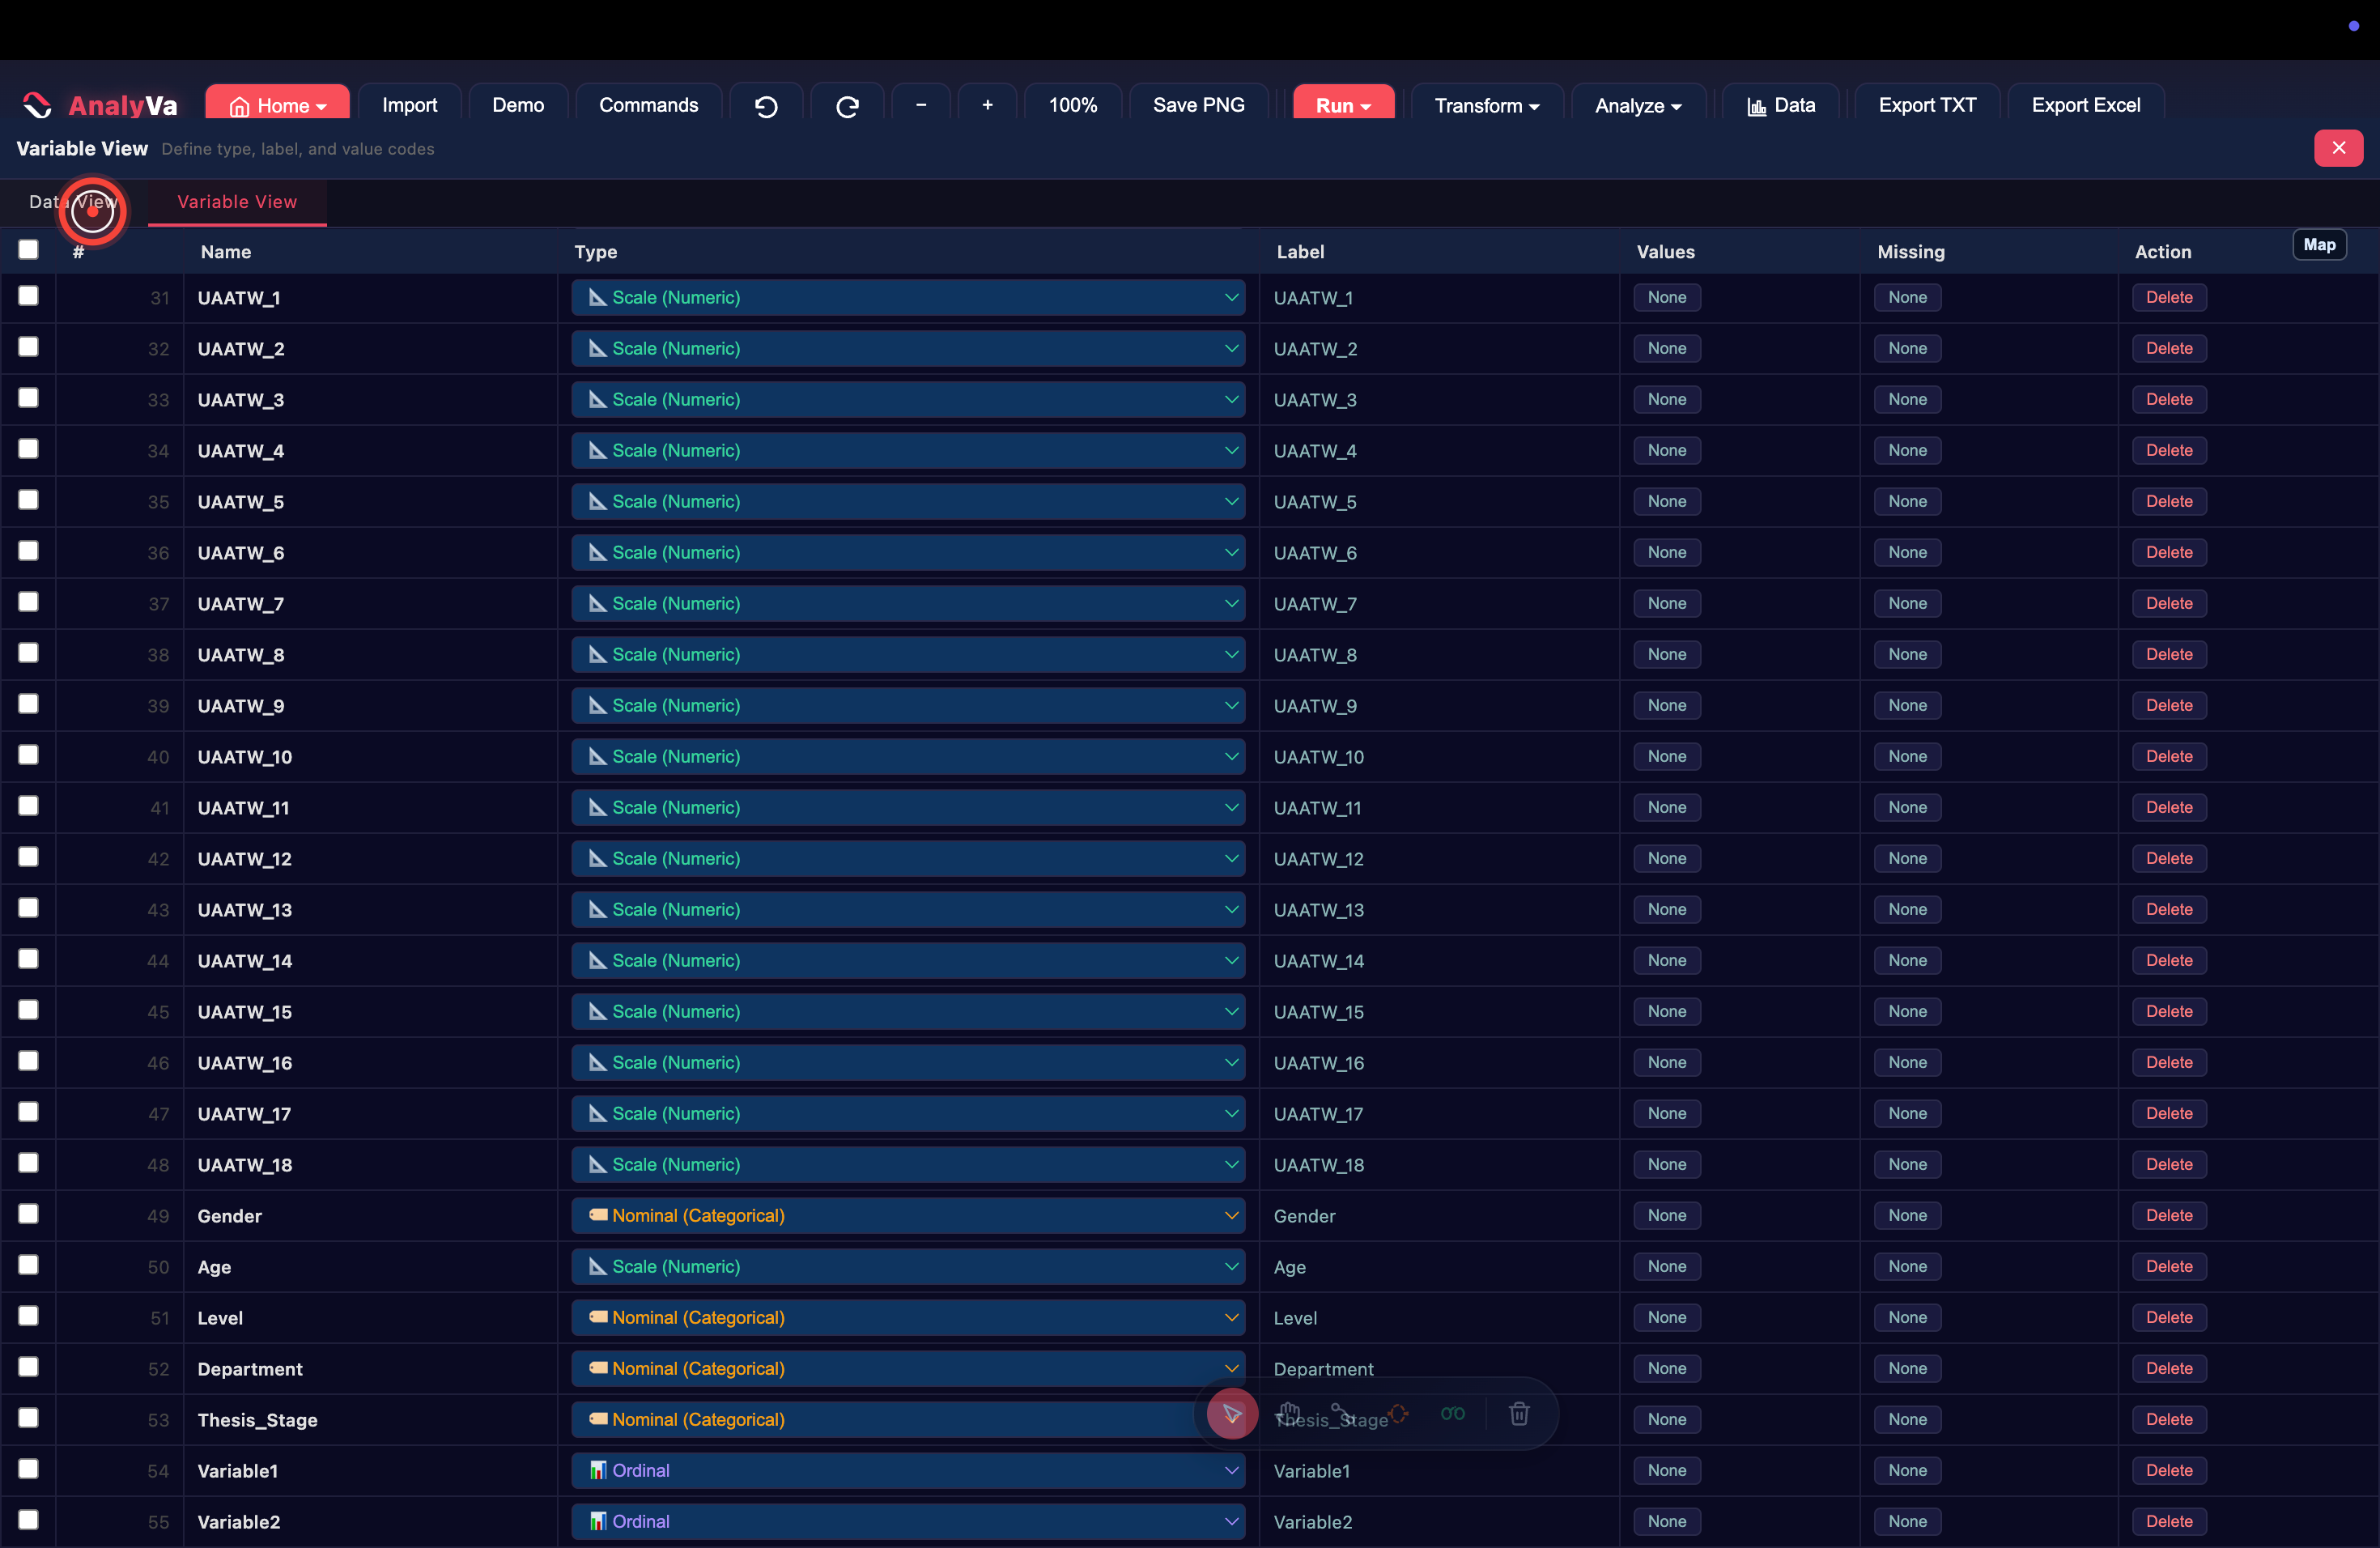
Every subsequent operation in this post happens in Variable View.
Task 1 — Change the type of a single variable
By default, AnalyVa infers types from the imported data (numeric → Scale, text → Nominal, etc.). To change a variable’s type:
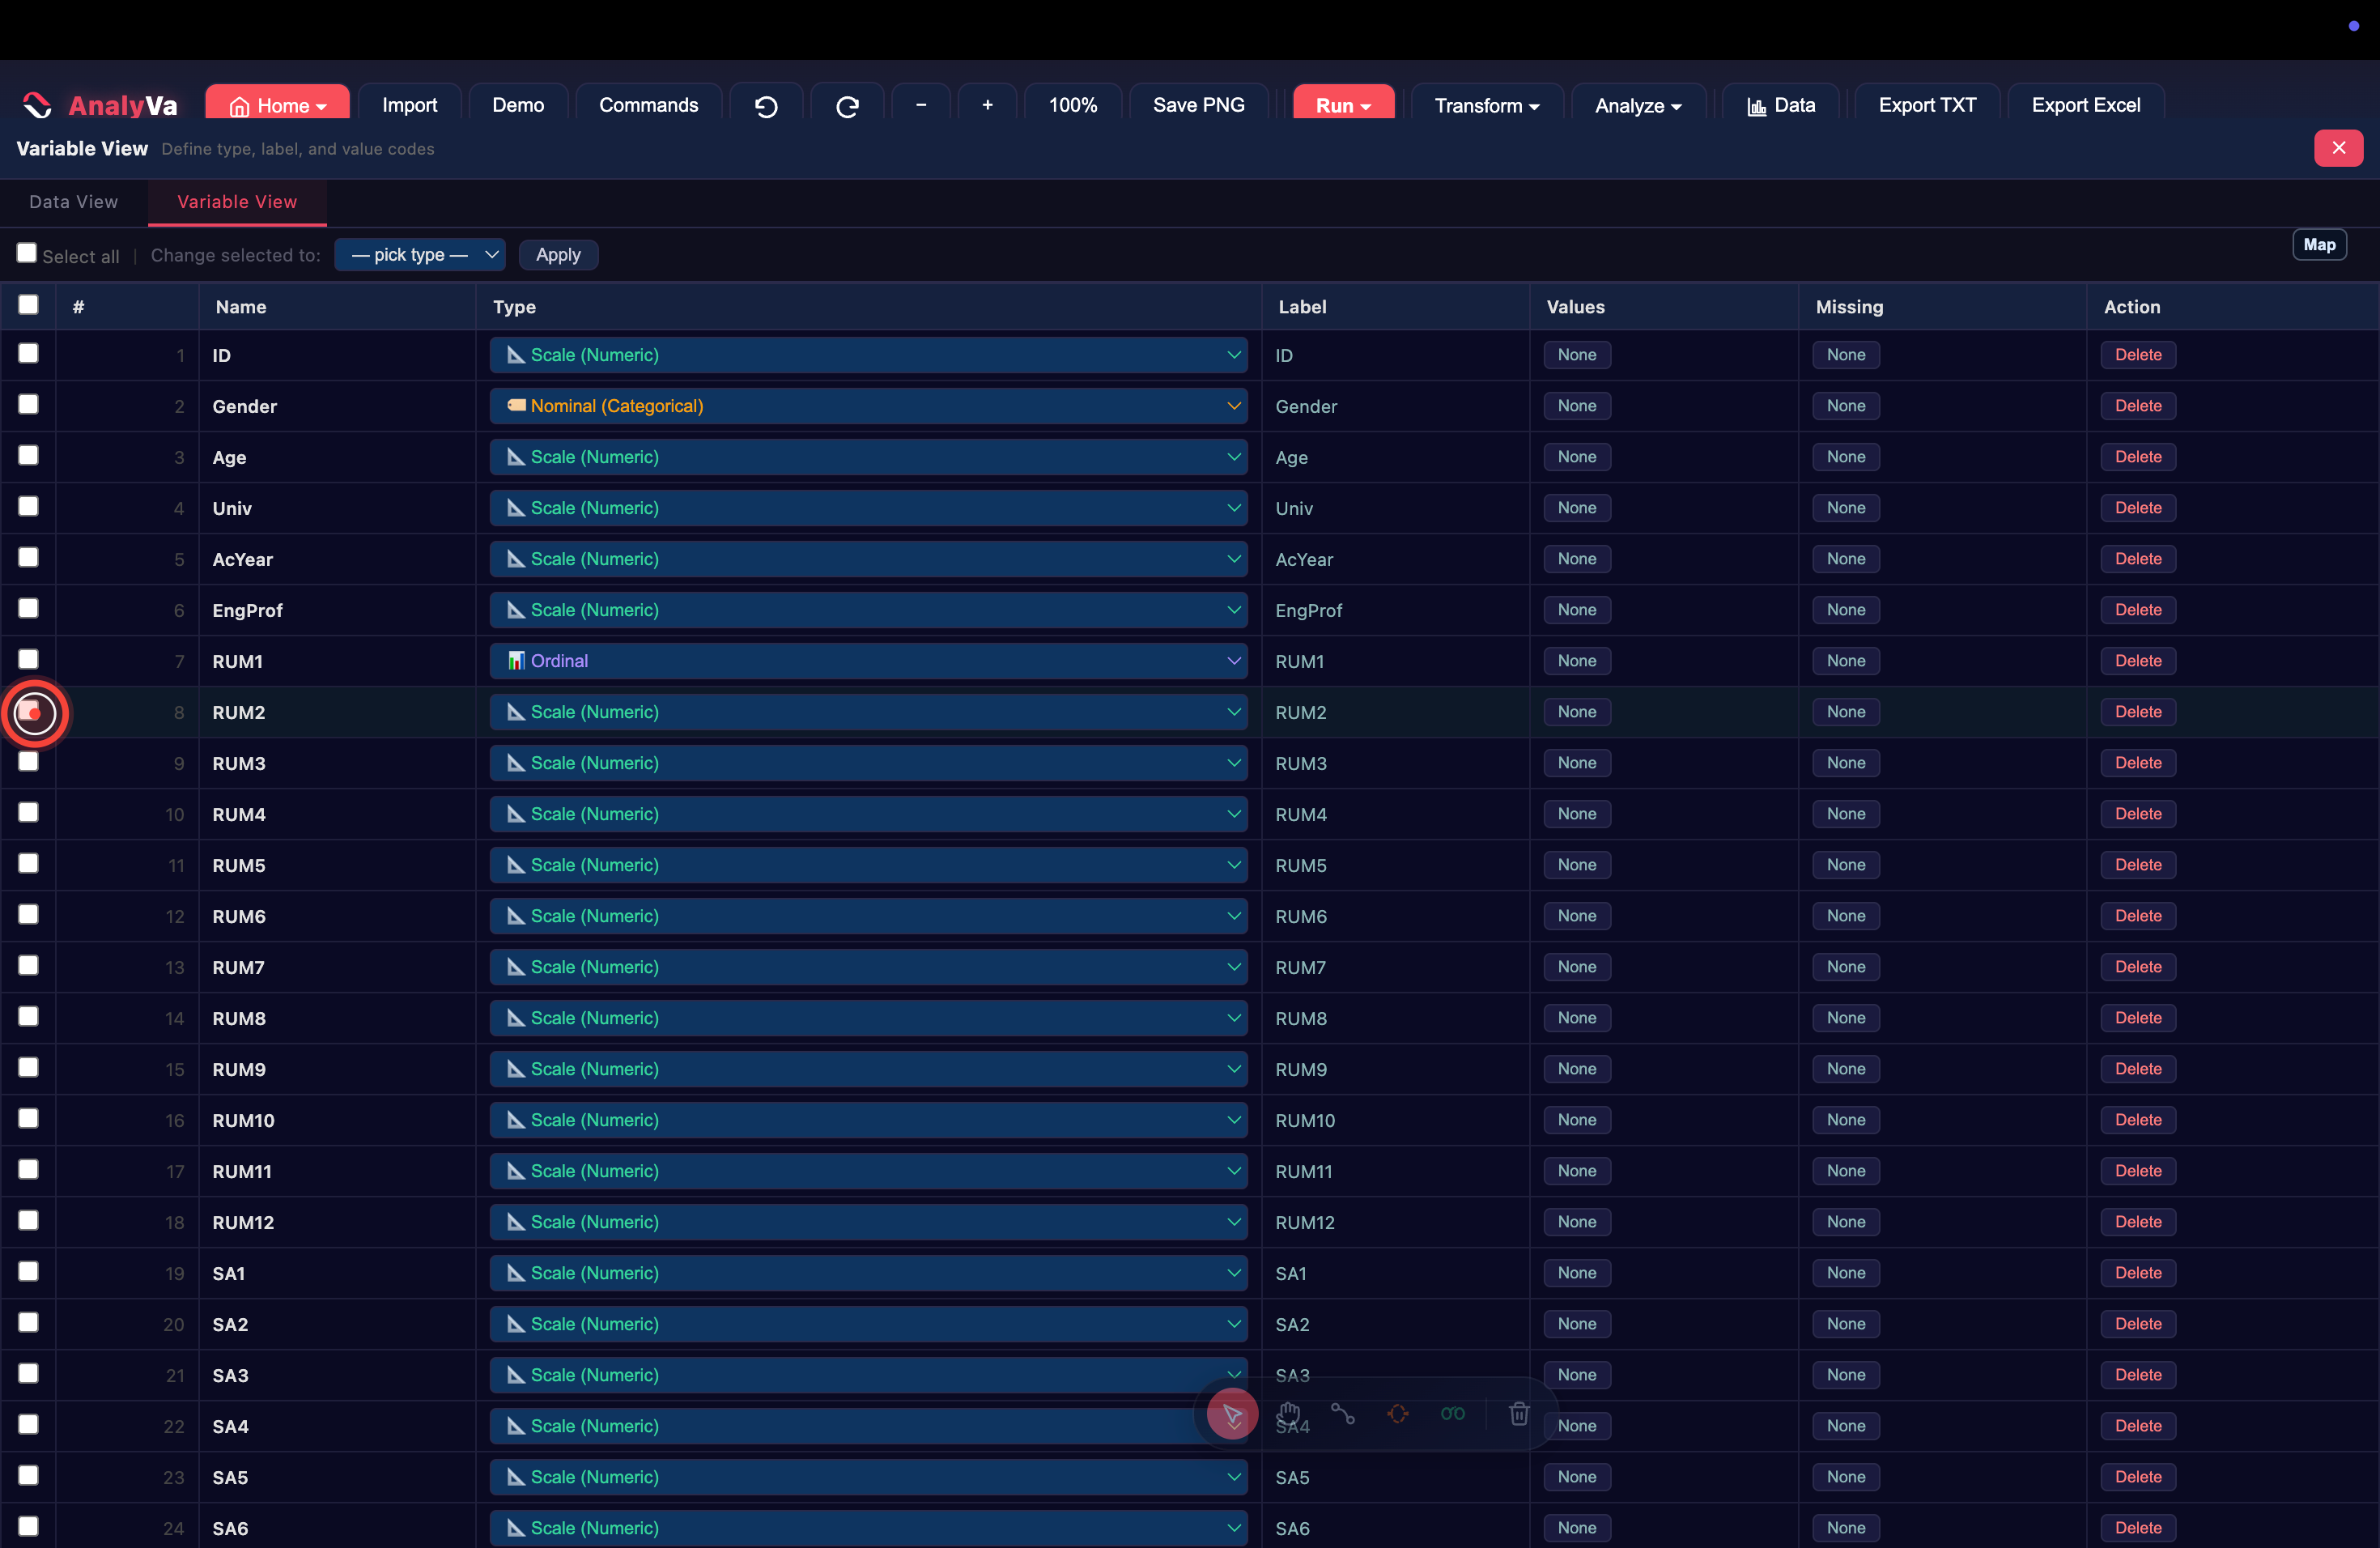
Step 3 — Click the Type dropdown for the row you want to change. You will see three options: Scale (Numeric), Nominal (Categorical), and Ordinal.
Step 4 — Pick the appropriate type. As a quick reminder:
- Scale — interval or ratio (age in years, income, exam score).
- Nominal — unordered categories (gender, country, brand).
- Ordinal — ordered categories with unequal spacing (Likert responses 1–5, education level).
Most survey scale items are technically ordinal, but many analyses treat them as scale in practice. Pick the type that matches the analysis you plan to run.
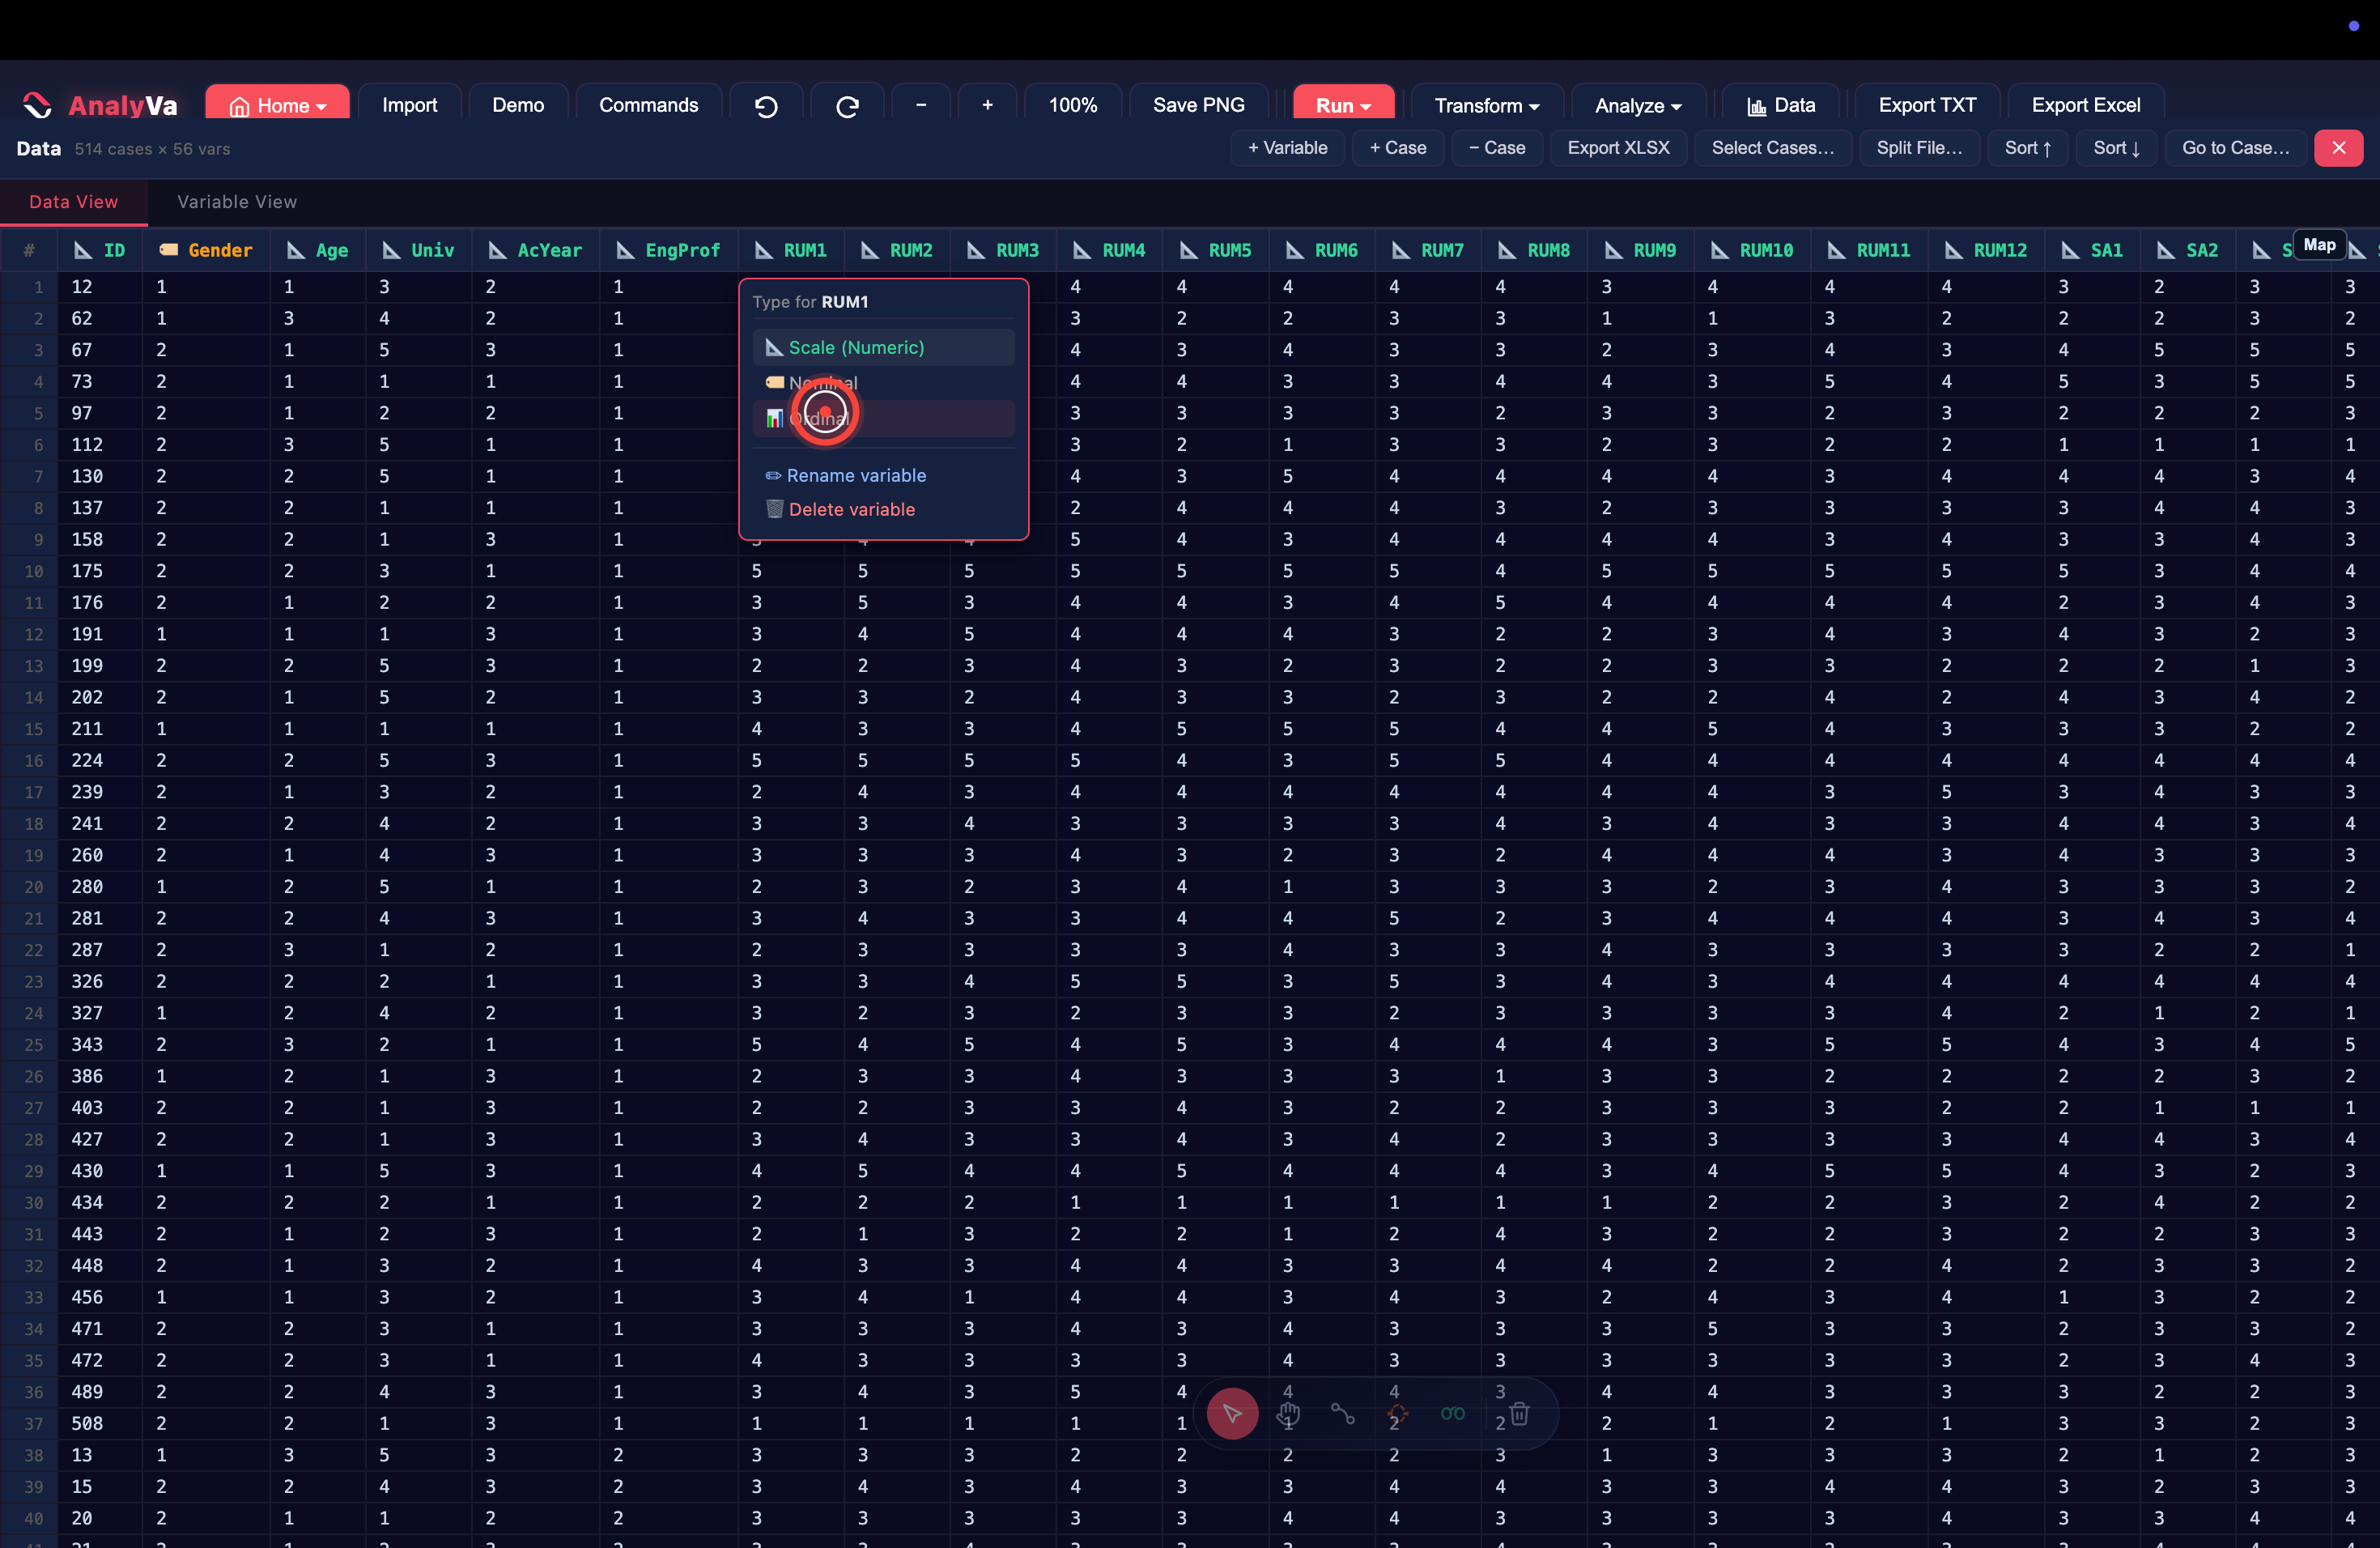
Step 5 — The change is instant. No Save button, no confirmation dialog. AnalyVa applies the type change immediately.
Step 6 — Sanity-check downstream. Every row shows a small type-icon on the left of the Type dropdown — scale, nominal, or ordinal. Scan the column to catch any variables still typed wrong.
Task 2 — Change the type of many variables at once
If you just imported a 60-item questionnaire, changing types one row at a time is tedious. AnalyVa has a bulk-change mode.
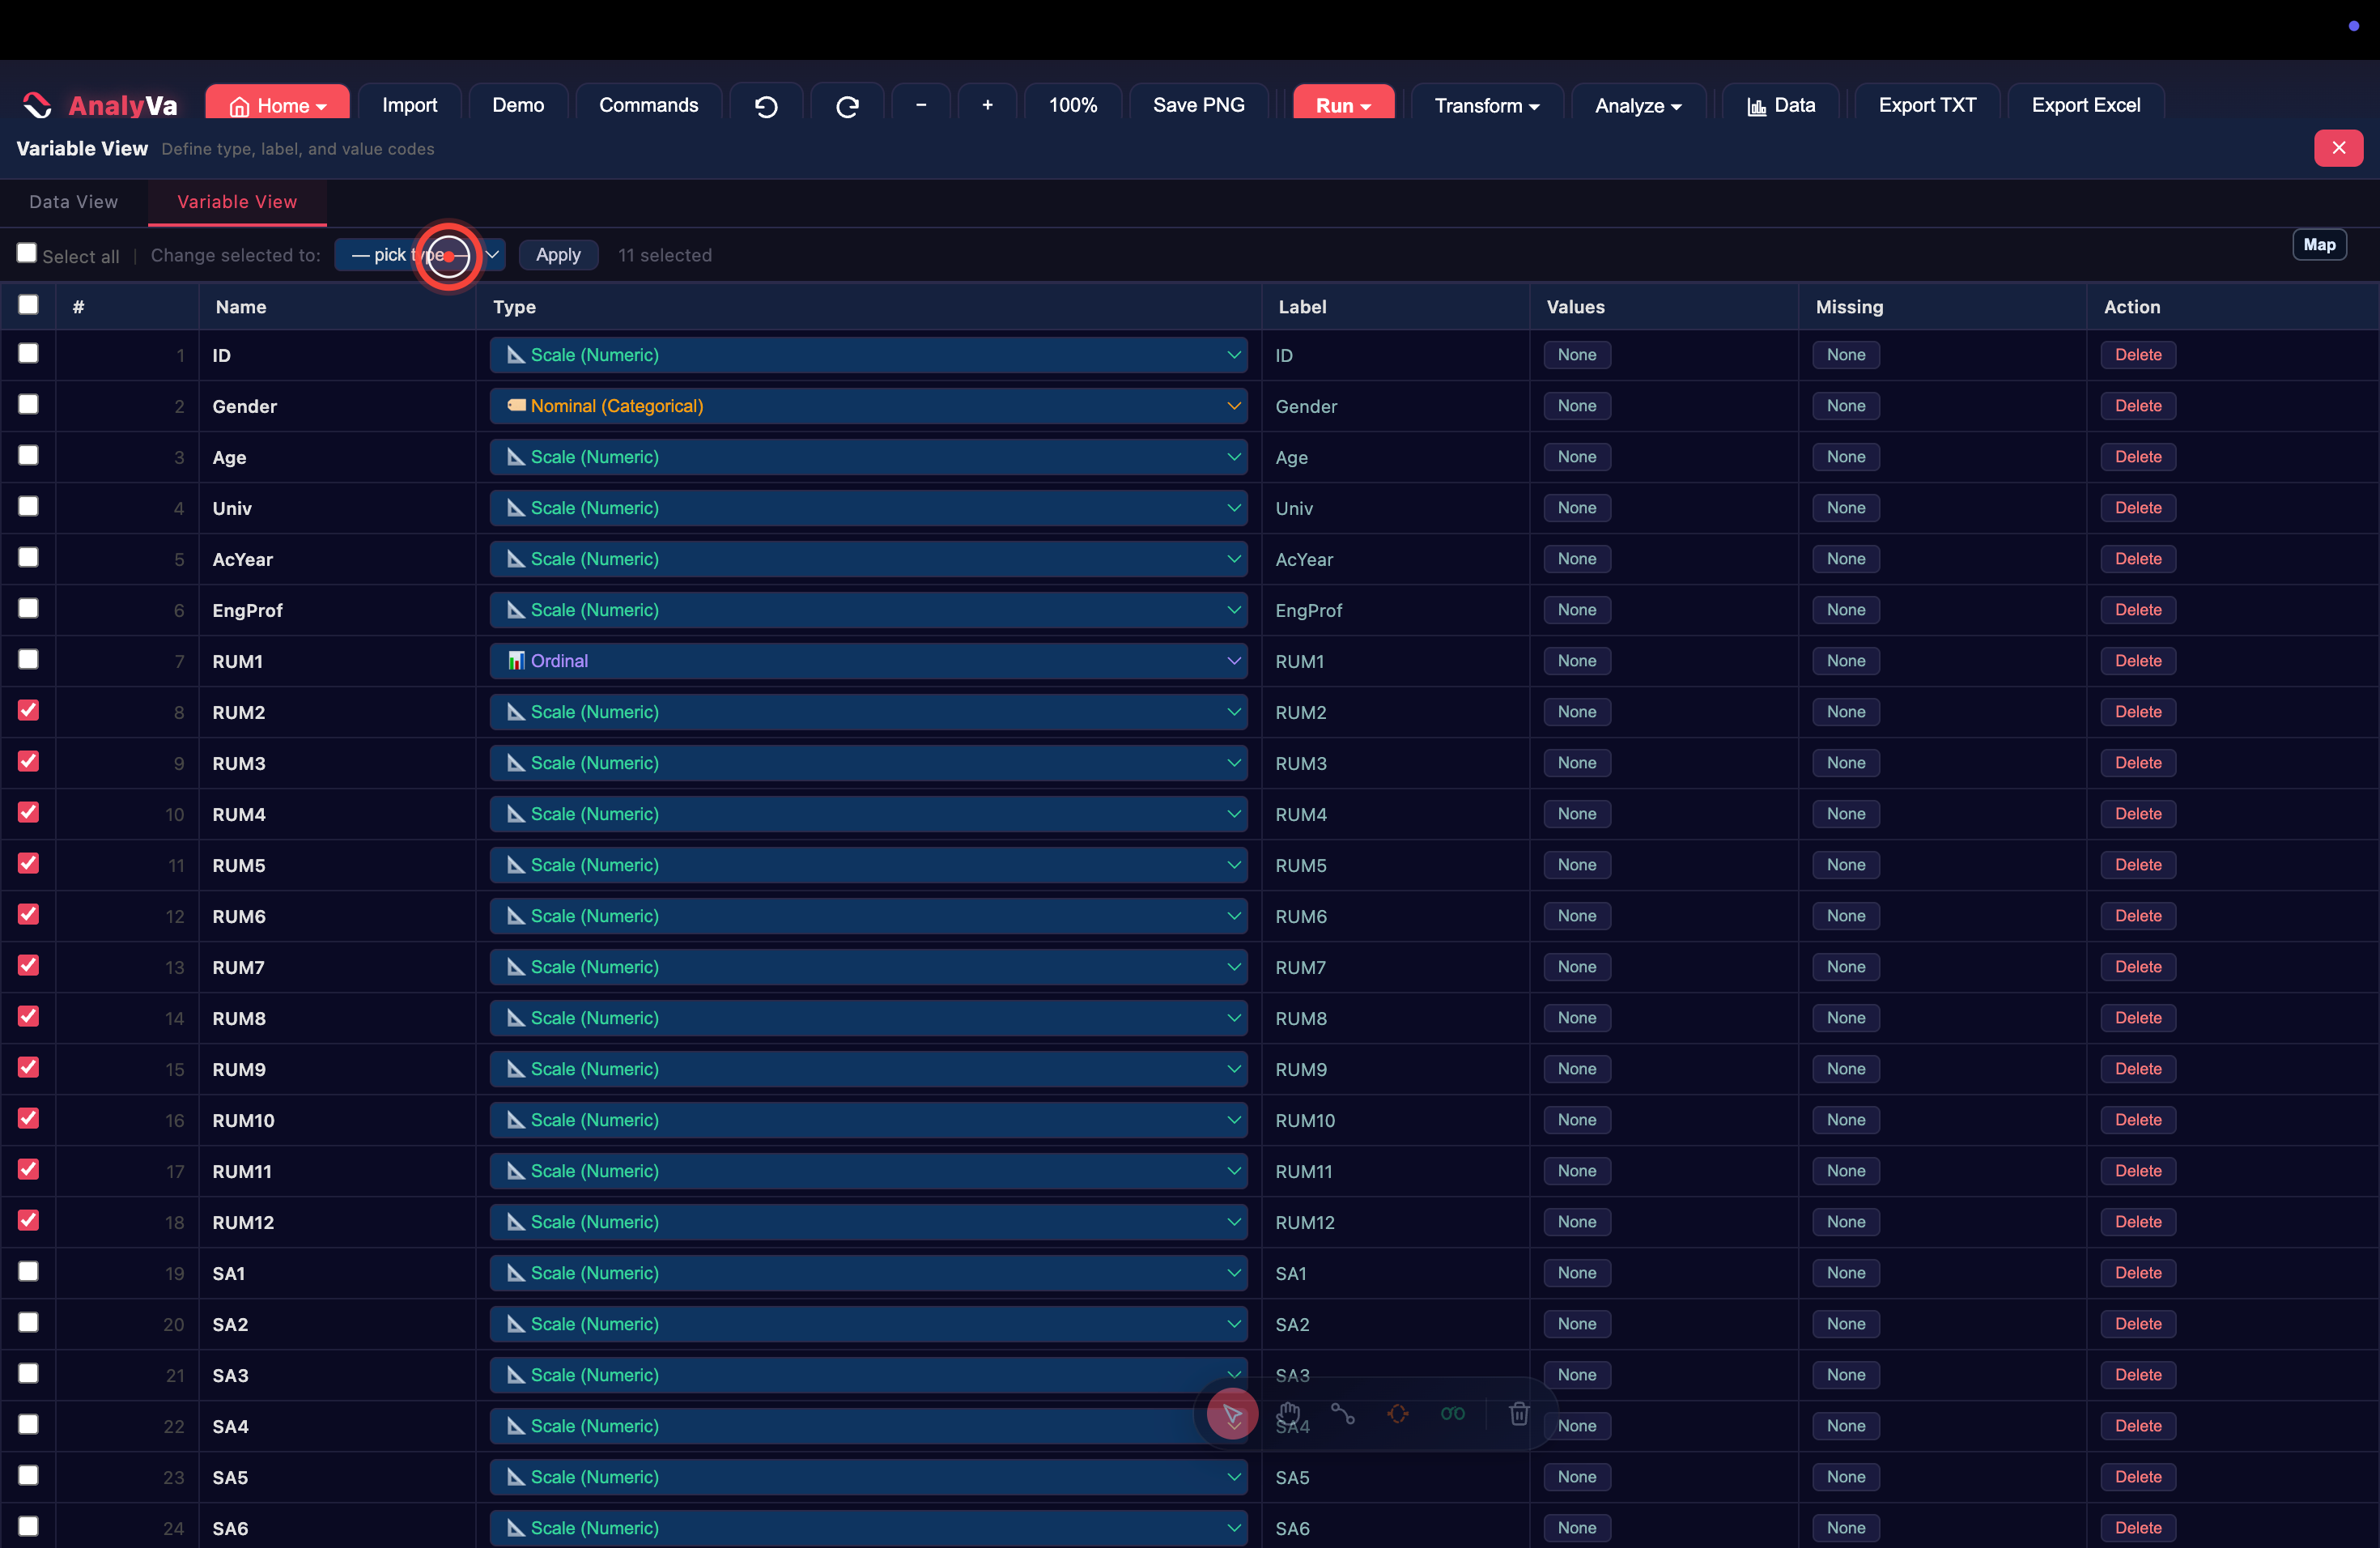
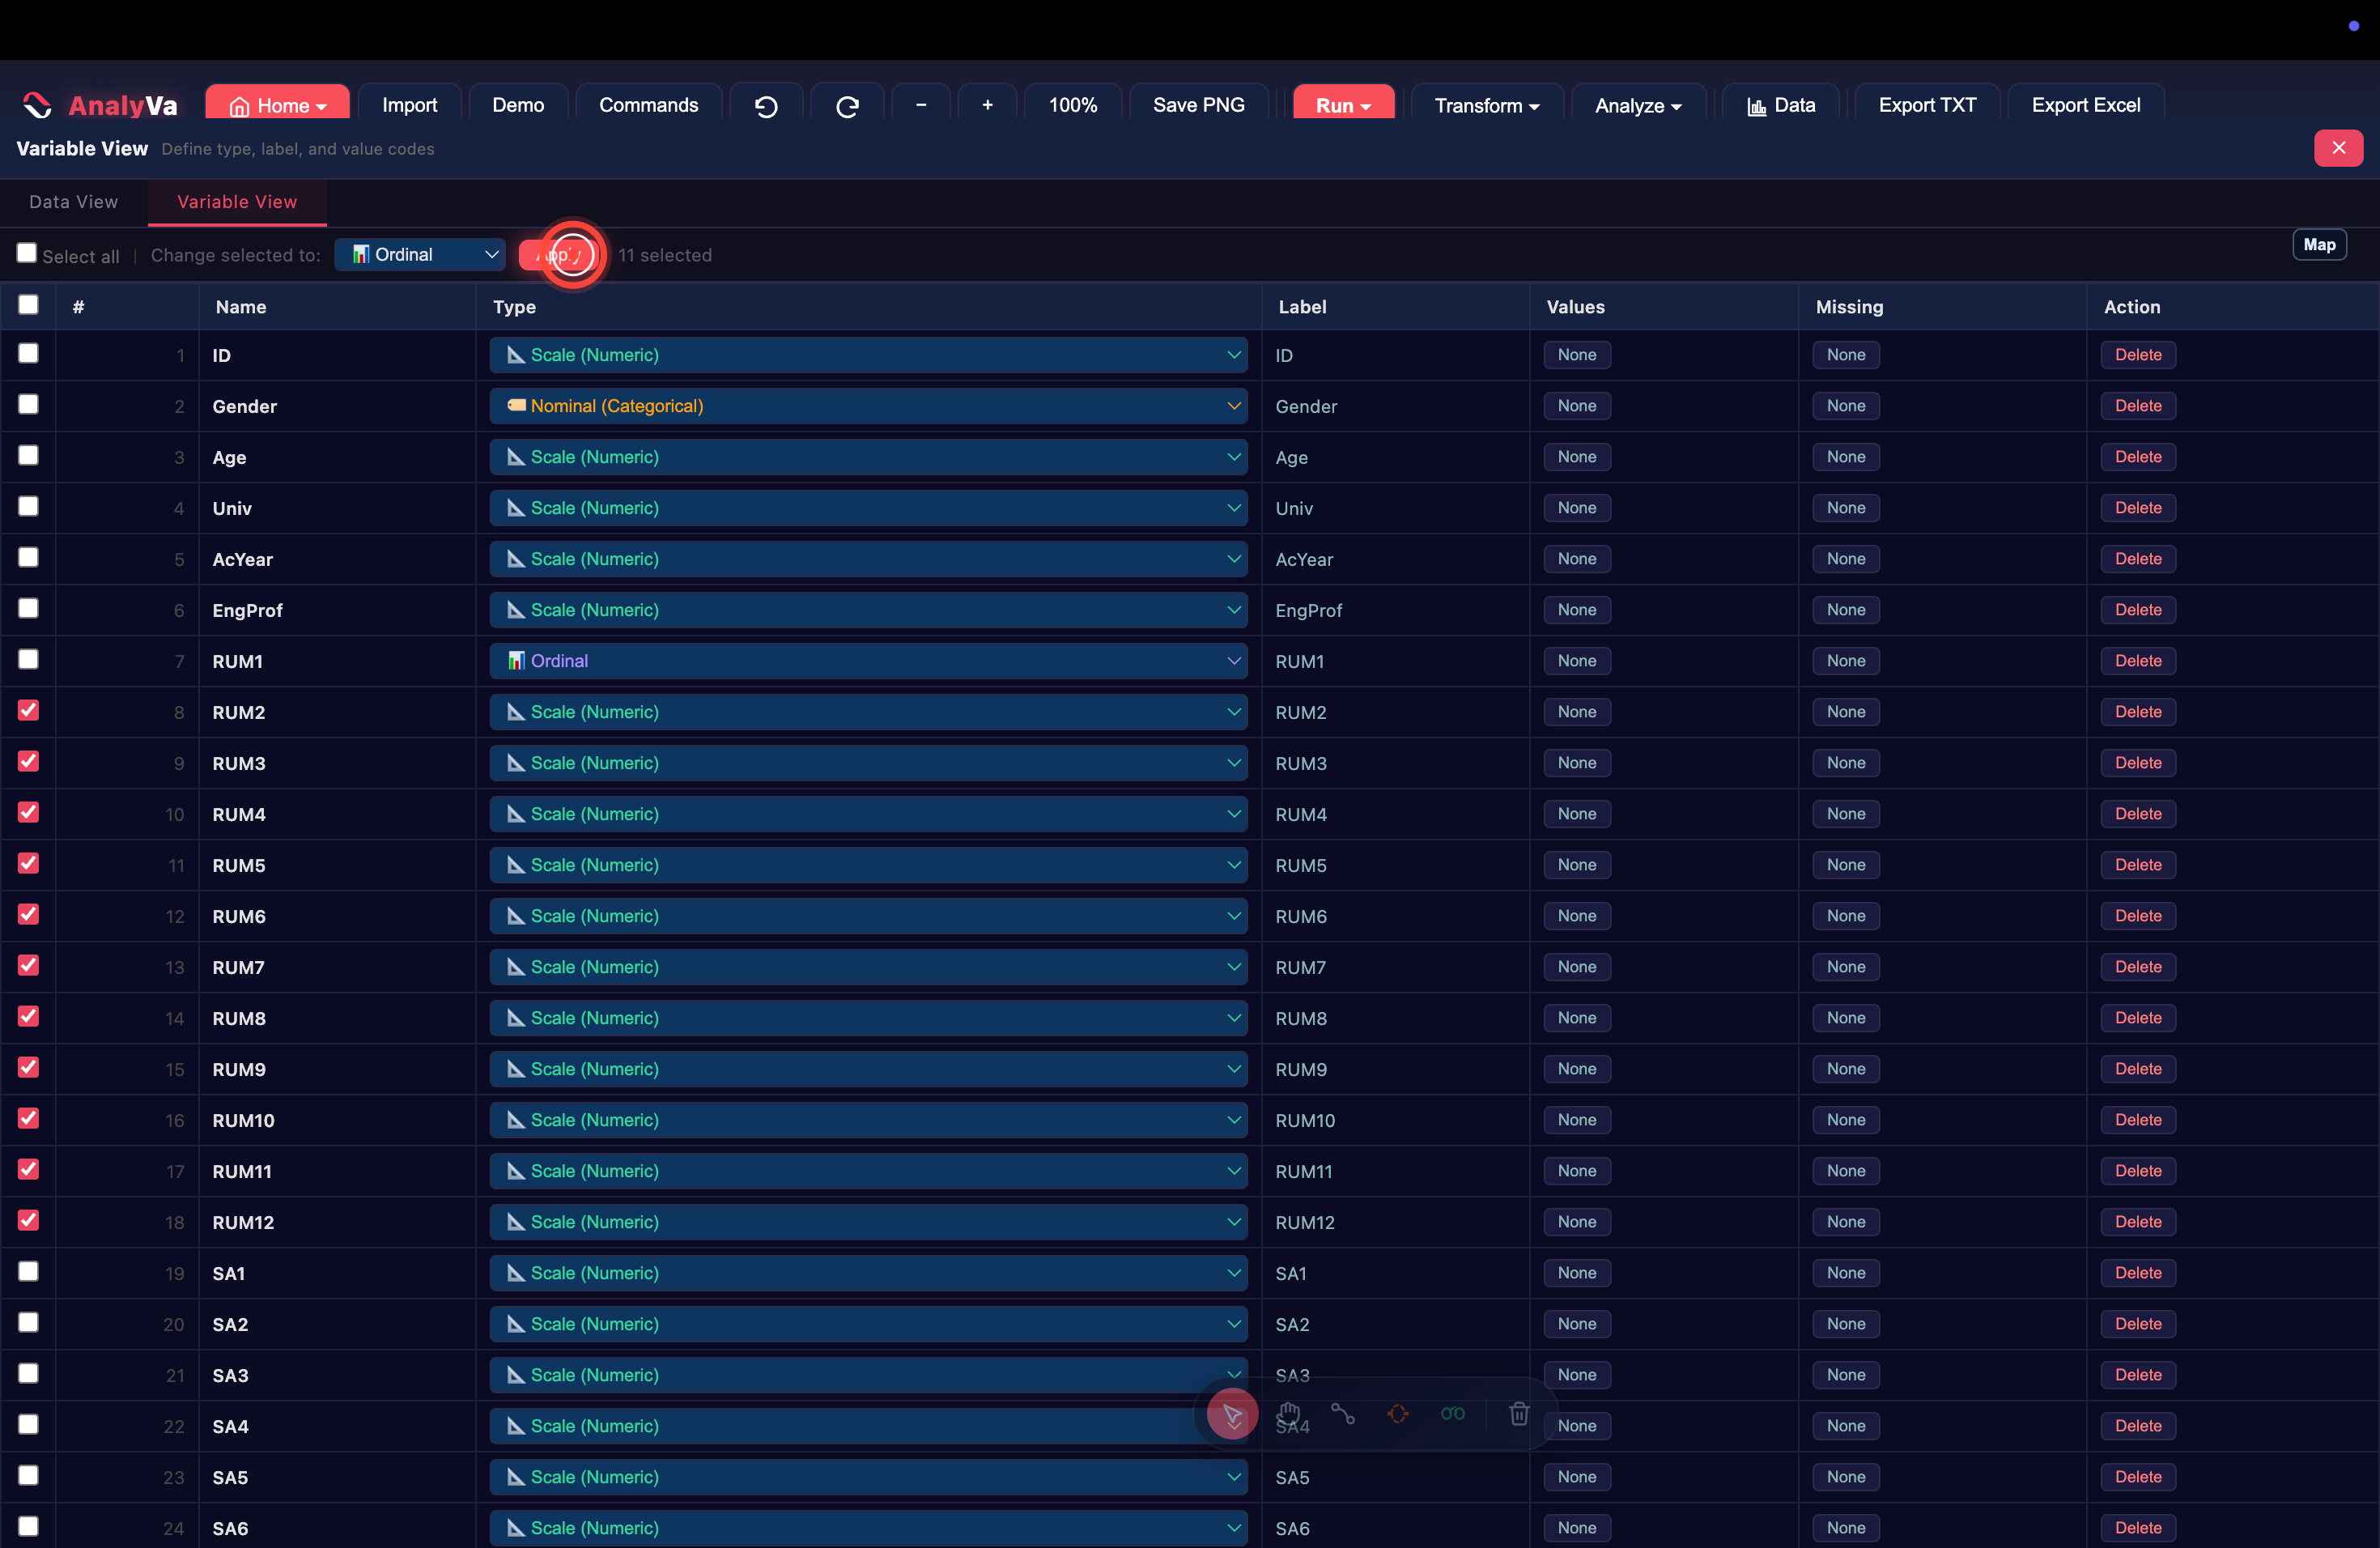
Step 7 — Tick the checkbox on each row you want to change. The leftmost column is a selection checkbox. Ticked rows highlight red.
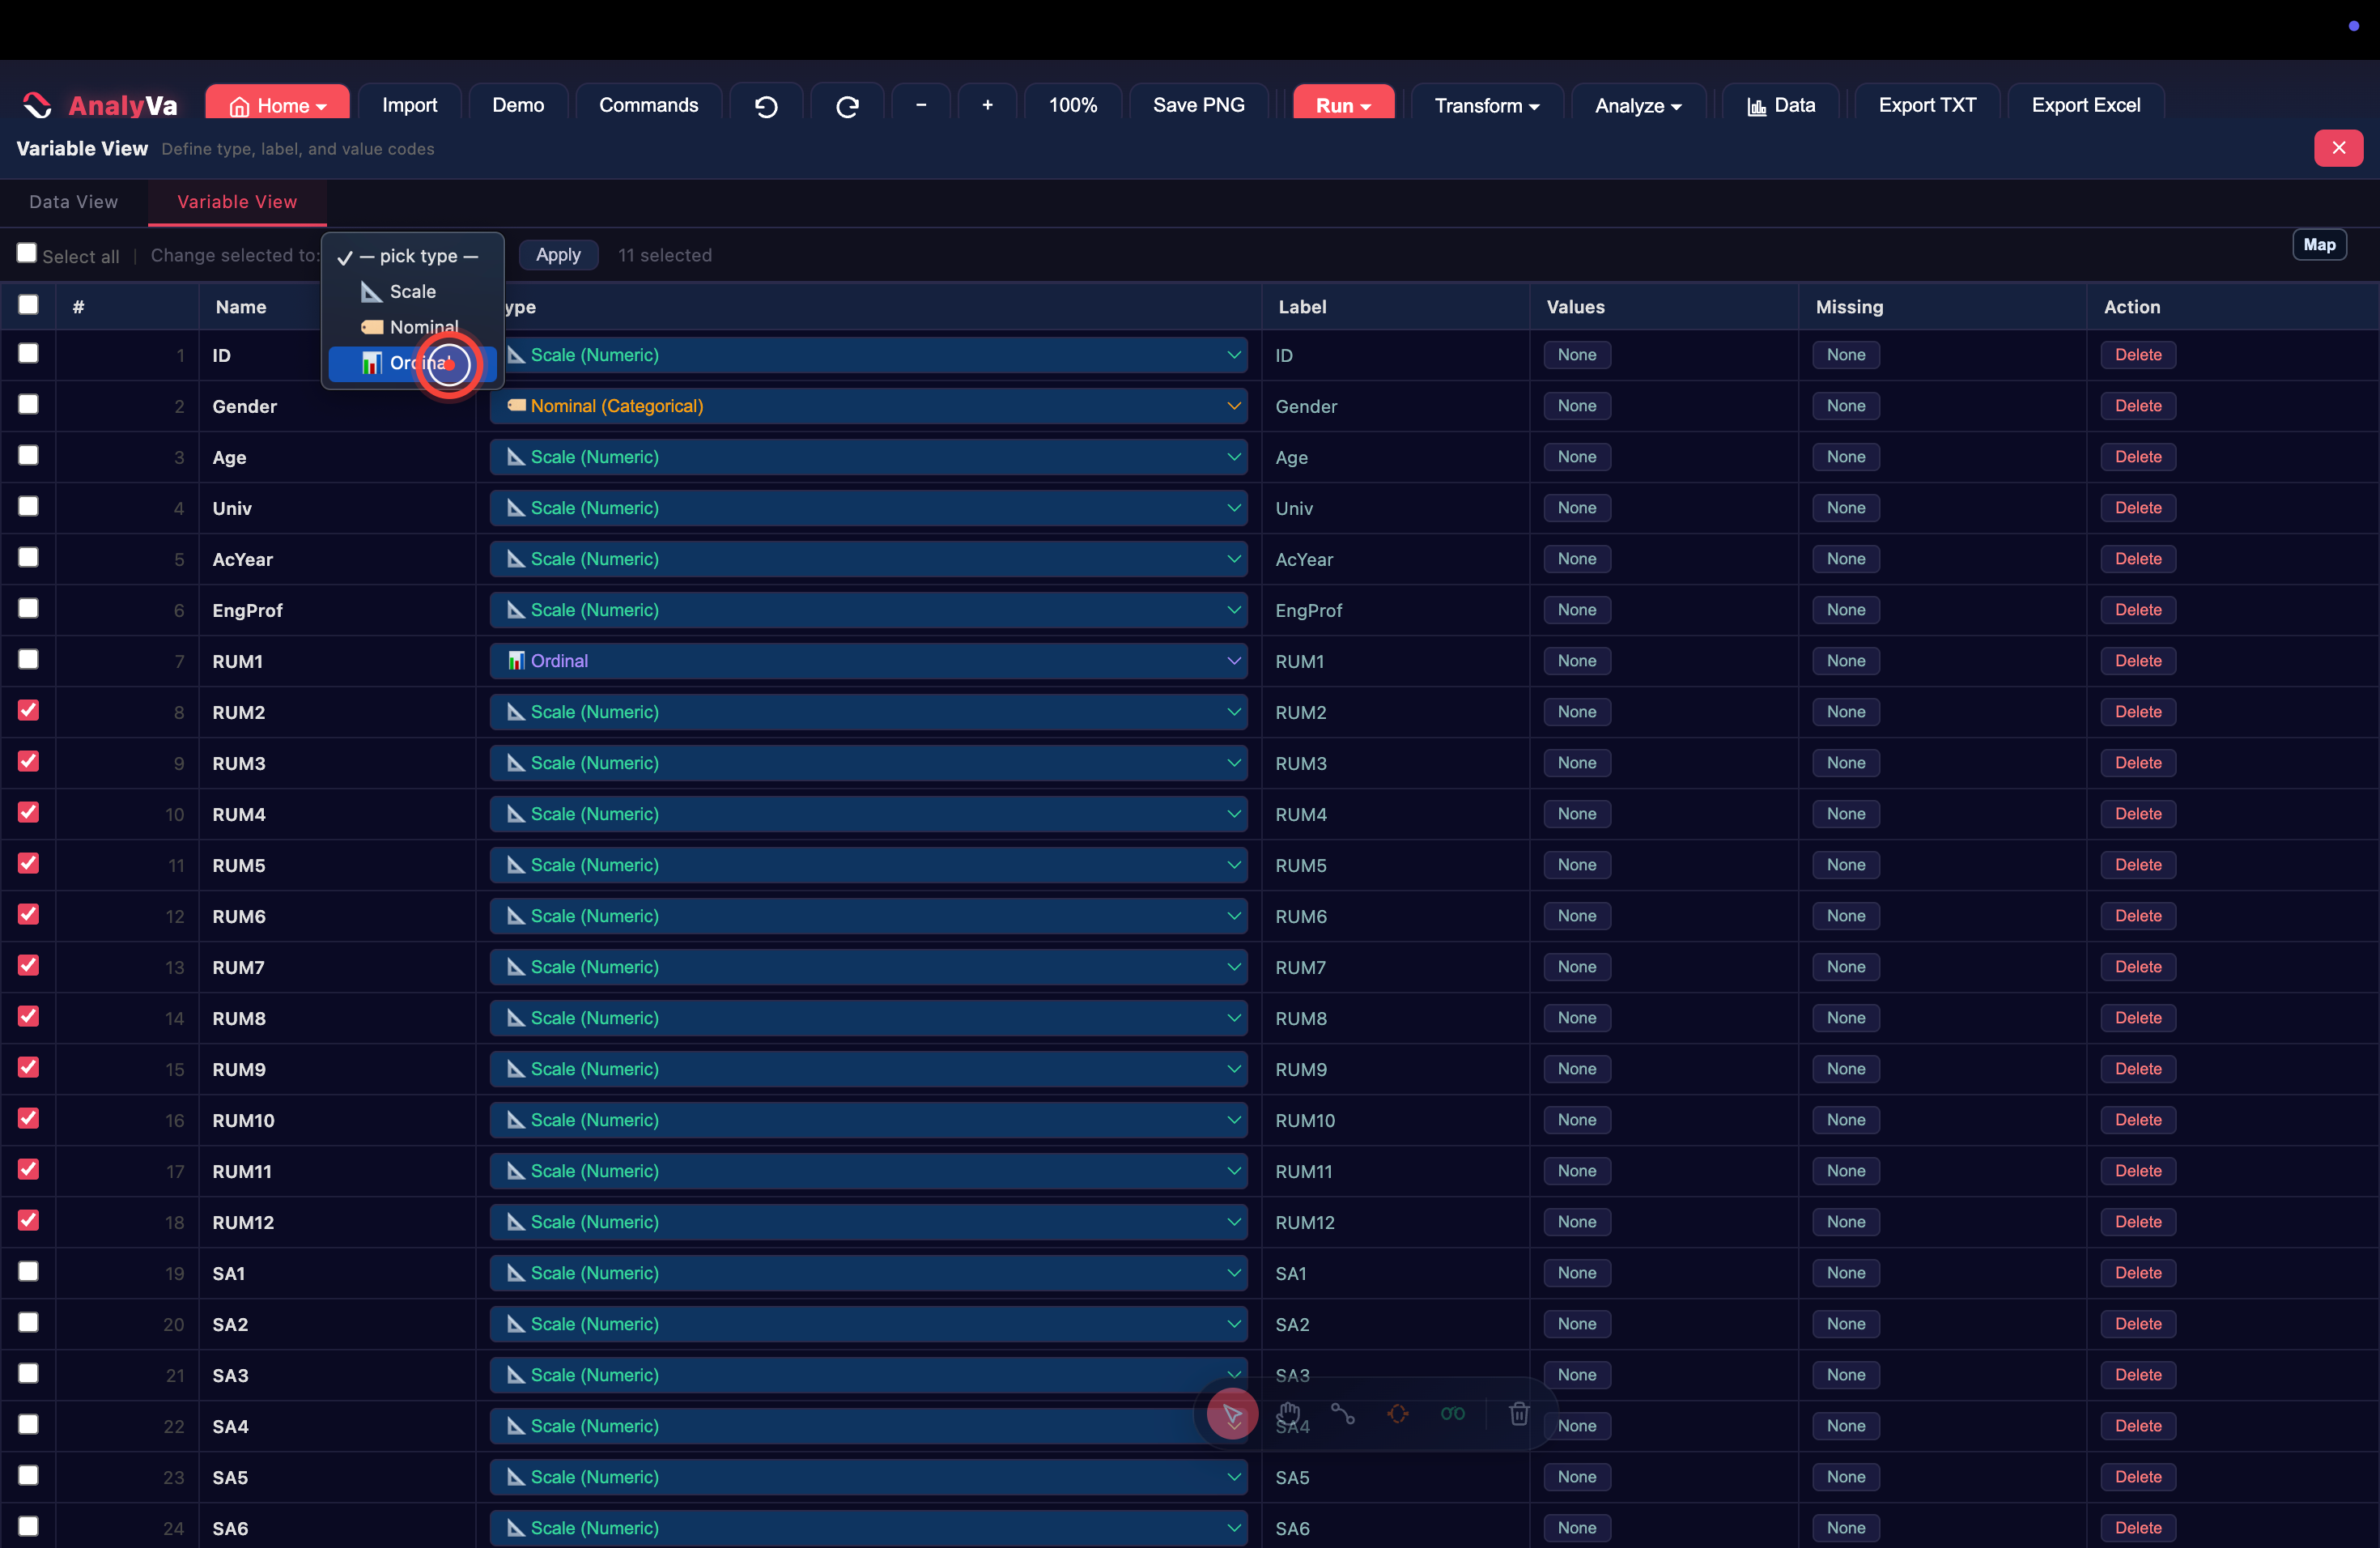
Step 8 — Pick the new type from Change selected to and click
Apply.
At the top of the Variable View, next to the Select all checkbox, a
dropdown appears with — pick type —. Choose Scale, Nominal, or
Ordinal. A counter tells you how many rows the change will affect
(here: 11 selected). Click Apply and every selected row updates
at once.
Task 3 — Reverse-code a scale
Well-designed questionnaires often include negatively-worded items
to catch inattentive respondents. Before analysing the scale, those
items must be reverse-coded — a 5 on a 5-point Likert flips to 1,
a 4 flips to 2, and so on.
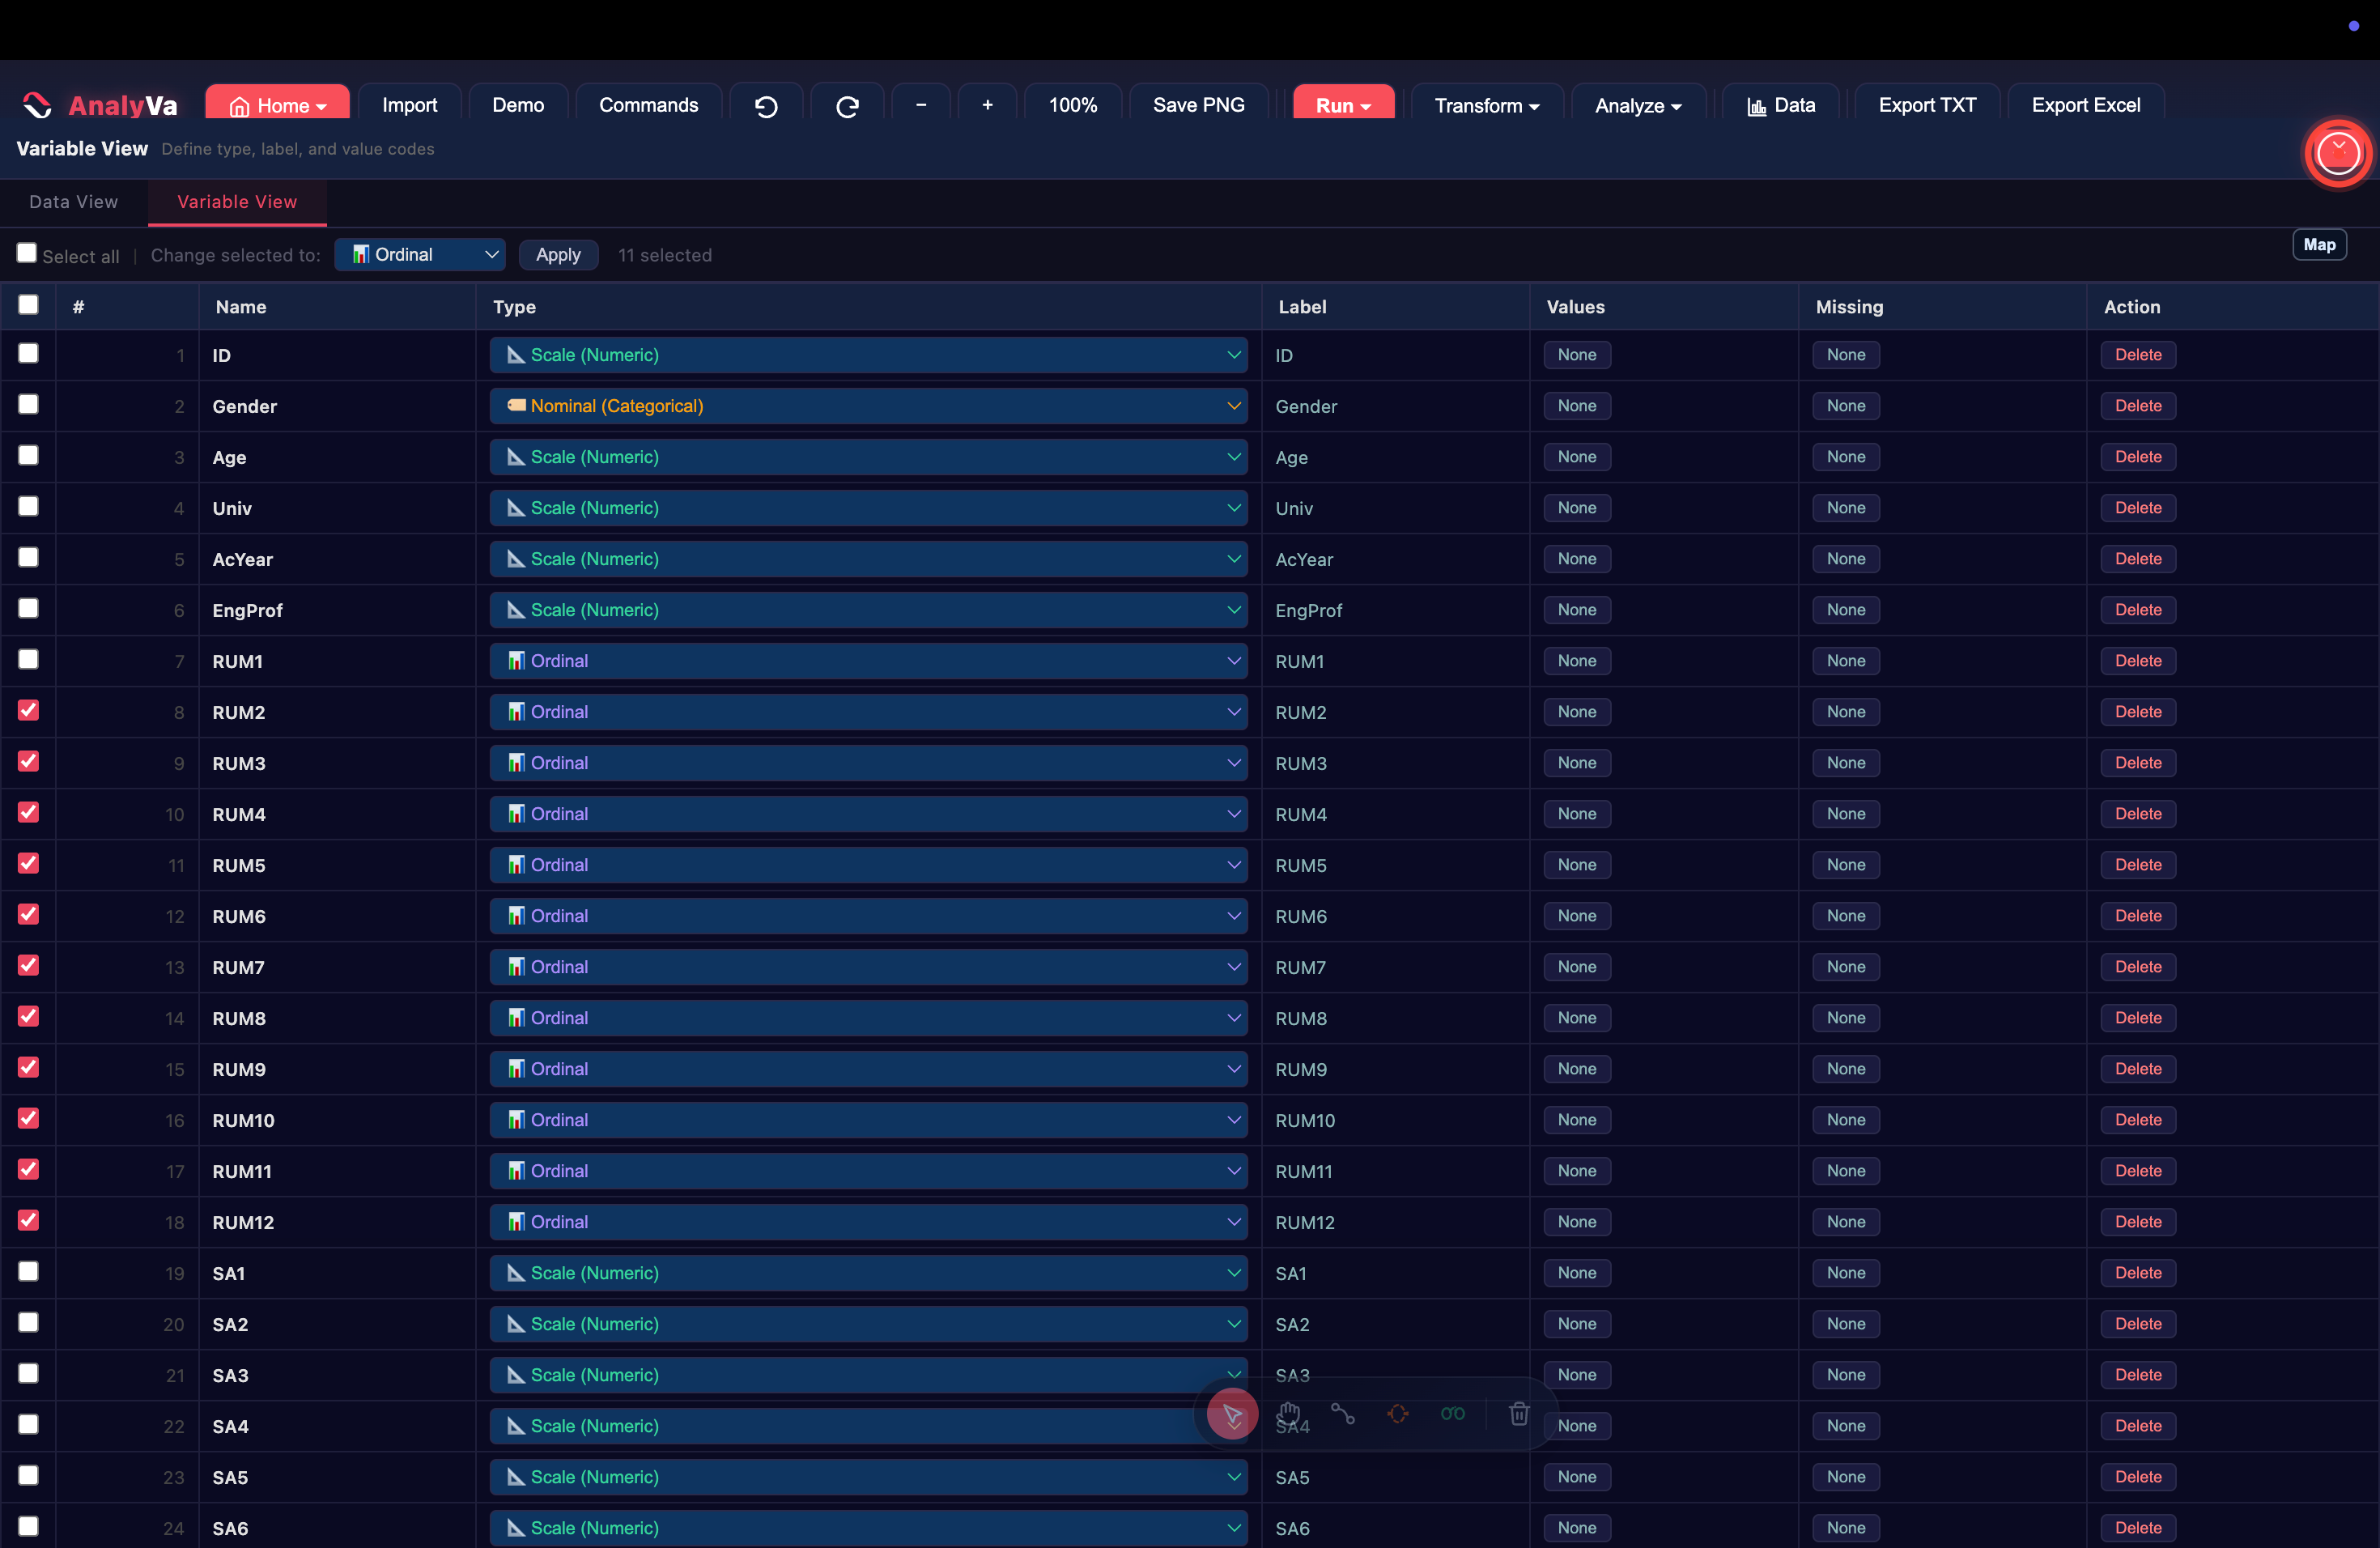
Step 9 — Confirm the recoding applied. The header shows a confirmation like “11 variables set to ordinal” so you know the previous step succeeded.
Step 10 — Return to the main workspace. Close the Data view or press Esc. The sidebar now shows every variable in the dataset.
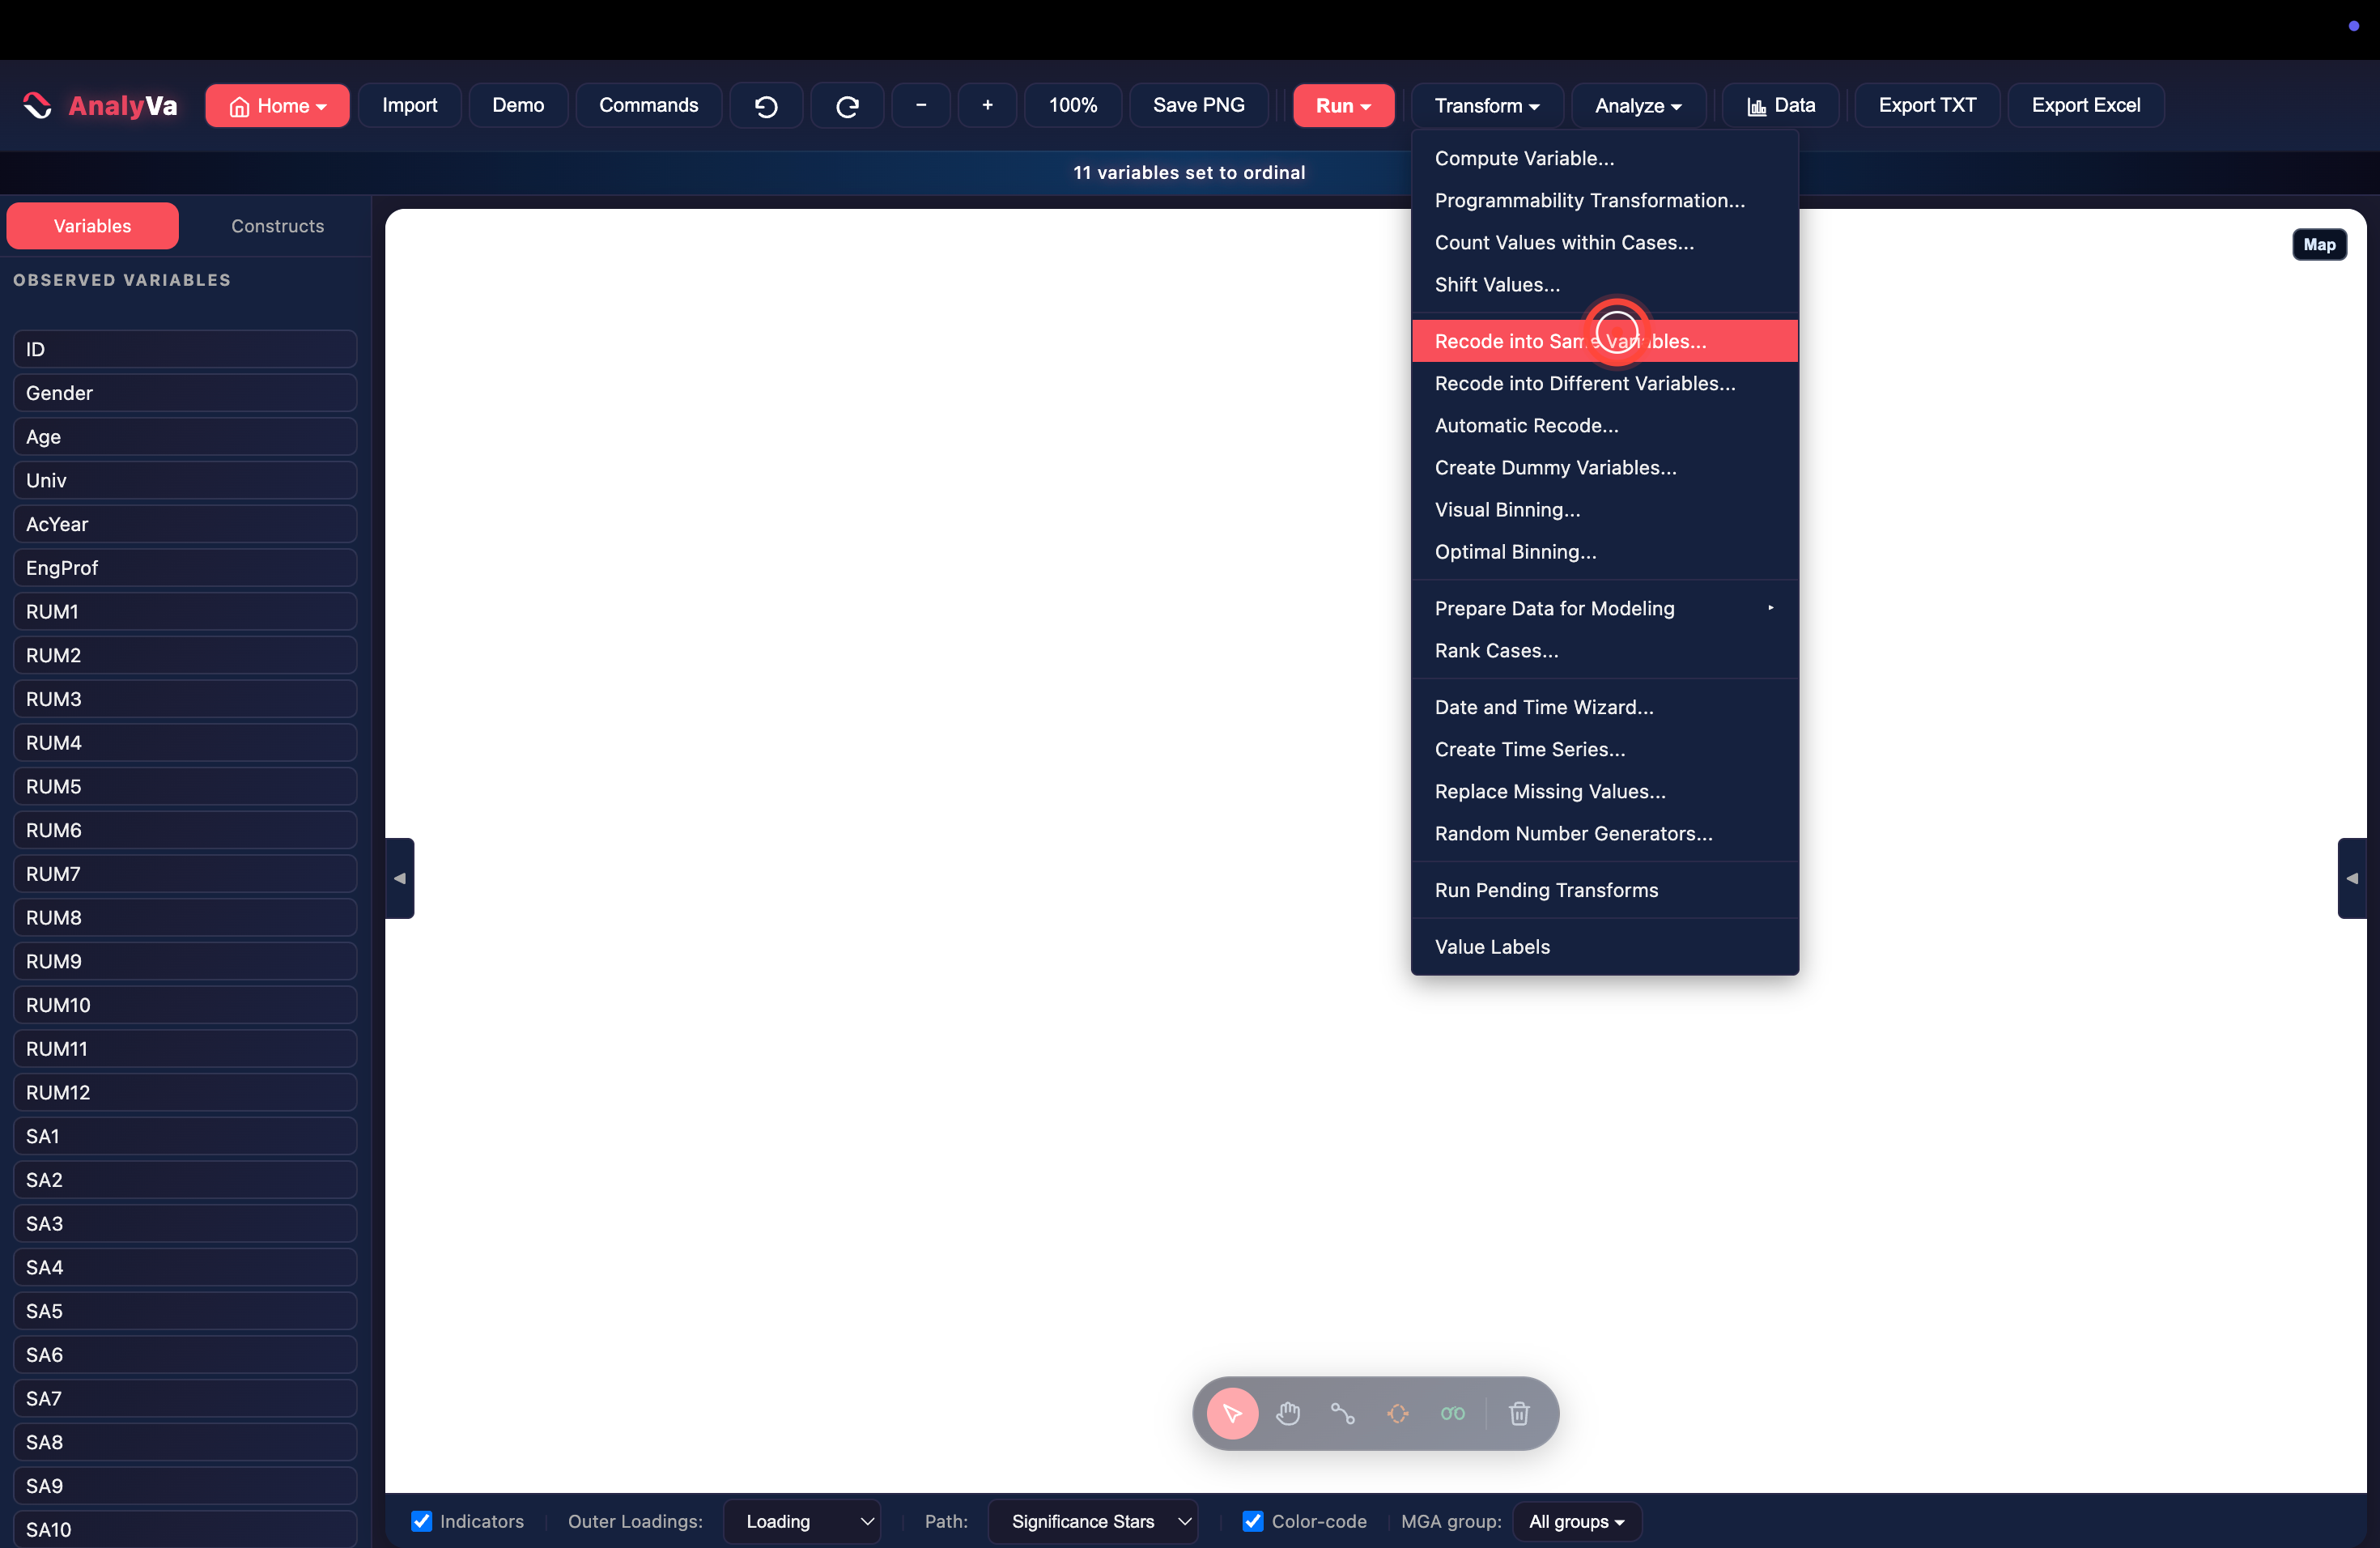
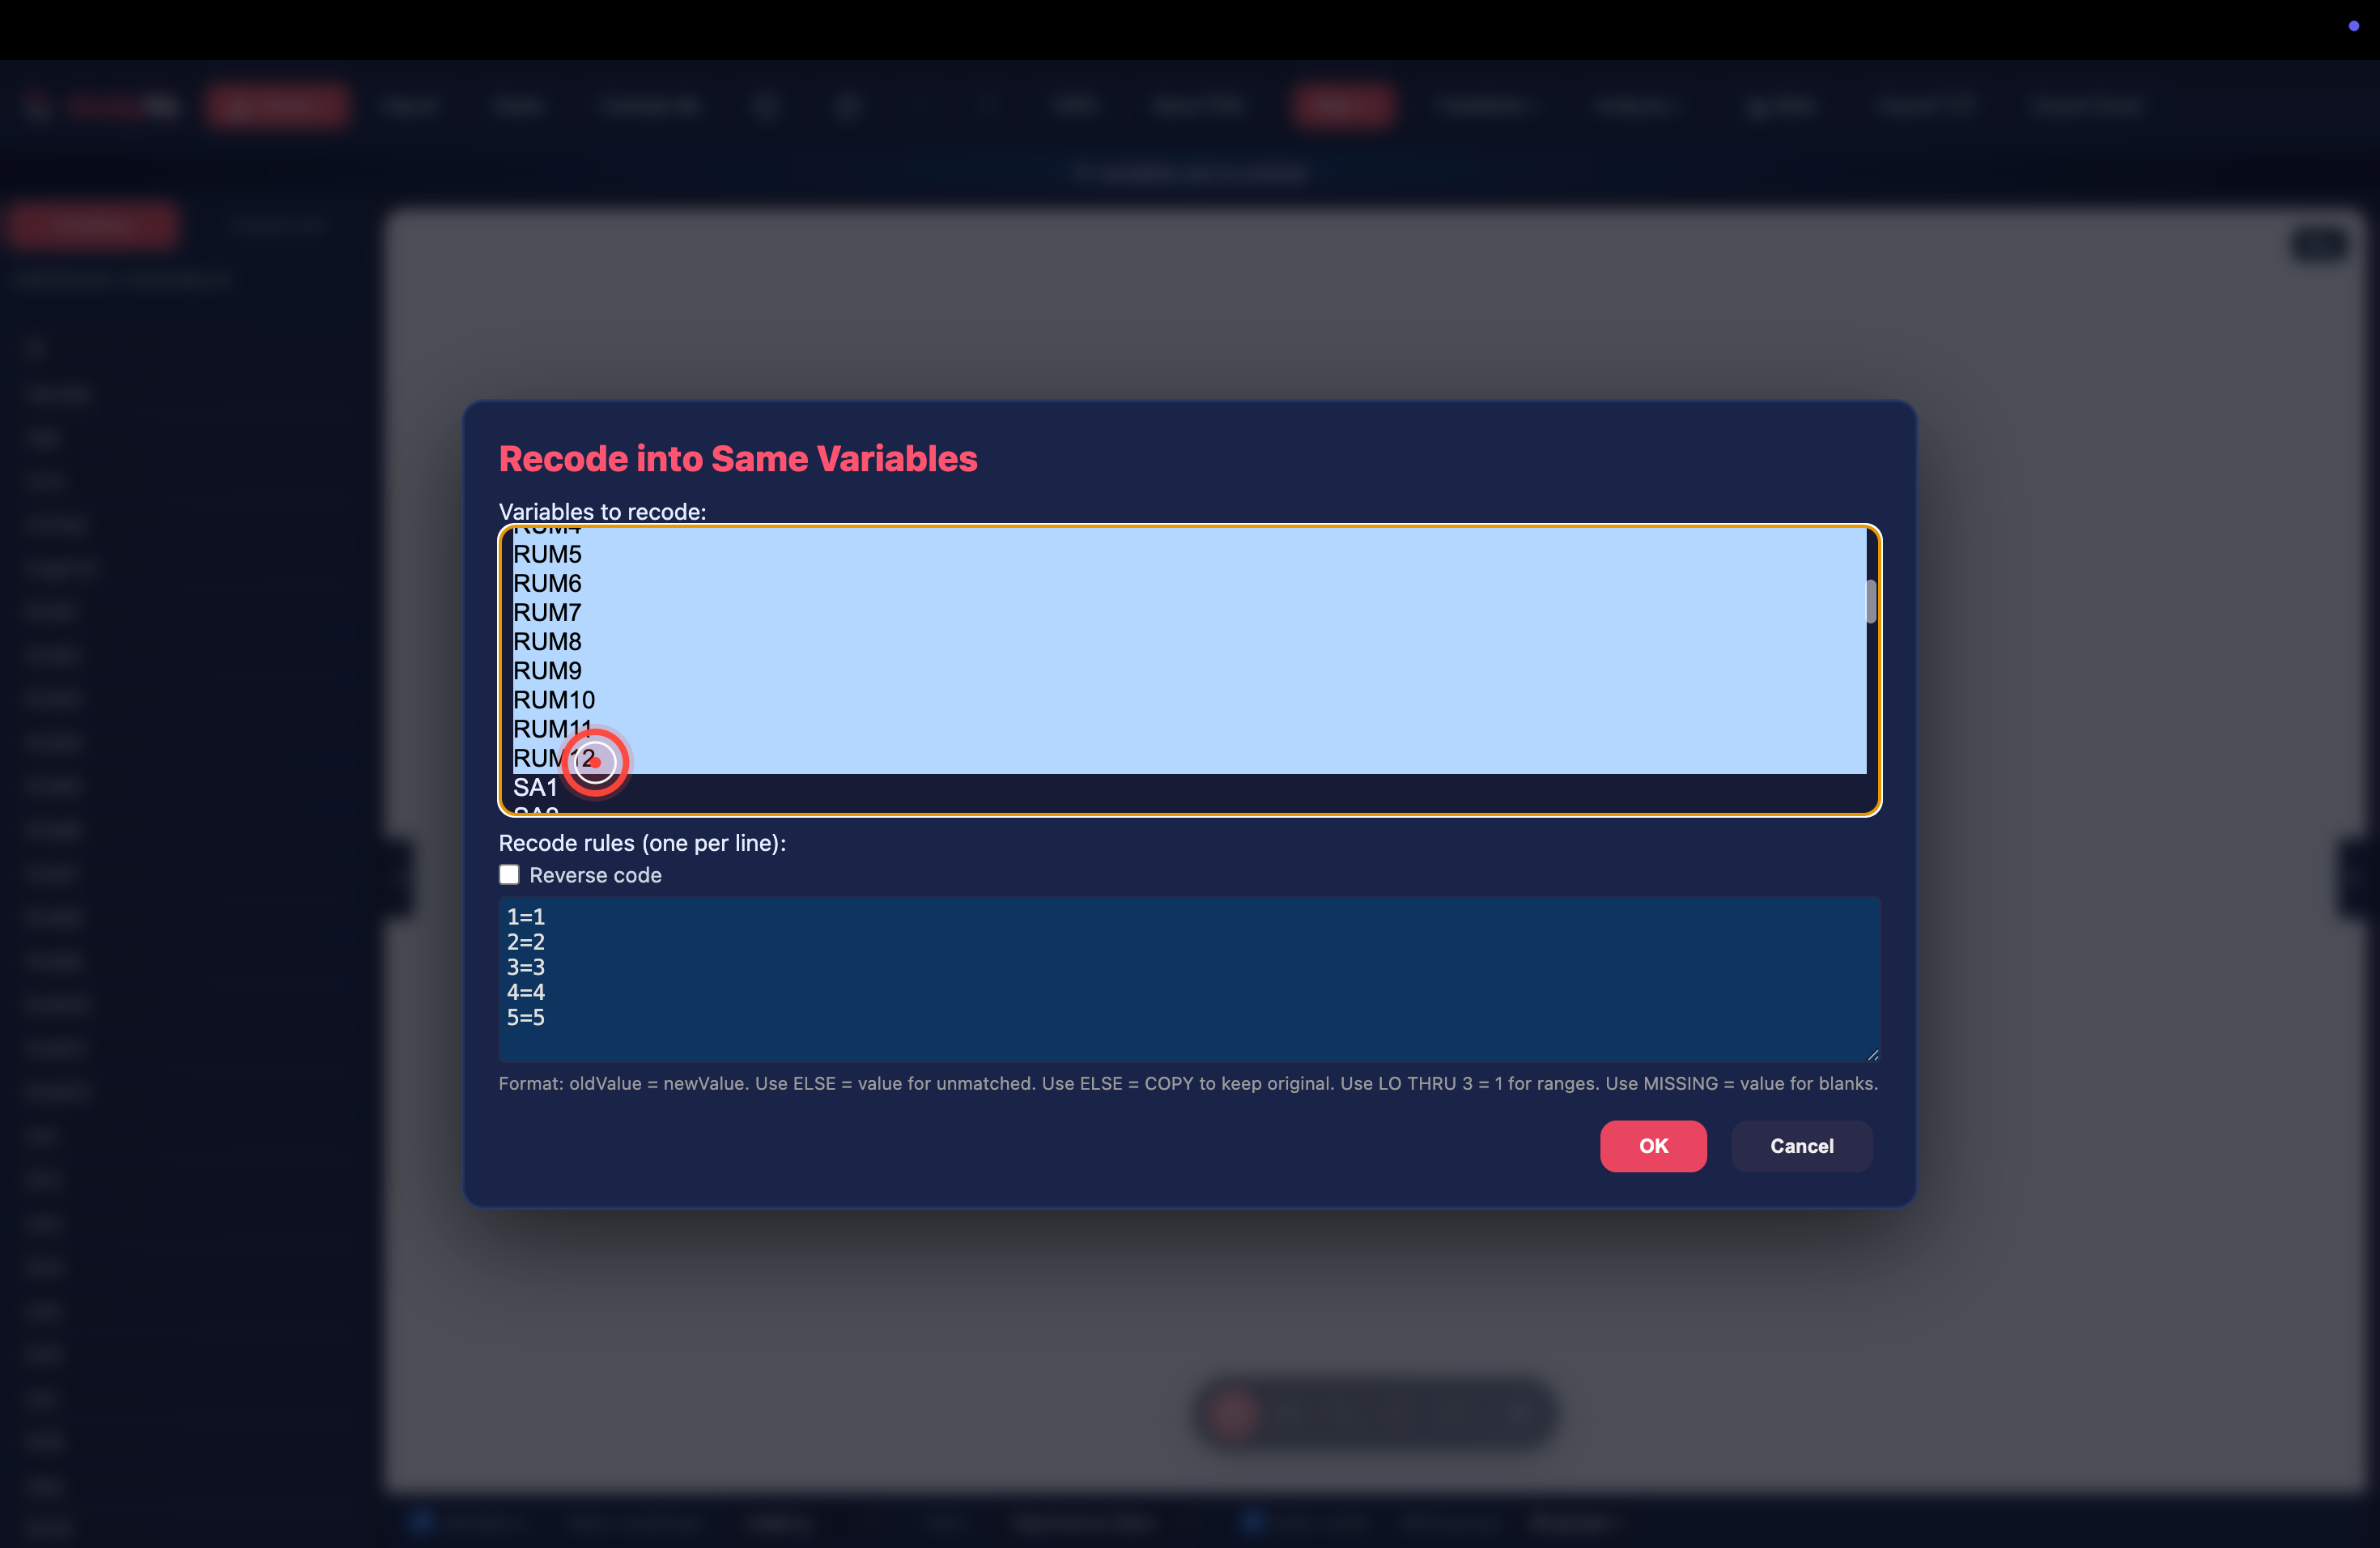
Step 11 — Open Transform → Recode into Same Variables. The Transform menu at the top of the app holds every data-manipulation command. Recode into Same Variables rewrites values in place — useful for reverse-coding. Recode into Different Variables creates a new column with the recoded values — safer when you want to keep the original.
Step 12 — The Recode dialog opens. Select the variables you want to reverse-code (Cmd/Ctrl-click for multiple, or Shift-click for a range).
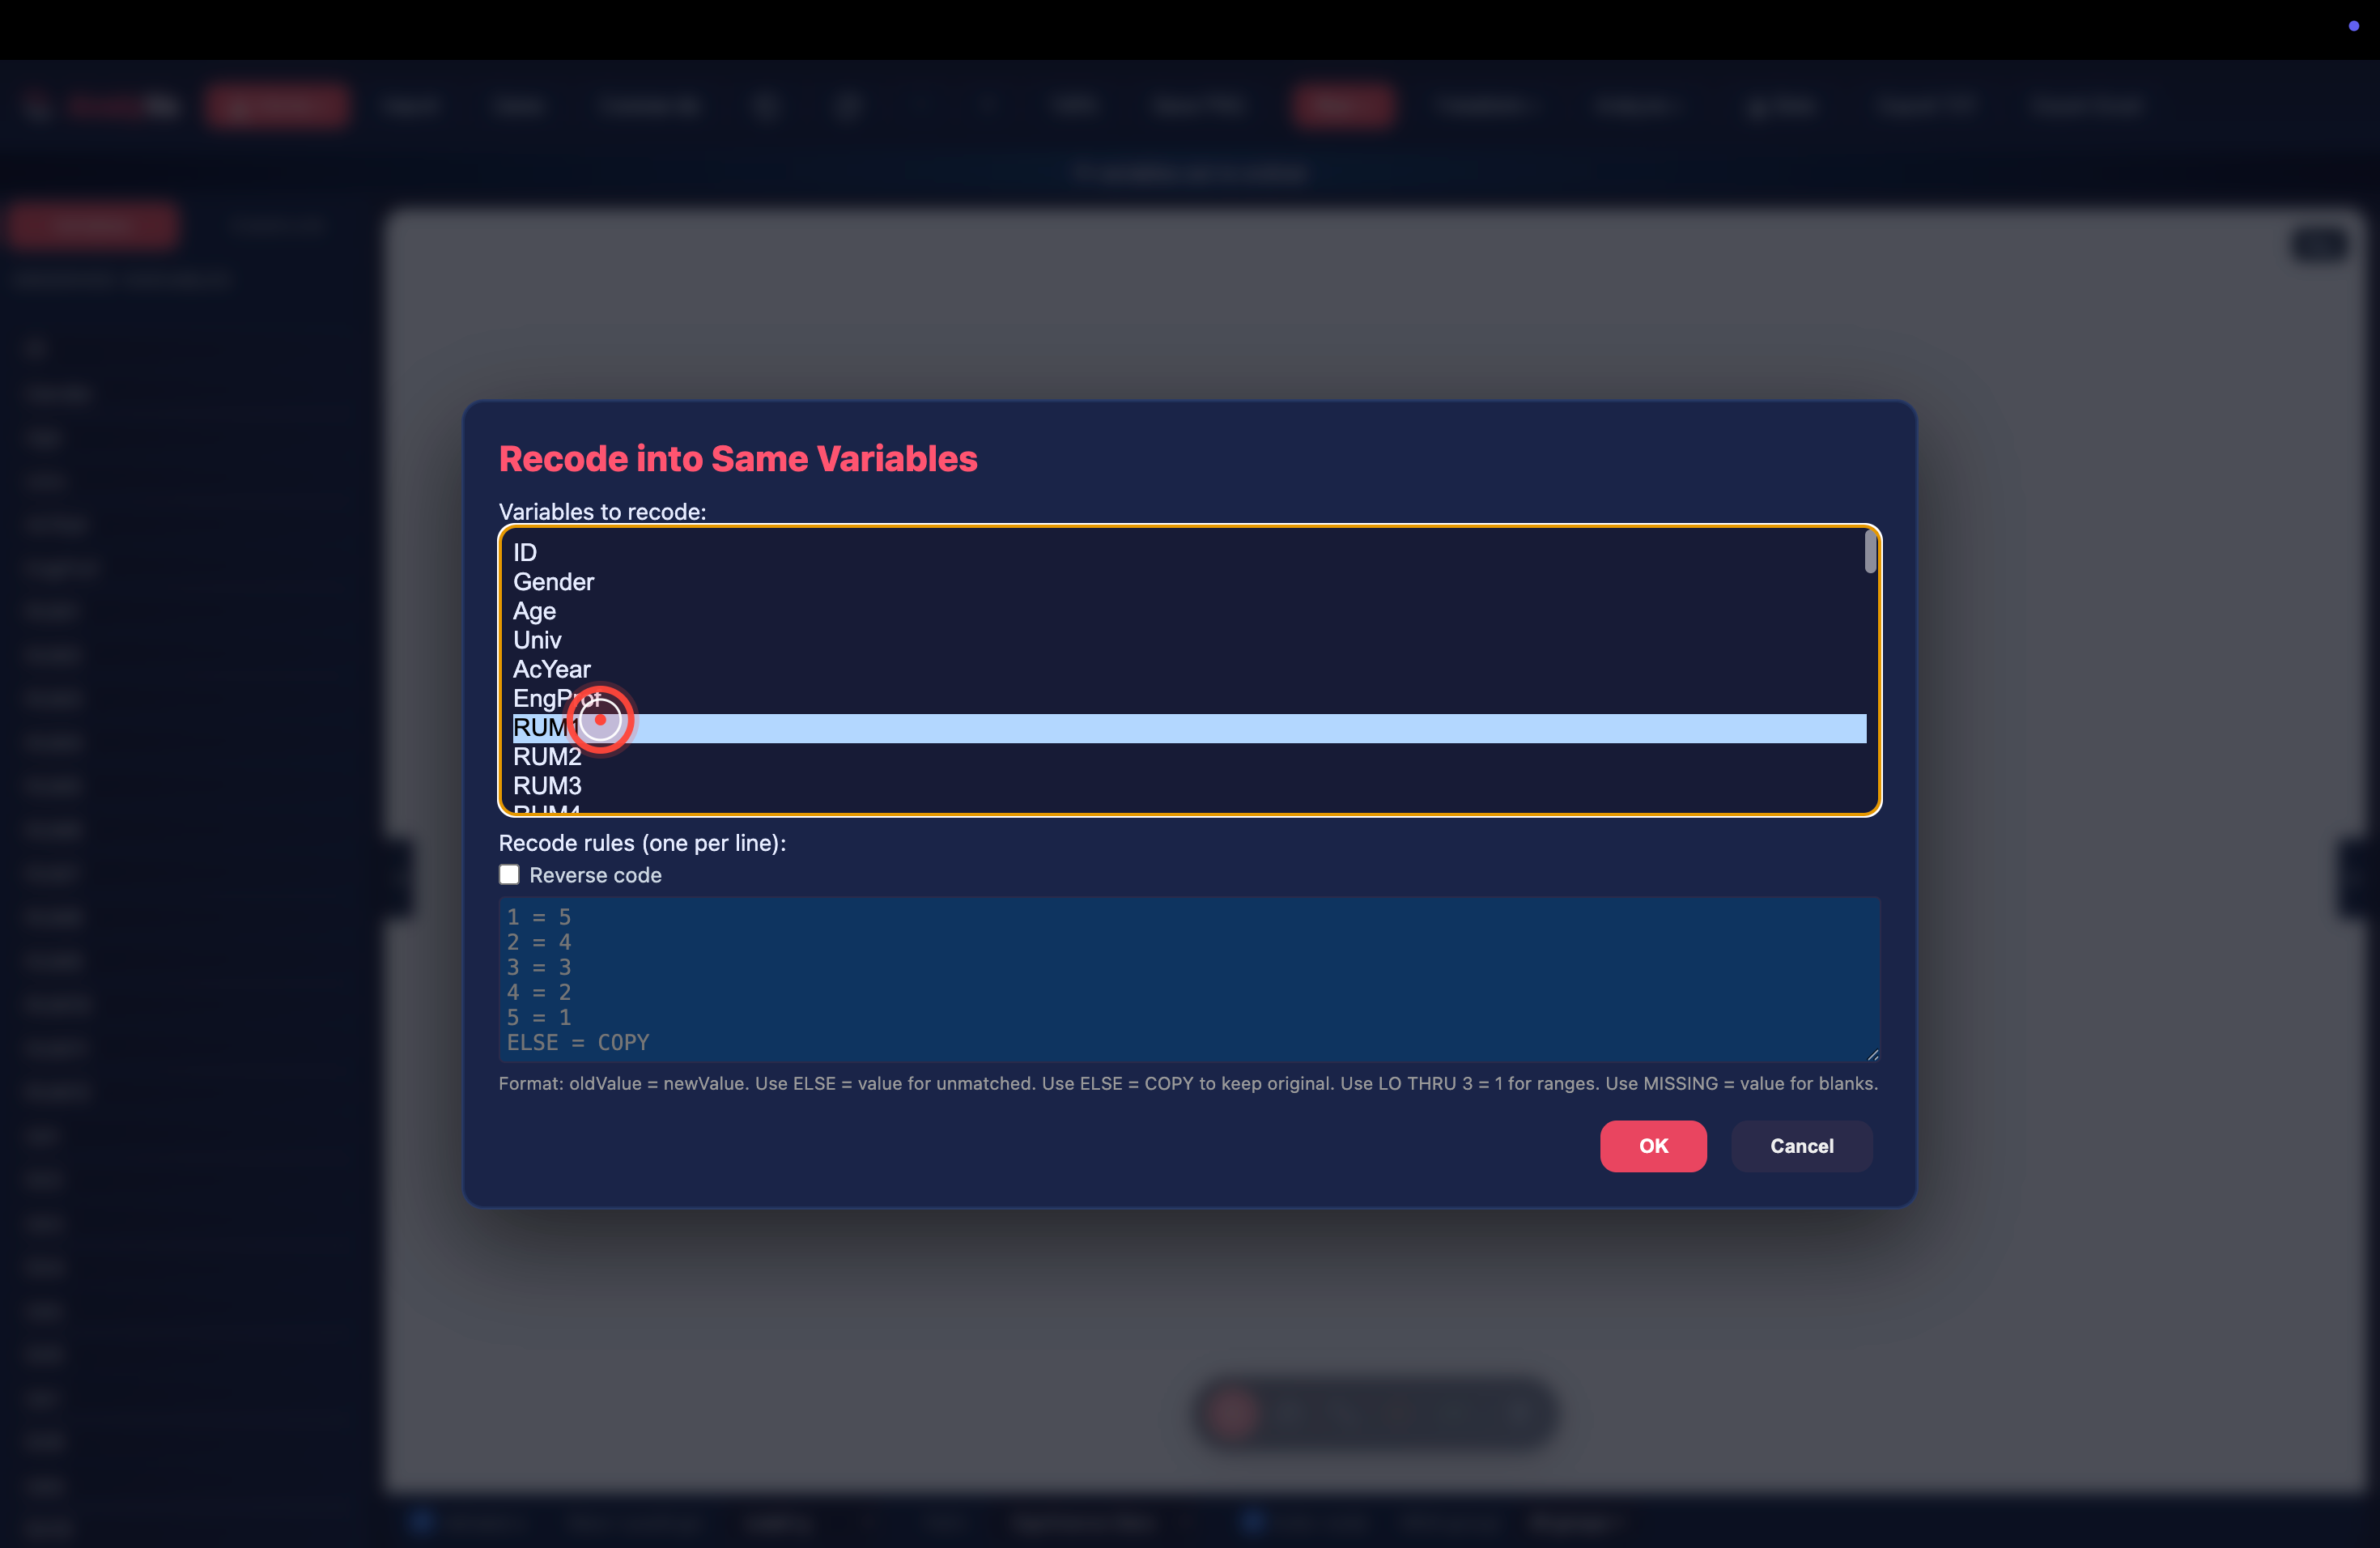
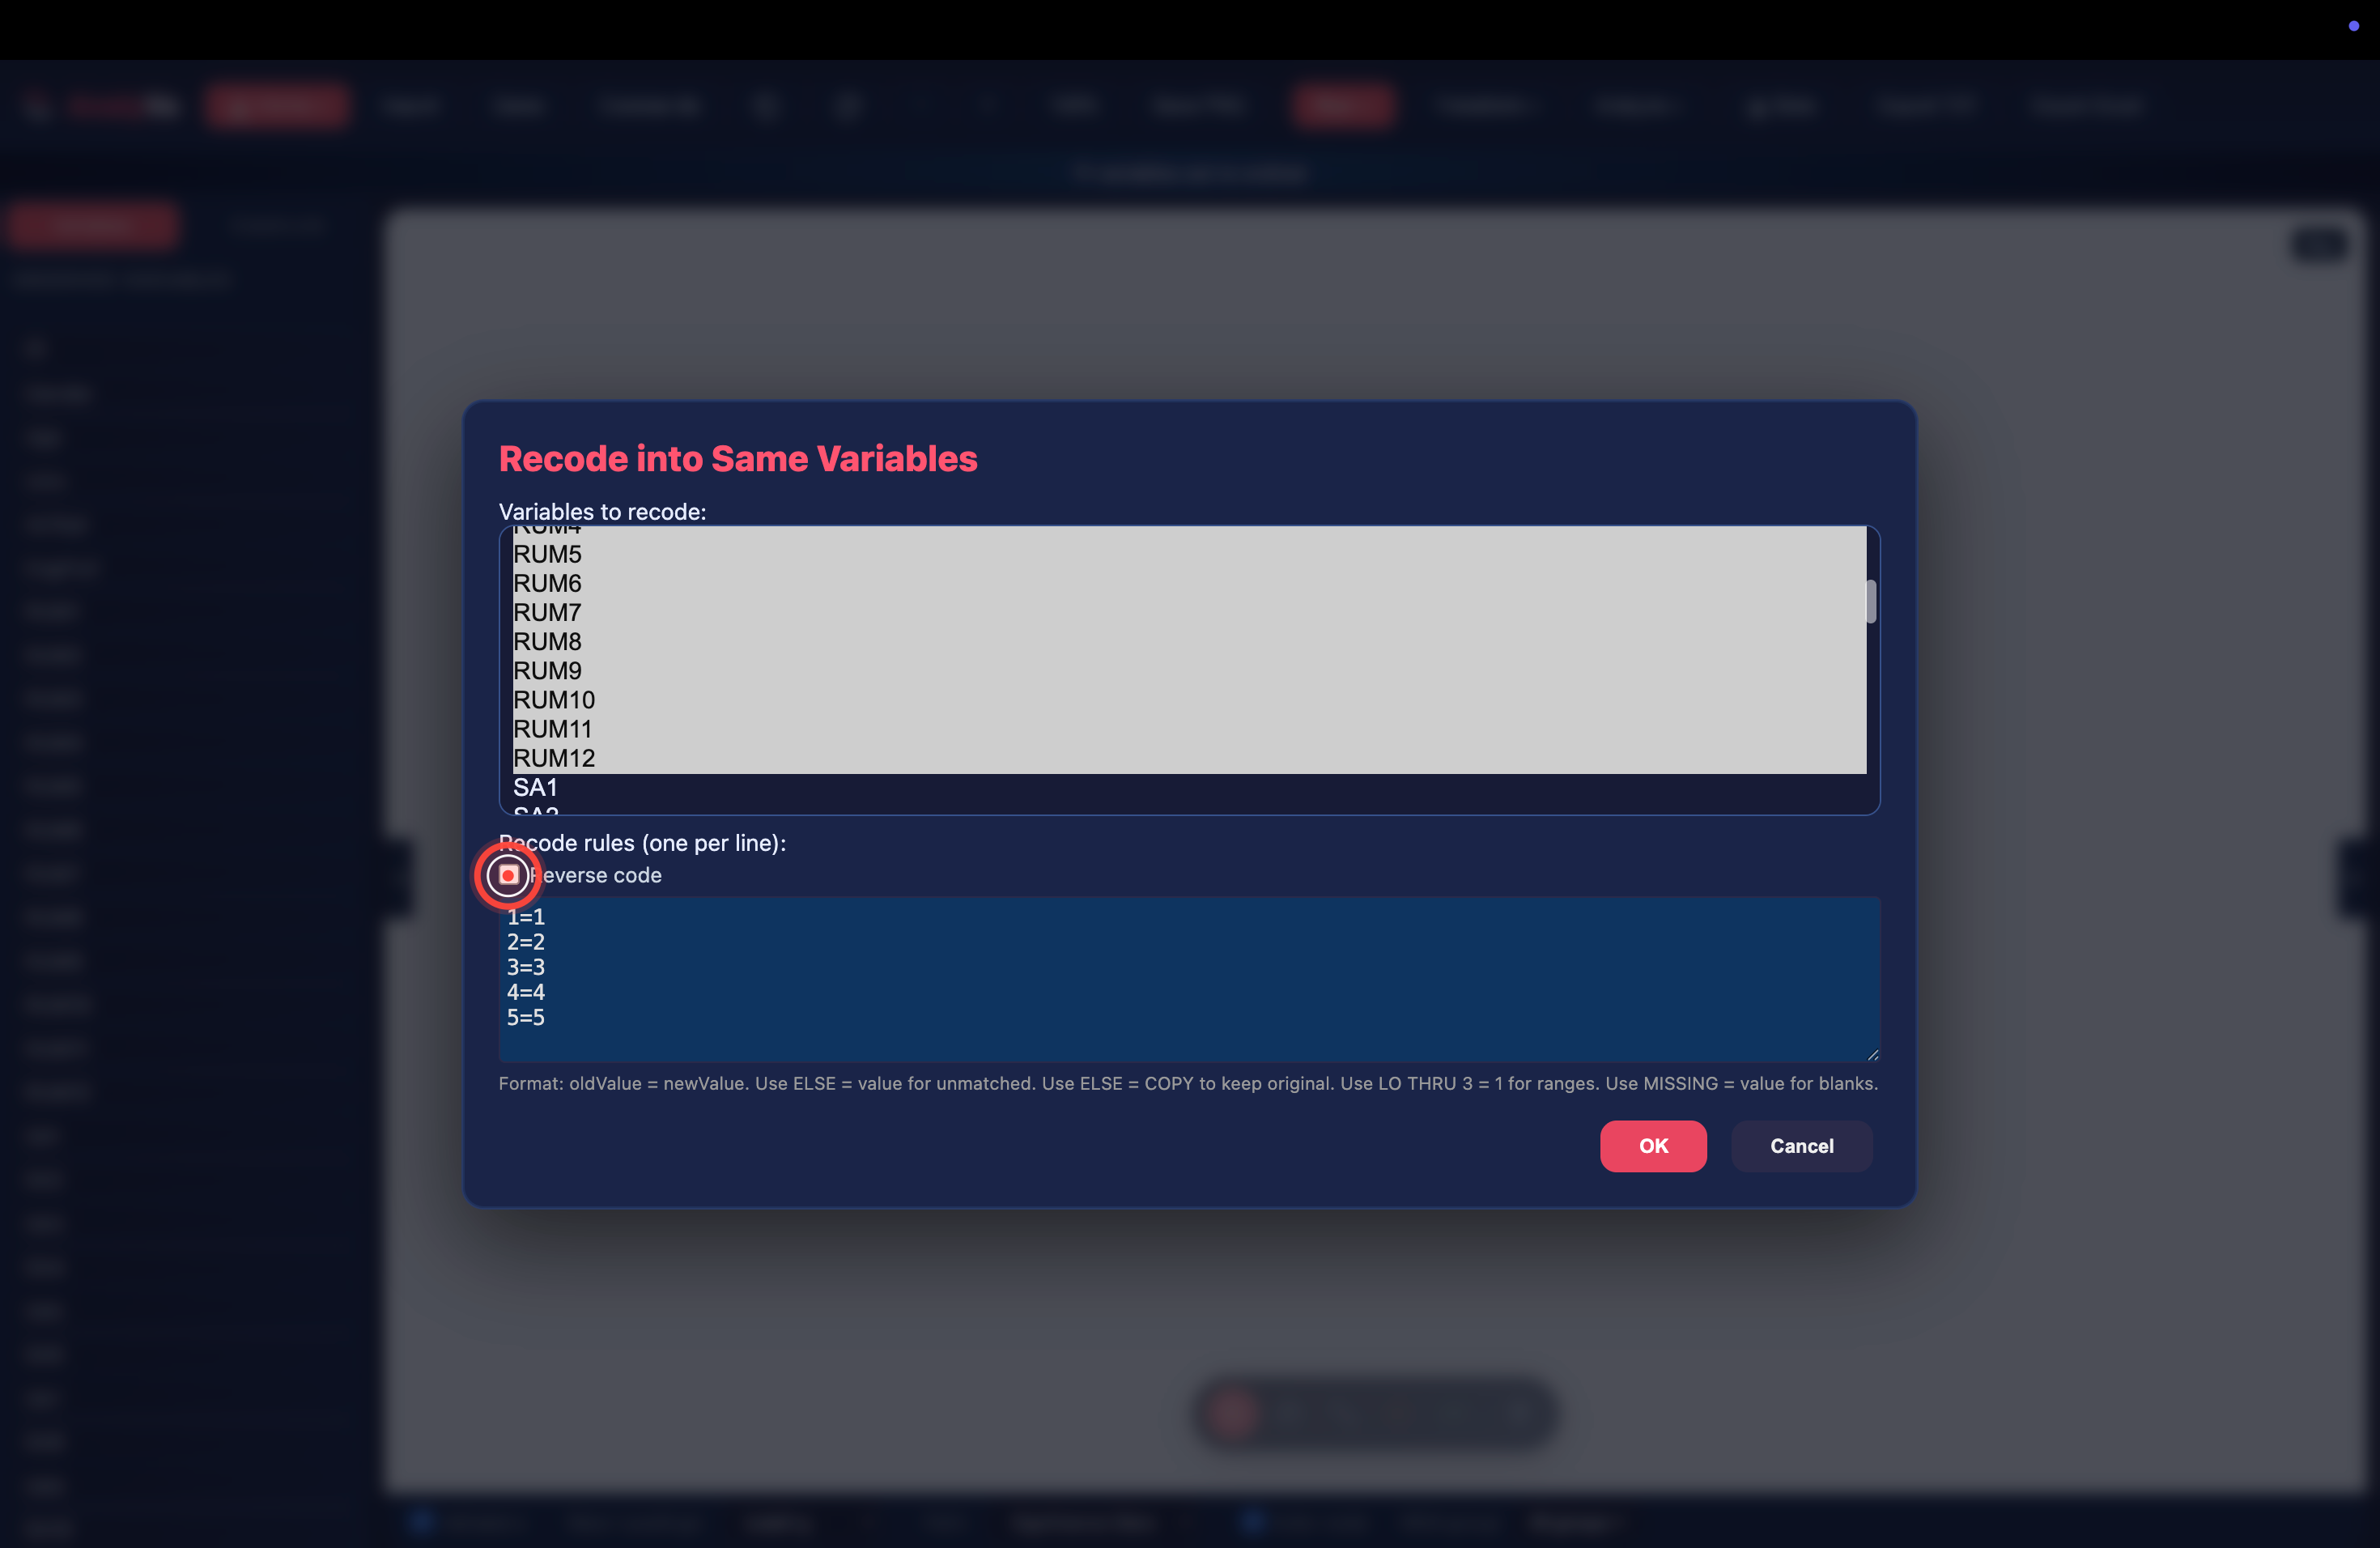
Step 13 — Tick Reverse code — or write the rules manually. Two ways to reverse-code:
- Fastest — tick the Reverse code checkbox. AnalyVa infers
the scale from the selected variables and generates the rules
automatically (e.g.
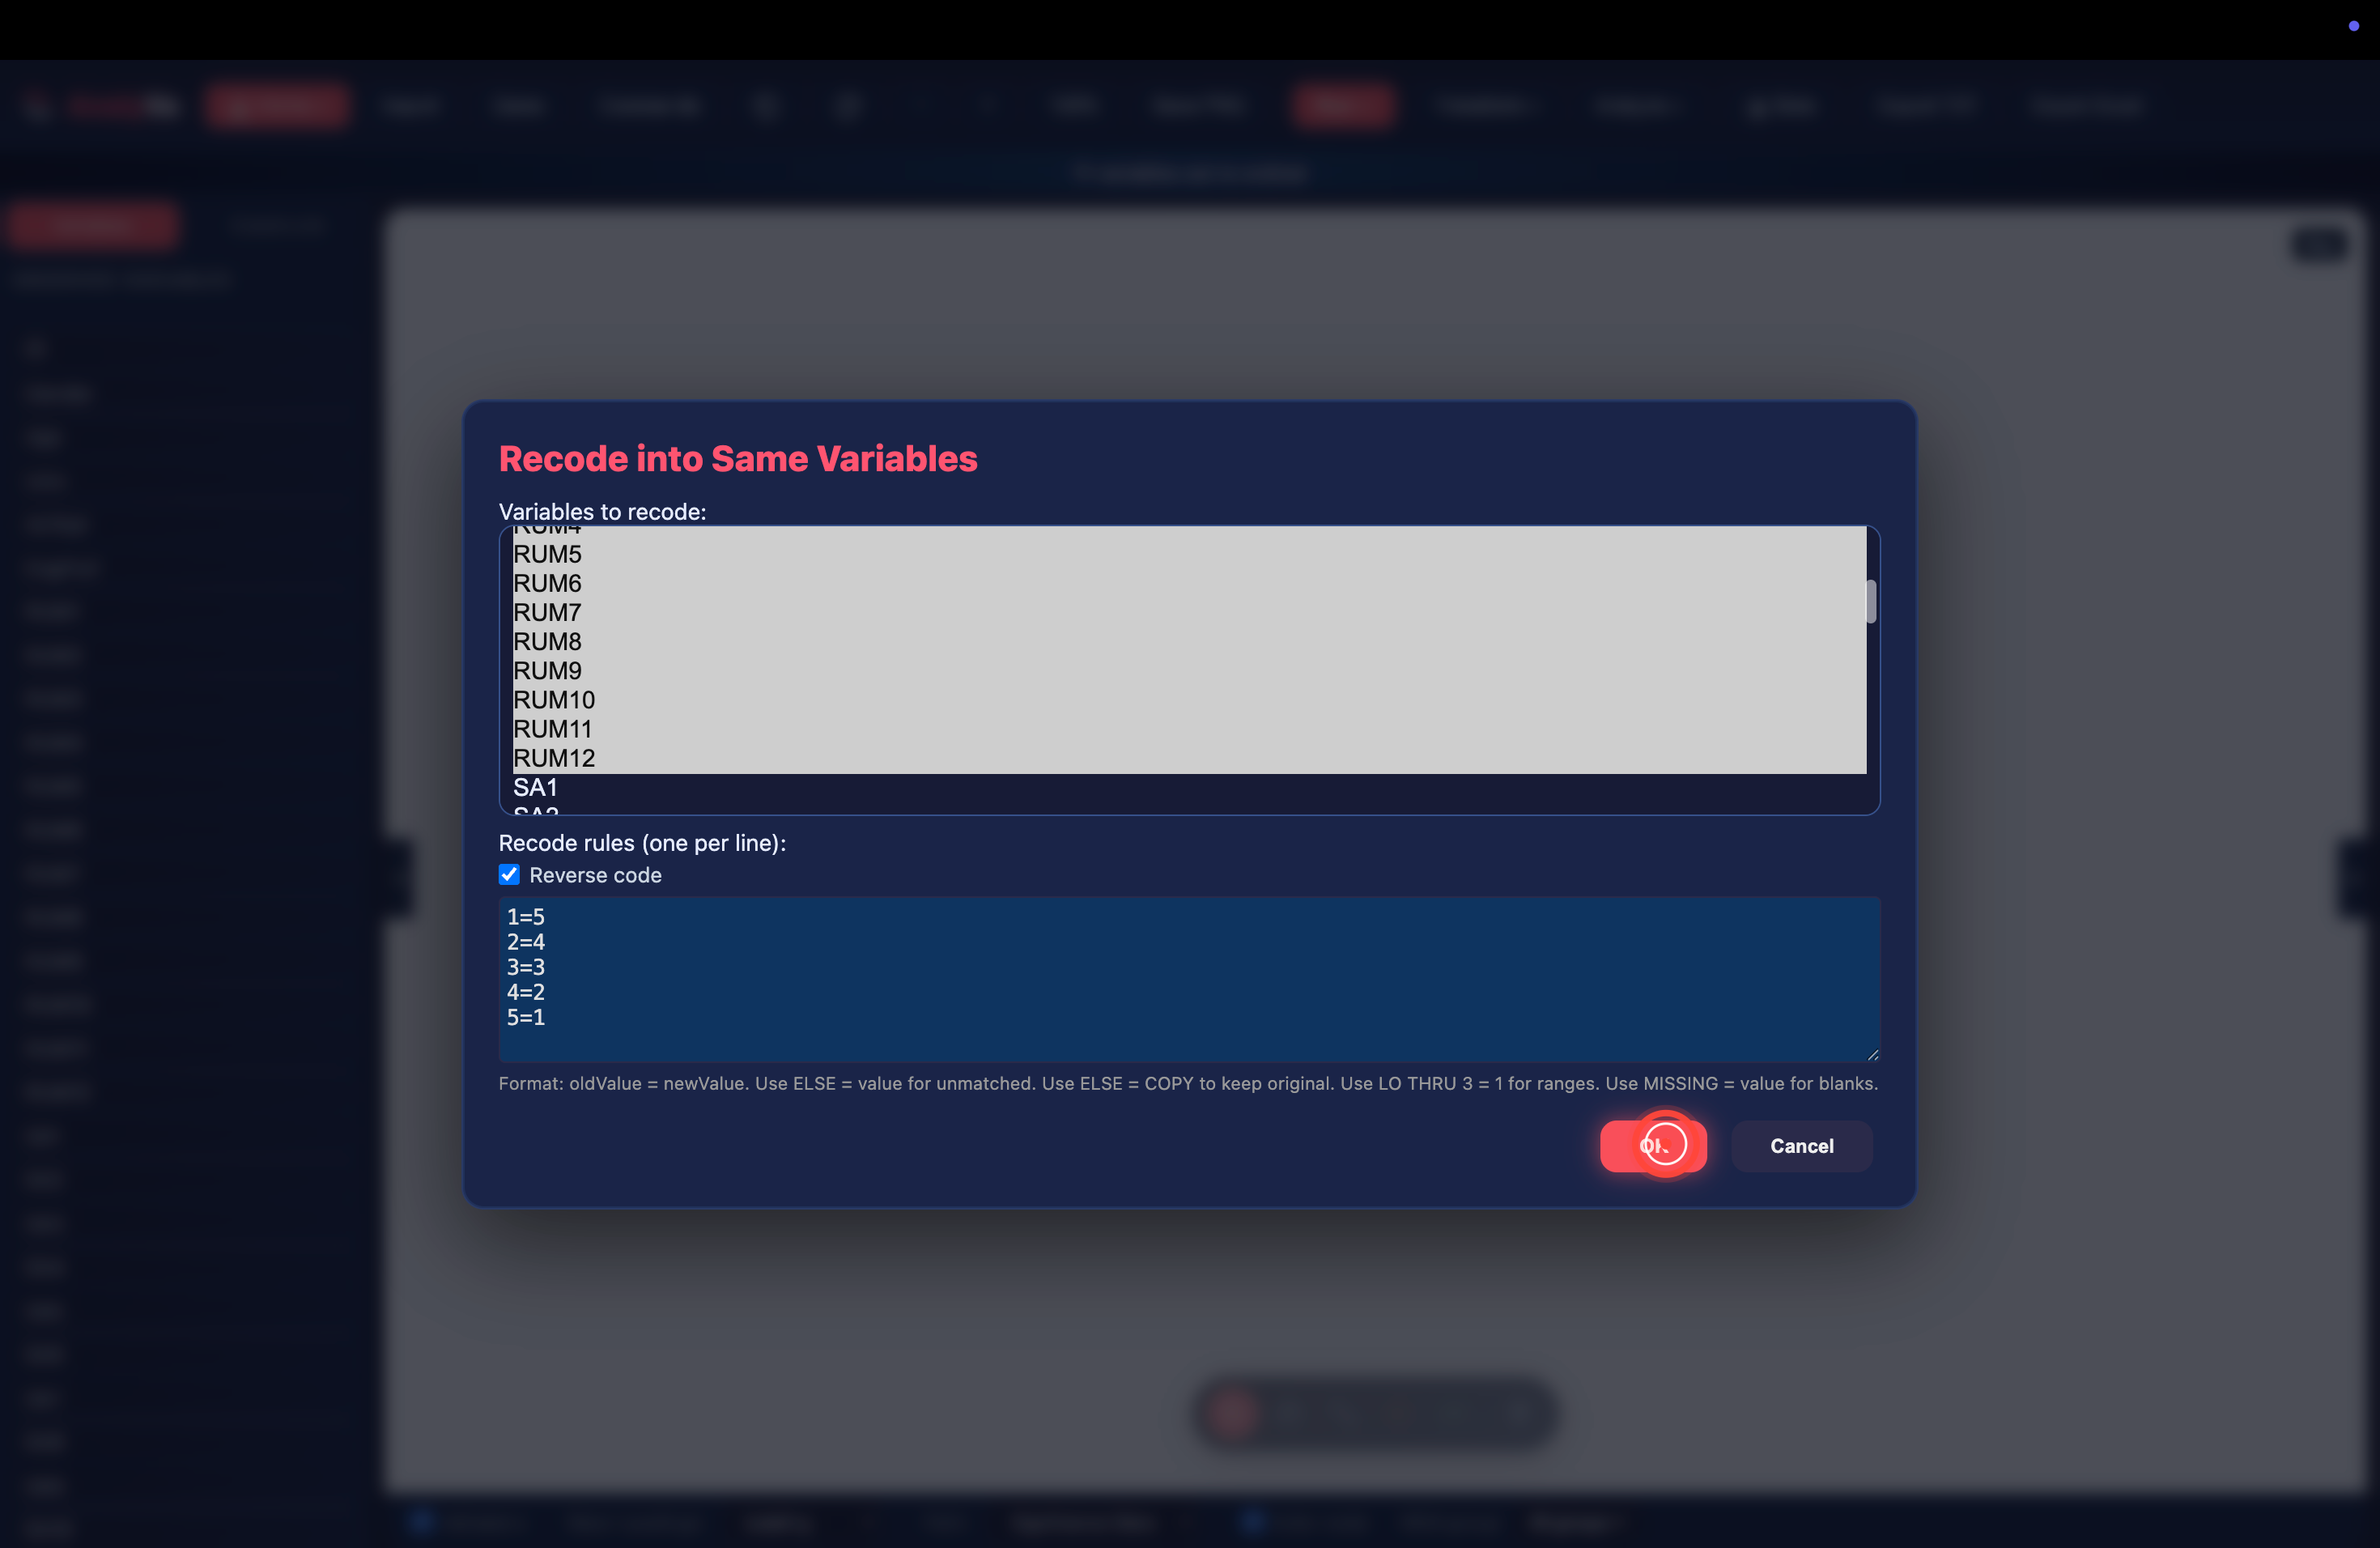
1=5,2=4,3=3,4=2,5=1). - Manual — write the rules directly in the Recode rules box, one
per line, using the format
oldValue = newValue. Special tokens:LO THRU 3 = 1— recode “lowest through 3” as 1 (range).ELSE = COPY— keep original for anything not matched.MISSING = 99— assign a code to blank cells.
Step 14 — Click OK. The recode is applied in place. Back in Data View you can spot-check that the values flipped correctly.
Step 15 — Recompute any composite scores. If you already built mean/sum composites from the raw items via Transform → Compute Variable, they are now stale. Delete the old composites and recompute them so the reverse-coded values propagate. This is the single most common data-prep bug — the reverse-code runs but downstream composites still reflect the un-reversed values.
The order that matters
For any dataset arriving fresh from a survey platform, the safest sequence is:
- Import the data.
- Fix variable types in Variable View (bulk-change if possible).
- Reverse-code any negatively-worded items via Recode into Same Variables + the Reverse code checkbox.
- Compute composite scores with Transform → Compute Variable.
- Only then run analyses on the composites.
Skip a step and every downstream result inherits the mistake.